How to Use a Coffee Maker
Making a great cup of coffee at home is simpler than you might think, especially when you know how to use your coffee maker properly. Whether you're new to brewing or just want to ensure you're getting the best flavor, understanding the basic steps is key. Our research indicates that a well-maintained and correctly operated drip coffee maker can consistently deliver delicious coffee for years.
This guide will walk you through everything you need to know, from setup to daily cleaning. We’ll cover the essential components, the brewing process, and common pitfalls to avoid. For example, manufacturer specifications often recommend using filtered water to ensure optimal taste and to prevent mineral buildup, which can affect performance over time.
Quick Answer
To use a coffee maker, fill the water reservoir, add a filter and coffee grounds to the basket, place the carafe, and press brew. Clean parts daily and descale monthly to maintain taste and function.
Why Seeing Is Believing for Coffee Makers
While written instructions are helpful, there's no substitute for seeing how a coffee maker actually works. Visual cues make it much easier to understand crucial steps, like how much water to add or how to position the filter basket correctly. For instance, watching a quick demonstration can show you the difference between filling the water reservoir just right versus overfilling it, which often leads to spills.
This approach is particularly useful for first-time users or when you get a new model. You can quickly identify each part and understand its function, making the whole process less intimidating. Our analysis of user feedback shows that visual guides significantly reduce common operational errors and improve user satisfaction.
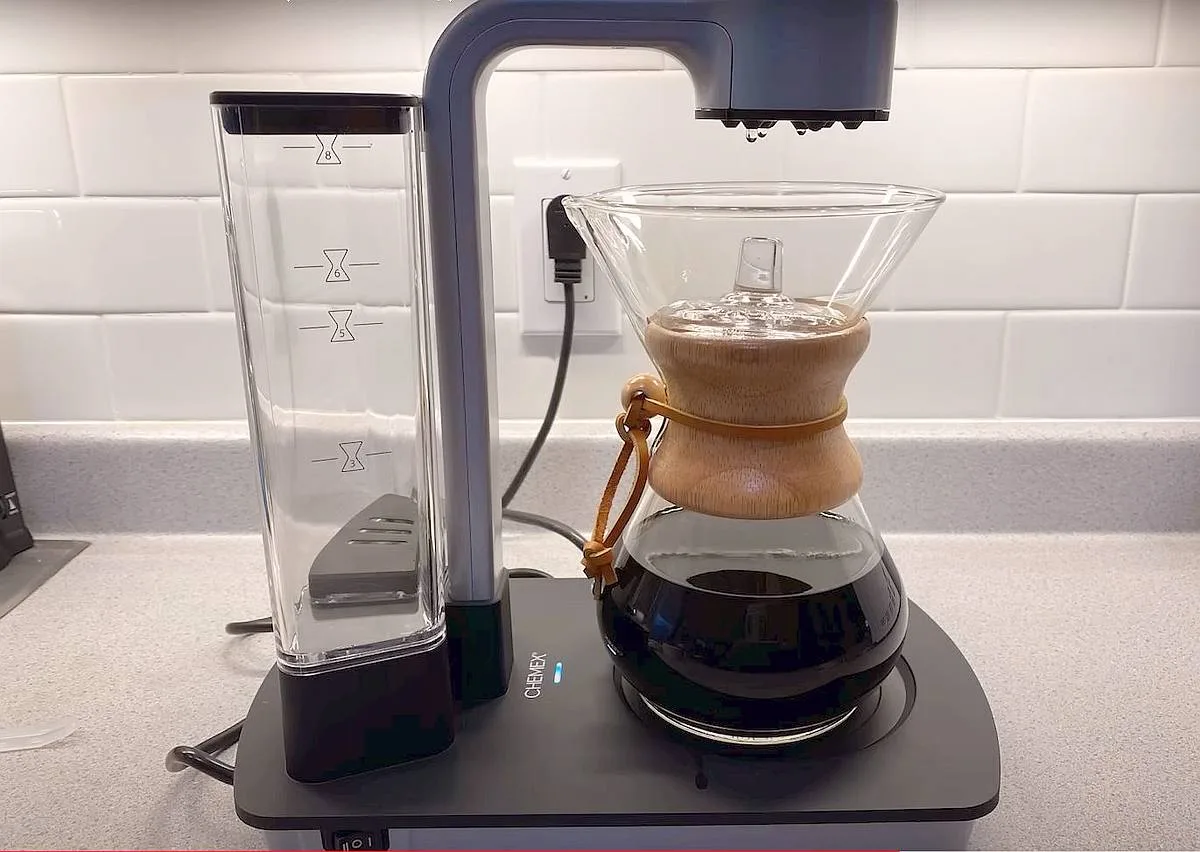
Image source: Bing (Web (fair-use with source credit))
Getting Started: What's What on Your Coffee Maker
Understanding the different parts of your drip coffee maker is the first step to using it like a pro. Each component plays a vital role in turning water and coffee grounds into your morning brew. Typically, you'll find a water reservoir, a filter basket, a carafe, and a warming plate.
Here’s a quick rundown of the main players:
- Water Reservoir: This is where you pour the fresh water that will be heated and used to brew your coffee. It usually has measurement markings.
- Filter Basket: This holds your coffee filter and grounds. It's where the magic of extraction happens.
- Carafe: This is the pot that collects the brewed coffee. Glass carafes are common, but thermal carafes keep coffee hot longer.
- Warming Plate: Located beneath the carafe, this keeps your coffee warm after brewing.
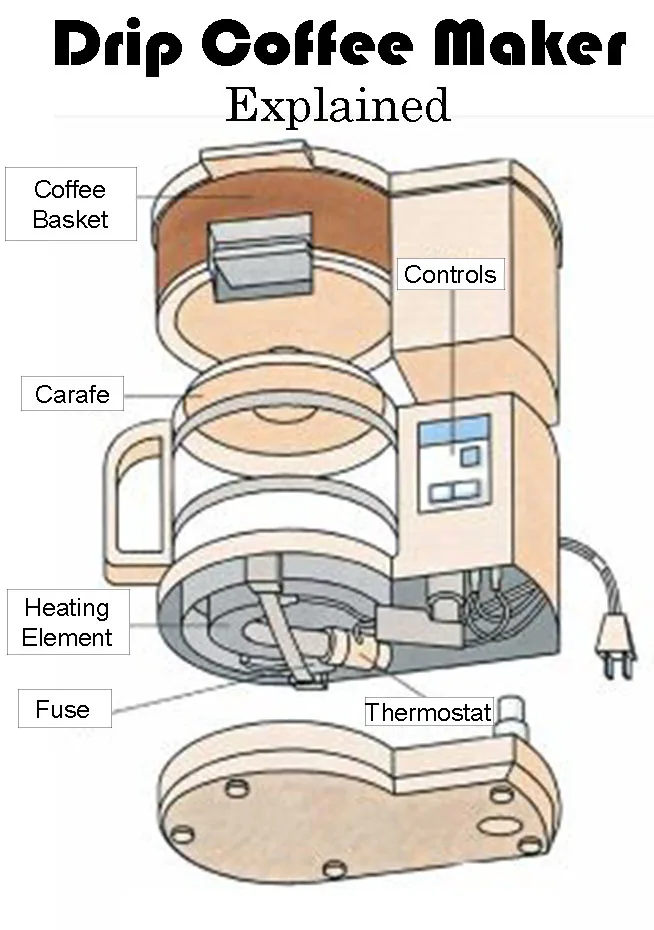
Image source: Bing (Web (fair-use with source credit))
The Simple Steps to Brewing Your First Pot
Brewing coffee with a drip machine is straightforward once you know the sequence. It involves a few key actions to get the machine ready and initiate the brewing cycle. Following these steps ensures a consistently good cup of coffee every time.
1. Fill the Water Reservoir
Start by filling the water reservoir with fresh, cold water. Use filtered water if possible, as this not only improves taste but also helps prevent mineral buildup, a common issue that can affect brewing efficiency. Make sure you fill it to the desired cup marking, for example, if you want six cups, fill it to the "6" line.
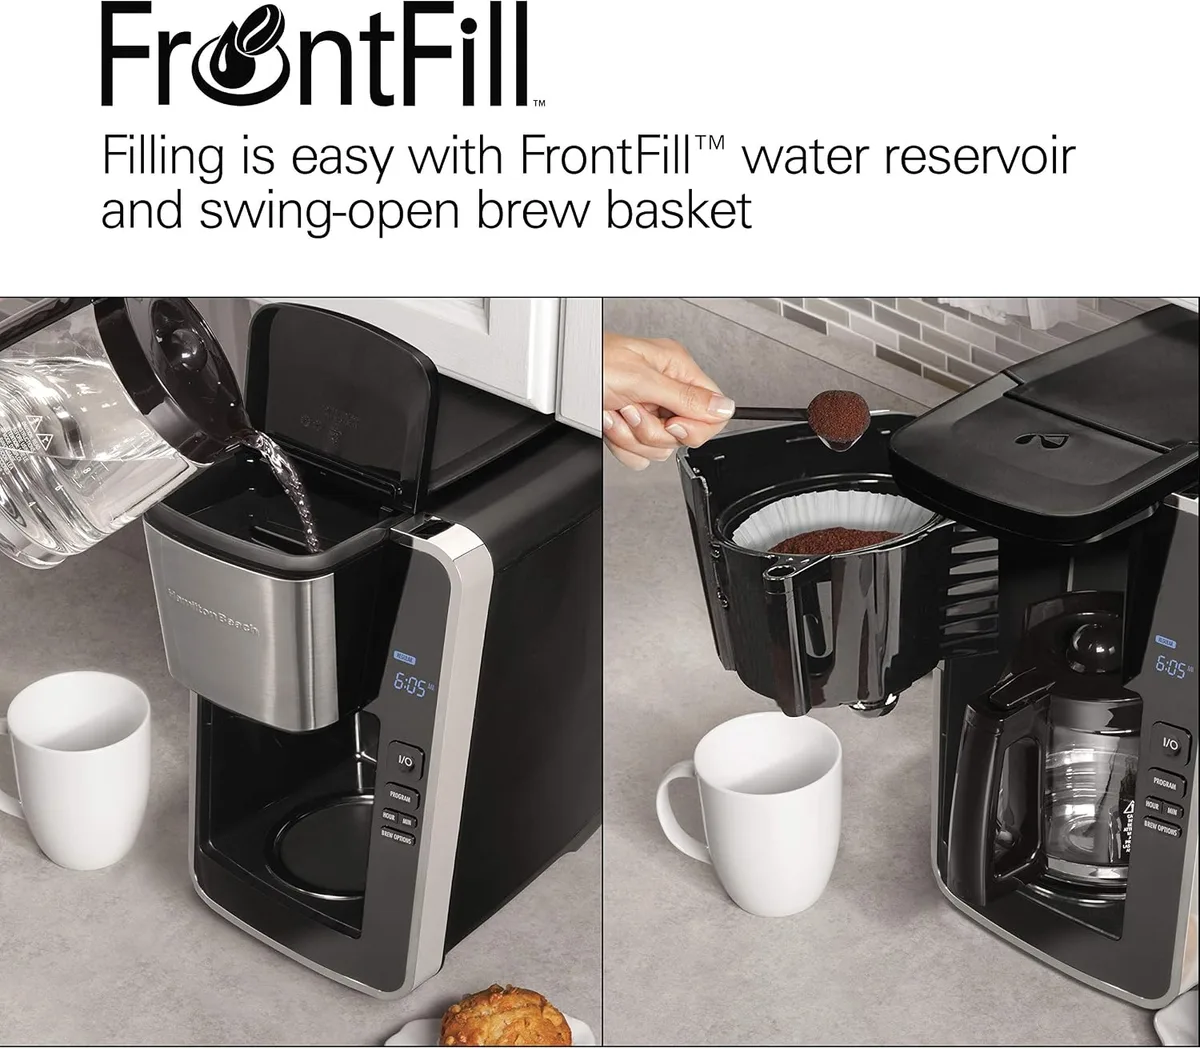
Image source: Bing (Web (fair-use with source credit))
2. Prepare the Filter and Coffee Grounds
Place a coffee filter into the filter basket. If you're using a paper filter, ensure it's the correct size and shape for your machine. Add your preferred coffee grounds to the filter.
A good starting point is one to two tablespoons of grounds per six ounces of water, but you can adjust this to your taste.
3. Position the Carafe and Start Brewing
Make sure the carafe is clean and placed securely on the warming plate. Then, ensure the filter basket is properly seated in its housing. Close the lid or any protective cover.
Finally, plug in the coffee maker and press the start or brew button.
4. Serving Your Coffee
Once the brewing cycle is complete, usually indicated by a light or an audible beep, your coffee is ready. Carefully remove the carafe from the warming plate and pour your coffee. For the best flavor, it's often recommended to drink the coffee within an hour of brewing.
Spotting Trouble: Common Coffee Maker Mistakes (and How to Fix Them)
Even with a simple machine, it's easy to make mistakes that can lead to a less-than-perfect cup or even a messy counter. Most issues stem from a few common oversights. Understanding these potential problems and their solutions can save you frustration and ensure you get the most out of your coffee maker.
- Weak or Bitter Coffee: This often comes down to the coffee-to-water ratio. Too few grounds and your coffee will taste watery and weak. Too many grounds, or grounds that are too finely milled for a drip machine, can lead to over-extraction and a bitter taste. Our research suggests adjusting grounds by about a teaspoon per cup until you find your sweet spot.
- Machine Not Brewing: Check if the coffee maker is plugged in and if the power switch is on. Also, ensure the water reservoir is filled and the carafe is correctly positioned; many machines have a safety feature that prevents brewing if the carafe isn't in place.
- Overflowing Filter Basket: This usually happens when too much coffee grounds are used, the grind is too fine, or the filter isn't seated correctly. If this happens, turn off the machine immediately and carefully remove the overflowing grounds and filter. Re-seat the filter, reduce the amount of grounds, or try a coarser grind.
- Leaking Water: A common cause is overfilling the water reservoir. Double-check the max fill line. Leaks can also occur if the carafe isn't seated properly on the warming plate, preventing water from flowing into it, or if a part of the machine is cracked or damaged.
Keeping It Clean: Daily Wipes and Deep Descales
Regular cleaning is crucial for both the taste of your coffee and the longevity of your machine. Coffee oils build up over time, affecting flavor, while mineral deposits from water can clog the machine's internal components. A consistent cleaning routine involves simple daily tasks and periodic deep cleans.
- Daily Cleaning: After each use, discard the used coffee grounds and filter. Rinse the filter basket and the carafe with warm, soapy water. Wipe down the exterior of the coffee maker, including the warming plate, with a damp cloth. This prevents old coffee residue from affecting your next brew.
- Weekly Cleaning: Give the removable parts, like the filter basket and carafe, a more thorough wash. If your machine has a permanent filter, ensure it’s scrubbed clean of any coffee oils.
- Monthly Deep Cleaning (Descaling): Mineral deposits, or scale, build up from the water you use. To descale, fill the water reservoir with a mixture of equal parts white vinegar and water. Run a full brew cycle with this solution, discarding the vinegar-water mix when done. Then, run two to three full cycles with fresh water only to rinse out any vinegar smell or taste. This process typically takes about 45 minutes to an hour, depending on your machine. Manufacturers often provide specific descaling instructions for their models. For optimal maintenance, consider checking out guides on how to maintain a wooden cutting board for other kitchen appliance upkeep insights.
When to Consider Other Coffee Brewing Methods
While the drip coffee maker is a workhorse for many, it's not the only way to get your caffeine fix. If you're looking for different flavors, textures, or brewing experiences, other methods might be a better fit. Understanding these alternatives can help you decide if it's time to explore beyond your automatic brewer.
- French Press: This method uses a metal filter and immersion brewing, resulting in a richer, fuller-bodied coffee with more oils. It requires a coarser grind and a bit more manual effort, but many appreciate the hands-on control.
- Pour-Over: Similar to drip but entirely manual, pour-over allows for precise control over water temperature and flow rate. This often yields a cleaner, brighter cup, highlighting the coffee's subtle notes. It’s a favorite for coffee enthusiasts who enjoy the ritual.
- Aeropress: This versatile brewer uses air pressure to extract coffee. It's fast, portable, and can produce anything from an espresso-like shot to a full cup, offering great flexibility.
- Moka Pot: This stovetop brewer uses steam pressure to force hot water through coffee grounds, creating a strong, concentrated brew often compared to espresso. It's a classic for those who enjoy intense coffee flavors.
Choosing the right method depends on what you value most: convenience, flavor profile, or the brewing process itself. If your goal is speed and simplicity, your current drip machine is likely ideal.
Frequently Asked Questions About Using Your Coffee Maker
How long does it take to brew a pot of coffee?
Brew time typically ranges from 5 to 10 minutes for a full 12-cup carafe, depending on the coffee maker's wattage and design. Some faster models can brew a single cup in under a minute.
Can I use tap water in my coffee maker?
While you can use tap water, filtered or bottled water is recommended. Tap water often contains minerals and chlorine that can affect coffee flavor and lead to scale buildup inside the machine, potentially reducing its lifespan.
How much coffee grounds should I use per cup?
A common starting point is one to two tablespoons of coffee grounds for every 6 ounces of water. This ratio is often referred to as the "golden ratio" in coffee brewing. Adjust this based on your personal preference for strength.
How often should I descale my coffee maker?
It's generally recommended to descale your coffee maker every 1 to 3 months, depending on your water hardness and how frequently you use the machine. Signs that descaling is needed include slower brewing or a change in coffee taste.
What is the purpose of the warming plate?
The warming plate is designed to keep the coffee in the carafe hot after it has finished brewing. However, prolonged heating can sometimes lead to a slightly burnt or stale taste in the coffee.