How to Use a Boning Knife
Boning meat can be a tricky task, and knowing how to use a boning knife effectively makes all the difference. This specialized tool isn't just for show; its design is critical for cleanly separating meat from bone. Our research indicates that the right technique, coupled with understanding the knife's attributes, can significantly improve your kitchen efficiency and reduce waste.
When you're working with meat, precision is key. A typical boning knife features a thin, flexible blade measuring around 5 to 6 inches, which manufacturer specifications confirm is ideal for maneuvering in tight spaces. Let's break down what makes this knife a game-changer and how you can master its use.
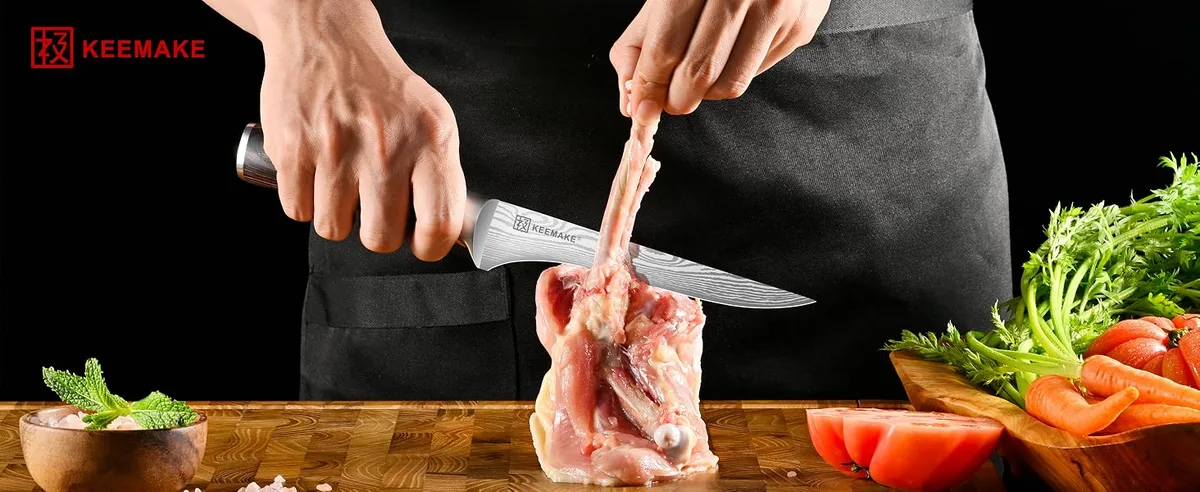
Image source: Bing (Web (fair-use with source credit))
Quick Answer
To use a boning knife, employ a pinch grip for control. Keep the thin, sharp blade angled towards the bone. Gently slide it between meat and bone, following the contours.
Use the pointed tip for joints. Always prioritize safety and a stable cutting surface.
What Makes a Boning Knife Special?
A boning knife stands out from your standard kitchen cutlery due to its unique design, tailored specifically for the intricate task of meat preparation. Unlike a chef's knife, which is built for broader chopping and slicing, a boning knife is all about agility and precision around bones. Its primary features are a slender profile and a flexible blade.
These characteristics allow it to navigate the curves and crevices of bones with remarkable ease. Manufacturer specifications often highlight the blade's flexibility, typically ranging from a moderately stiff to a very flexible steel. This flexibility is crucial; it lets the blade bend and conform to the shape of the bone, ensuring you get as much meat off as possible without tearing.
Think of it as a surgeon's scalpel for your kitchen. The thinness reduces friction, making cuts smoother, while the sharp point is perfect for piercing membranes or making those initial nicks that start the separation process. This specialized design makes it an indispensable tool for anyone serious about butchery or simply wanting to get the most from their cuts of meat.
Getting the Right Grip for Control
How you hold your boning knife is just as important as the knife itself. The right grip provides stability, enhances precision, and, critically, keeps your hand safe. Without a proper hold, you risk losing control, which can lead to ragged cuts or accidental slips.
Our research into kitchen techniques consistently points to two primary grips for boning knives, each serving a slightly different purpose.
The Pinch Grip for Precision
The pinch grip is the go-to method for most boning tasks, offering the best balance of control and dexterity. This technique positions your fingers directly on the blade, giving you an intimate feel for the tool and allowing for incredibly precise movements.
- How to do it:
- Wrap your fingers around the handle firmly but comfortably.
- Place your thumb and index finger on either side of the blade, just in front of the handle where the metal begins. This is known as the "pinch point."
- Your remaining three fingers wrap around the base of the handle.
This grip allows the blade to act almost as an extension of your hand. You can feel the resistance of the meat and bone, enabling you to make minute adjustments to the blade's angle and pressure. It’s this level of control that allows for those clean, efficient cuts around joints and along bones that minimize meat waste.
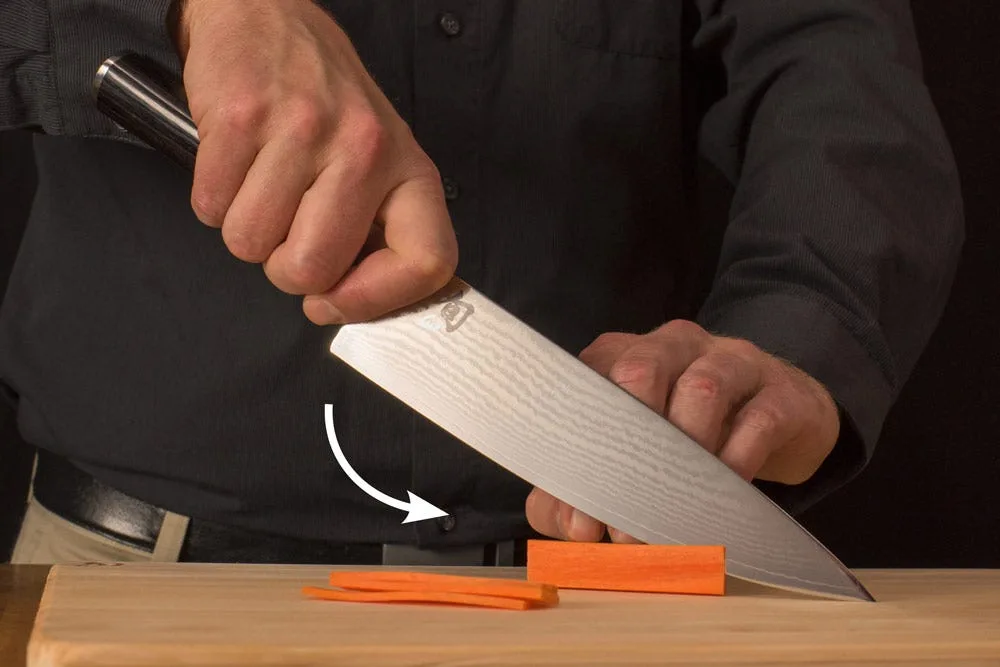
Image source: Bing (Web (fair-use with source credit))
When to Use a Handle Grip
While the pinch grip offers superior control, there are situations where a simple handle grip might be beneficial. This is often when you need a bit more leverage or are dealing with particularly stubborn sinews or connective tissues that require a more forceful, direct push.
- How to do it:
- Grip the handle of the boning knife as you would a chef's knife, with your thumb resting on the spine of the blade or along the side of the handle for added support.
- Your fingers wrap around the handle for a secure hold.
This grip can provide more power for initial cuts or when working through thicker sections. However, for the delicate work of separating meat from bone, it generally offers less finesse than the pinch grip. It's best used strategically for moments when extra force is needed, rather than as your primary technique throughout the entire boning process.
The Core Techniques: How to Bone Like a Pro
Mastering how to use a boning knife comes down to a few key cutting techniques. These aren't complicated, but they require a deliberate approach and a feel for the material you're working with. The goal is always to get the cleanest possible cut, leaving the most meat attached to the flesh and the least on the bone.
Our analysis of culinary training materials emphasizes practicing these techniques on various cuts to build muscle memory and confidence.
Following the Bone: Your Main Move
This is the fundamental technique you'll use most often. It involves guiding the knife’s edge along the surface of the bone, essentially "unzipping" the meat from it. The key is to keep the blade angled slightly towards the bone.
- How it works:
- Start with a gentle sawing motion, letting the sharp edge do the work.
- Maintain consistent, light pressure. Forcing the knife will result in ragged cuts and potentially damage the blade or your meat.
- Keep the blade in contact with the bone as much as possible. Imagine you're shaving the meat off the bone's surface.
This method ensures that minimal meat is left behind. The flexibility of the boning knife is crucial here, allowing the blade to bend and follow the bone’s contours, even in tight spots.
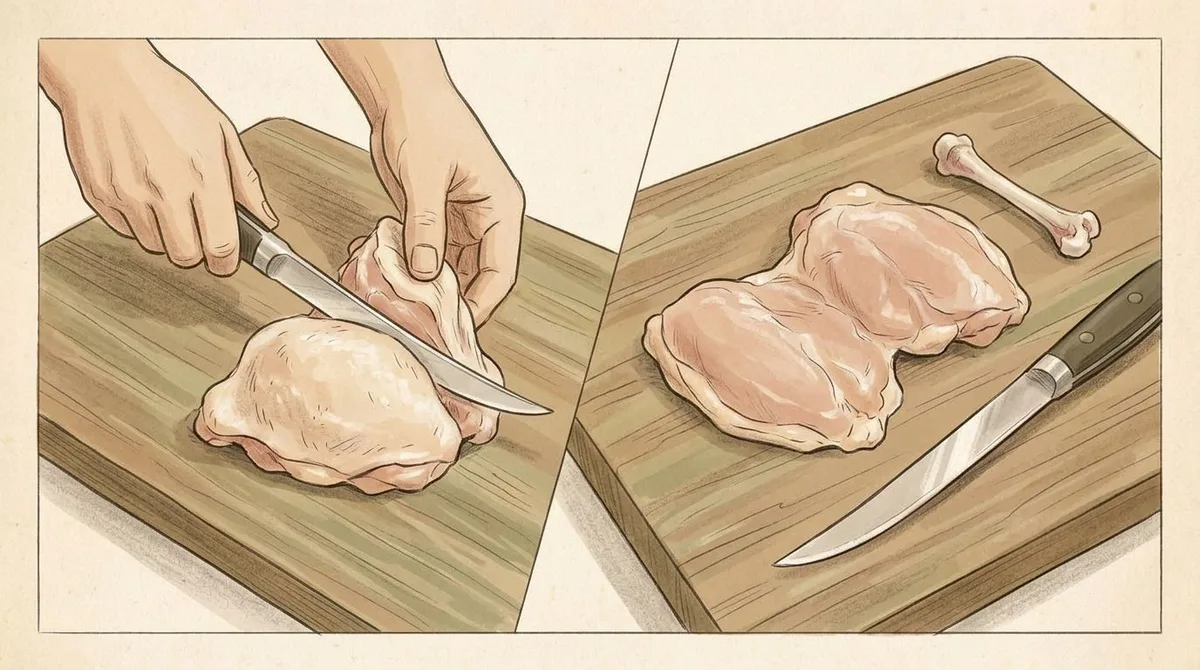
Image source: Bing (Web (fair-use with source credit))
Navigating Around Joints
Joints present a different challenge. Here, you're often dealing with ligaments and connective tissues that hold bones together. The sharp, pointed tip of the boning knife is your best friend for these areas.
- How to approach it:
- Locate the joint. You might need to use the tip to feel for where the bones meet.
- Insert the tip of the knife into the joint.
- Use a delicate, sawing motion to cut through the tough ligaments and cartilage. You may need to slightly lift or twist the meat to get better access.
- Work slowly and deliberately. If you feel significant resistance, check if you're on the right track or if there's a stronger connective tissue to sever.
Carefully working through joints prevents tearing surrounding meat and allows for a cleaner separation of primal cuts. This is where control and a keen sense of touch are paramount.
Peeling Meat Cleanly
Sometimes, you'll need to remove meat from a flatter bone, like a chicken breast from the rib cage or a loin from a backbone. For these situations, you'll often employ a "peeling" motion.
- The peeling technique:
- Hold the meat firmly to keep it steady.
- Start by making a small incision to get the blade underneath the meat, close to the bone.
- Angle the boning knife so the flat side of the blade runs almost parallel to the bone’s surface.
- Use smooth, sweeping strokes to push the blade forward, peeling the meat away from the bone.
This technique is all about maintaining a consistent, close contact between the blade and the bone. It's particularly useful for larger cuts where you want to detach a significant portion of meat in one piece.
Common Boning Knife Mistakes to Watch Out For
Even with the right tool and technique, it’s easy to fall into common traps when you’re learning how to use a boning knife. Our review of culinary forums and expert advice highlights several frequent missteps that can lead to frustration, wasted meat, or even injury. Being aware of these can help you avoid them and improve your results.
- Using a Dull Knife: This is perhaps the most dangerous mistake. A dull blade requires more force to cut, significantly increasing the risk of slipping. It also tears the meat rather than slicing cleanly, leading to a less appealing final product. Manufacturer specifications for professional boning knives emphasize the need for consistent sharpening.
- Over-forcing the Cut: When you encounter resistance, the instinct might be to push harder. However, a boning knife is designed for finesse, not brute force. If you’re struggling, it usually means you need to adjust your angle, find a different starting point, or use the knife's flexibility to maneuver around the obstruction.
- Not Keeping the Blade Against the Bone: The primary goal is to get the meat off the bone. If your blade is cutting too deep into the meat or lifting away from the bone, you're leaving usable meat behind. This reduces your yield and makes the process less efficient.
- Ignoring Joint Ligaments: Trying to cut through thick ligaments with the main edge of the blade can be difficult and lead to tearing. Using the pointed tip to sever these tough connective tissues first often makes the rest of the process much smoother.
- Working on an Unstable Surface: A cutting board that slides around is a recipe for disaster. This instability makes it hard to control your cuts and greatly increases the risk of the knife slipping, potentially causing injury. Always ensure your board is firm and doesn't shift.
- Improper Finger Placement: Keeping your fingers, especially those holding the meat, away from the blade's path is paramount. Accidents happen when fingers are too close to where the knife is cutting.
Avoiding these common errors will not only make your boning tasks more successful but also much safer.
Essential Boning Knife Safety Tips
Safety is non-negotiable when working with any sharp tool, and a boning knife is no exception. Its sharp, pointed blade demands respect and careful handling to prevent injuries. Our review of safety guidelines from culinary institutions and manufacturer warnings underscores the importance of a few key practices.
Adhering to these tips will help ensure your kitchen experience remains safe and enjoyable.
- Always Use a Stable Cutting Surface: As mentioned, a cutting board that slides is dangerous. You can prevent this by placing a damp cloth, paper towel, or a non-slip mat underneath your cutting board. This creates friction and keeps the board firmly in place, giving you a secure base for your work.
- Keep Your Fingers Tucked: This applies to both the hand holding the knife and the hand holding the meat. For the hand holding the meat, curl your fingers inward, creating a "claw" grip that keeps your fingertips safely out of the blade’s path. For the knife hand, ensure your grip is secure and your thumb is positioned correctly to avoid accidental contact with the sharp edge.
- Cut Away From Yourself: Whenever possible, direct the blade's movement away from your body. This is a fundamental knife safety rule that applies universally in the kitchen. If the knife were to slip, it would move away from your hand or body, minimizing the chance of injury.
- Never Try to Catch a Falling Knife: This is an instinct many people have, but it's incredibly dangerous. If you drop your boning knife, step back and let it fall. Attempting to catch it often results in severe cuts to your hands.
- Focus on the Task: Distractions can lead to mistakes. Avoid talking on the phone, engaging in lengthy conversations, or multitasking heavily while you are actively boning meat. Give your full attention to the task at hand.
- Store Knives Safely: When not in use, store your boning knife properly. This means using a knife block, a magnetic strip, or a sheath designed to protect the blade and prevent accidental contact. Leaving sharp knives lying around is a significant hazard.
- Sharpen Regularly: While it seems counterintuitive, a sharp knife is safer than a dull one. A sharp blade cuts cleanly with less pressure, reducing the likelihood of slips. However, always exercise caution when sharpening and handling a freshly sharpened blade.
By integrating these safety tips into your routine, you can confidently use your boning knife for all your meat preparation needs.
Frequently Asked Questions About Boning Knives
How sharp should a boning knife be?
A boning knife needs to be extremely sharp. Its thin, flexible blade relies on sharpness to glide through meat and around bones cleanly. Dullness not only makes the job harder but also significantly increases the risk of slipping and injury.
Can I use a boning knife for other kitchen tasks?
While a boning knife is specialized, its thin, sharp blade can be useful for tasks like peeling fruits and vegetables with tough skins, deveining shrimp, or even detailed garnishing. However, it's not a replacement for a chef's knife for general chopping or slicing.
How do I clean a boning knife?
Always hand-wash your boning knife immediately after use with warm, soapy water. Dry it thoroughly with a clean towel, paying attention to the blade and handle, before storing it. Avoid putting it in the dishwasher, as harsh detergents and high heat can dull the blade and damage the handle.
Is a flexible or stiff boning knife better?
The choice between a flexible and a stiff boning knife depends on the task and personal preference. Highly flexible blades are excellent for intricate work, like filleting fish or navigating the delicate bones of poultry. Stiffer blades offer more rigidity, which can be helpful when working with larger game or denser cuts of meat where you need more leverage.
How often should I sharpen my boning knife?
You should sharpen your boning knife regularly, ideally before each significant use, or whenever you notice it dragging rather than slicing cleanly. Even a few passes on a honing steel between tasks can help maintain the edge. For actual sharpening, a whetstone or professional sharpening service is recommended periodically.