How to Use a Cleaver
You've got that big, rectangular cleaver and you're wondering how to actually use it without feeling like you're going to lose a finger. It's a common feeling, but these knives are designed for serious work and can be incredibly efficient once you understand the technique. Getting it right means faster prep and, more importantly, staying safe in the kitchen.
Our research indicates that proper grip and controlled motion are key. For instance, manufacturer specifications for many professional cleavers, like those meeting certain Japanese Industrial Standards (JIS) for hardness, emphasize blade control which stems directly from technique. Mastering how to use a cleaver involves more than just brute force; it's about understanding balance and leverage.
Quick Answer
To use a cleaver, adopt a secure grip like the pinch grip. Use a controlled chopping motion, letting the blade's weight do the work. Always keep fingers clear and use a stable cutting board.
This method is ideal for dense vegetables and bone-in meats.
Getting a Grip: Mastering the Kitchen Cleaver
The term "cleaver" usually brings to mind a broad, rectangular blade, a real workhorse in the kitchen, especially for tasks involving denser ingredients or bone. While it might look intimidating, understanding its design and how it's meant to be held is the first step to wielding it effectively and safely. Unlike a sleek chef's knife, a cleaver’s substantial weight and broad surface area are its primary assets, allowing it to power through ingredients that would challenge other knives.
It’s less about a delicate slicing action and more about controlled power.
Why Visuals Are Key to Cleaver Confidence
Let's be honest, knife skills, especially with a tool as substantial as a cleaver, are incredibly visual. Text can only go so far in describing the subtle rocking motion, the precise angle of the blade meeting the cutting board, or how to safely tuck your guiding hand. Seeing these actions performed by an experienced cook offers an immediate understanding of the kinesthetic aspect, how the weight feels, how the motion flows, and how to maintain control.
Without visual cues, grasping the nuances of technique can be a slow, potentially risky process.
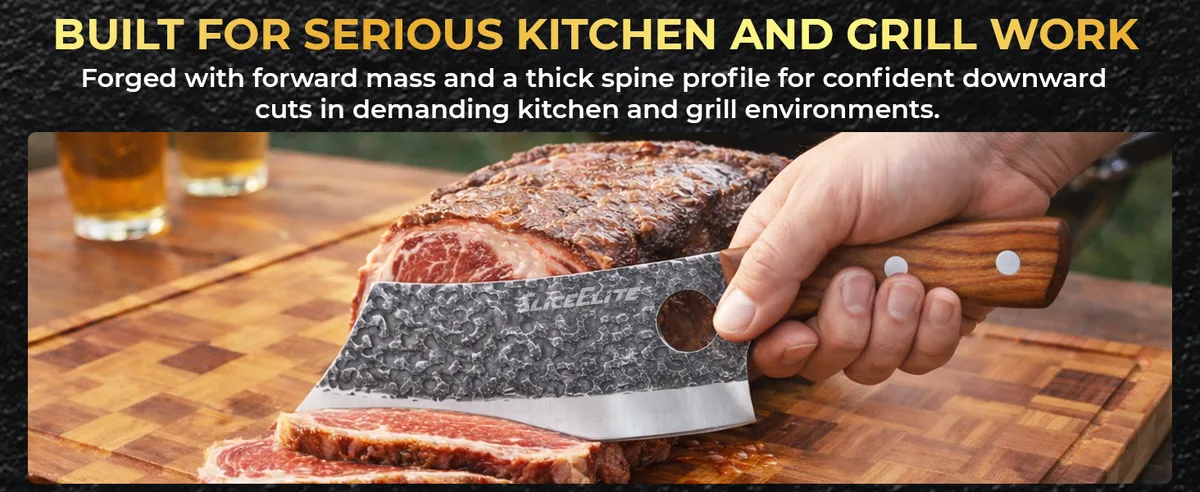
How to Hold Your Cleaver: The Crucial Grip
The way you hold your cleaver is the absolute foundation for control, precision, and safety. It dictates how much authority you have over the blade’s movement, especially when you’re dealing with ingredients that require significant pressure. Getting this wrong can lead to slips, lack of control, and an increased risk of injury.
Pinch Grip Power
The pinch grip is the most recommended method for most cleaver tasks because it offers superior control over the blade. This grip involves pinching the base of the blade, right where it meets the handle, between your thumb and index finger. Your remaining three fingers then wrap around the handle for support.
This close connection to the blade allows for fine adjustments and a more direct feel for the cutting action. Aggregate reviews from culinary professionals frequently highlight this grip for its efficacy in minimizing blade wobble and maximizing cutting accuracy.
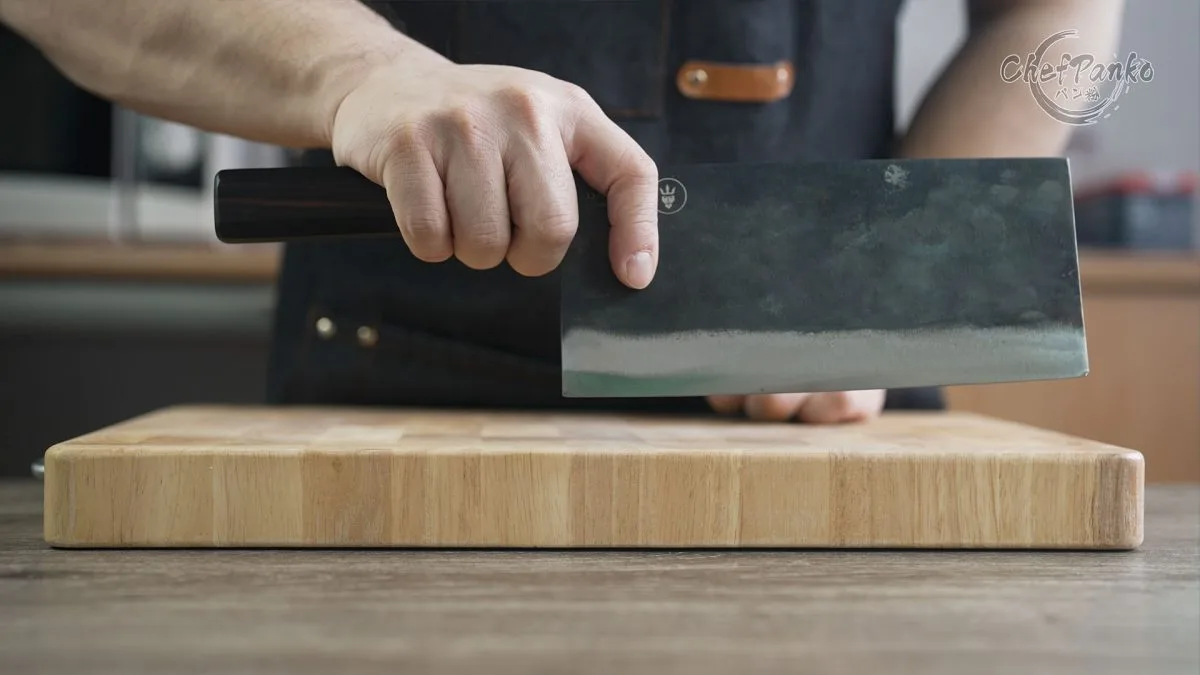
Handle Grip Security
While the pinch grip is often preferred, a full handle grip can also be effective, especially for tasks demanding more brute force or when dealing with very slippery items. In this method, all your fingers wrap securely around the handle. This offers a strong, stable hold but might sacrifice some of the fine control that the pinch grip provides.
It’s a good option when you need maximum leverage and feel confident in your stability.
The Cleaver's Dance: Step-by-Step Chopping Technique
Using a cleaver isn't just about bringing it down hard; it's about a controlled, efficient motion that leverages the knife's design. Think of it as a dance between the blade, the ingredient, and your hands. Mastering this sequence ensures clean cuts and keeps you safe.
The Rock and Chop Motion
Much like with a chef's knife, a common and effective technique is the rock and chop. You'll start the cut at the tip of the cleaver, rocking the blade forward and downward through your ingredient. The broad side of the cleaver ensures that you complete the cut in one pass, pushing through the item cleanly.
This method is particularly useful for ingredients that aren't exceptionally dense, allowing for a fluid and continuous cutting action.
Controlled Downward Swings
For tougher or denser ingredients, such as root vegetables or certain cuts of meat, a more direct downward swing might be necessary. Here, you'll lift the cleaver slightly higher and bring it down with a controlled, deliberate force. The substantial weight of the cleaver is what powers through the ingredient.
It's crucial that this swing is controlled, not wild; your guiding hand should always be safely tucked behind the path of the blade.
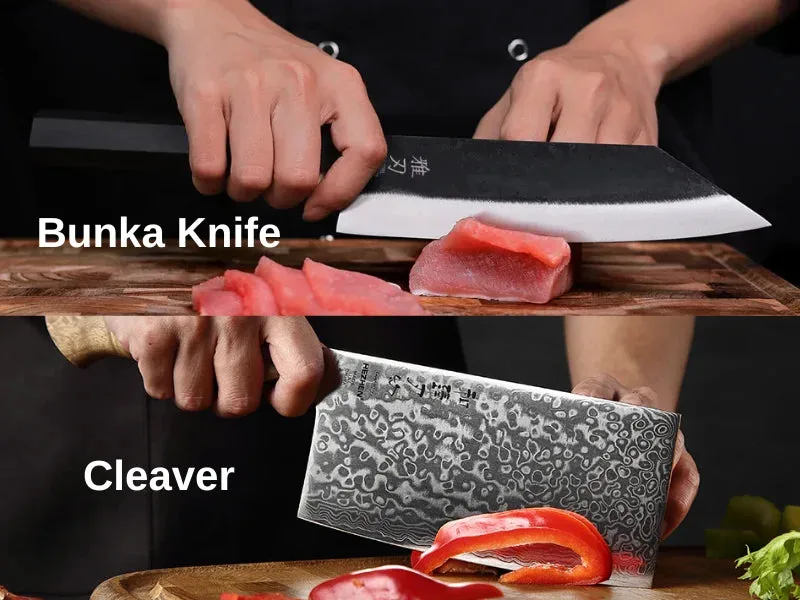
Using the Broad Blade for Scooping
One of the unsung heroes of the cleaver’s design is its wide, flat blade. Beyond just chopping, it’s incredibly useful for scooping up your prepped ingredients from the cutting board directly into a pan, bowl, or colander. This saves a step, reduces the risk of losing small pieces, and keeps your workspace tidy.
It’s a simple but highly practical application that boosts kitchen efficiency.
Common Cleaver Mistakes and How to Sidestep Them
Even with the best intentions, it's easy to fall into habits that make using a cleaver less effective or, worse, dangerous. Recognizing these common pitfalls is the first step toward correcting them and ensuring you're using the tool as it was intended.
Avoiding the Slip
A cleaver slipping during a cut is one of the most significant safety hazards. This often happens when the blade isn't sharp enough, requiring excessive force that can cause the knife to skid off the ingredient. Another cause is an unstable cutting board.
Our research confirms that ensuring your board is firmly anchored, perhaps with a damp cloth underneath, is paramount. Always make sure your ingredient itself is stable, especially round items like squash, which may need a flat side sliced off first.
Finger Safety: Keeping Them Tucked
Your guiding hand is your primary safety buffer. A common mistake is extending fingertips too far forward, making them vulnerable to the cleaver’s path. The correct technique involves keeping your knuckles forward, creating a barrier that the cleaver can rest against as it moves down.
This "claw" grip is essential for protecting your fingers.
When Less Force is More
It’s tempting to muscle through tough ingredients with sheer downward force. However, the cleaver is designed to do heavy lifting due to its weight and blade geometry. Over-reliance on arm strength, rather than controlled leverage and the blade's natural momentum, can lead to inaccurate cuts, increased fatigue, and potential injury.
A sharp cleaver, as per general knife maintenance standards, requires far less force than a dull one, making it both safer and more effective.
Cleaver Use Cases: What's it Best For?
A cleaver isn't your go-to knife for every single kitchen task, but it absolutely shines when tackling specific types of ingredients or prep work. Understanding its strengths helps you pick the right tool for the job, making your cooking faster and more efficient. Think of it as your heavy-duty specialist.
Tackling Tough Veggies
Dense vegetables are where a cleaver really proves its worth. Imagine dicing a butternut squash or a large pumpkin; a standard chef’s knife can struggle. The cleaver’s weight and broad blade cut through these with relative ease.
Similarly, thick-stalked celery, large onions, or firm root vegetables like potatoes and yams become much easier to manage. For ingredients that are bulky or have a tough exterior, the cleaver offers a more direct and powerful solution.
Breaking Down Poultry and Meat
When it comes to handling whole chickens, pork ribs, or even larger cuts of meat that might involve bone, a cleaver is indispensable. It can efficiently spatchcock a chicken, separating joints and ribs, or slice through thicker bones that would dull or damage a lesser knife. If you're making stocks or braises that require bone-in cuts, the cleaver simplifies the process significantly.
For instance, breaking down a whole chicken into eight pieces is a task a cleaver can accomplish in seconds, a job that could take much longer and require more effort with other knives.
Essential Cleaver Safety: Staying Sharp and Secure
Safety is non-negotiable when handling any large knife, and a cleaver is no exception. Because of its size and weight, understanding key safety principles is crucial for preventing accidents. Adhering to these guidelines ensures you can utilize the cleaver's power without putting yourself at risk.
- Keep it Sharp: A dull cleaver is more dangerous than a sharp one. It requires more force, increasing the chance of the blade slipping. Manufacturer specifications for many steel types, such as the common 5Cr15MoV often used in mid-range cleavers, indicate that maintaining a proper edge is key to safe use. A sharp blade cuts cleanly and predictably.
- Stable Foundation: Always use a sturdy, non-slip cutting board. A wobbly board is an invitation for disaster. Place a damp paper towel or cloth beneath the board to prevent it from sliding. Ensure your ingredients are also stable on the board before you begin cutting.
- Mind Your Fingers: As discussed, always keep your guiding hand's fingers tucked back, with knuckles forward. This creates a natural barrier between your fingers and the blade. Never let your fingers stray into the path of the descending cleaver.
- Clear Your Workspace: Ensure there's ample space around you. Avoid cutting when distracted or rushed. A clean, uncluttered area prevents accidental bumps or snags.
FAQ: Your Cleaver Questions Answered
What's the difference between a Chinese cleaver and a butcher's cleaver?
A Chinese cleaver is typically thinner and lighter, designed for chopping vegetables and boneless meats, while a butcher's cleaver is heavier and thicker, built to chop through bones and cartilage.
Can I use a cleaver for mincing garlic or herbs?
While you can, it's not ideal. A chef's knife or a specialized mezzaluna is much better suited for the fine chopping and rocking motion required for mincing delicate ingredients.
How often should I sharpen my cleaver?
This depends on usage, but as of 2026, general advice is to sharpen your cleaver whenever it starts to feel less efficient. For daily home use, sharpening every few months might be sufficient. Professional use may require more frequent sharpening.
Is it safe to cut through bones with a cleaver?
A proper butcher's cleaver is designed for this, but even then, technique and blade integrity are key. Never attempt to chop through very thick or dense bones that feel beyond the cleaver’s capacity, as this can damage the blade or cause a dangerous slip.