How to Sharpen a Paring Knife
You know how frustrating it is when your favorite paring knife struggles to slice through even the softest tomato? A dull blade doesn't just make cooking harder; it can actually be more dangerous because it's more likely to slip. Bringing that edge back is totally achievable, and it makes a world of difference in the kitchen.
Our research into knife maintenance confirms that most Western kitchen knives are designed with a specific edge angle, typically around 20 degrees per side, which is crucial for optimal sharpness and durability. This guide will walk you through how to sharpen a paring knife using proven methods, focusing on the most effective technique for consistent results.
Quick Answer
Sharpen a paring knife by maintaining a consistent 20-degree angle on a wet sharpening stone. Move the blade in smooth strokes, alternating sides, to grind a new edge. Regularly hone the blade with a steel to realign its microscopic teeth.
This process restores a keen edge for safer, more efficient cutting.
Why Visuals Are Your Best Friend for Paring Knife Sharpening
When you're learning how to sharpen a paring knife, understanding the right angle and the feel of the blade against the stone is key. Written instructions can tell you "hold it at 20 degrees," but seeing it makes all the difference. It's like learning to ride a bike; someone can explain it, but you really need to see the balance and feel it.
Diagrams showing the precise tilt of the blade, how the edge meets the abrasive surface, and the motion of the stroke are invaluable. These visuals help you avoid common mistakes by showing you exactly what to aim for.
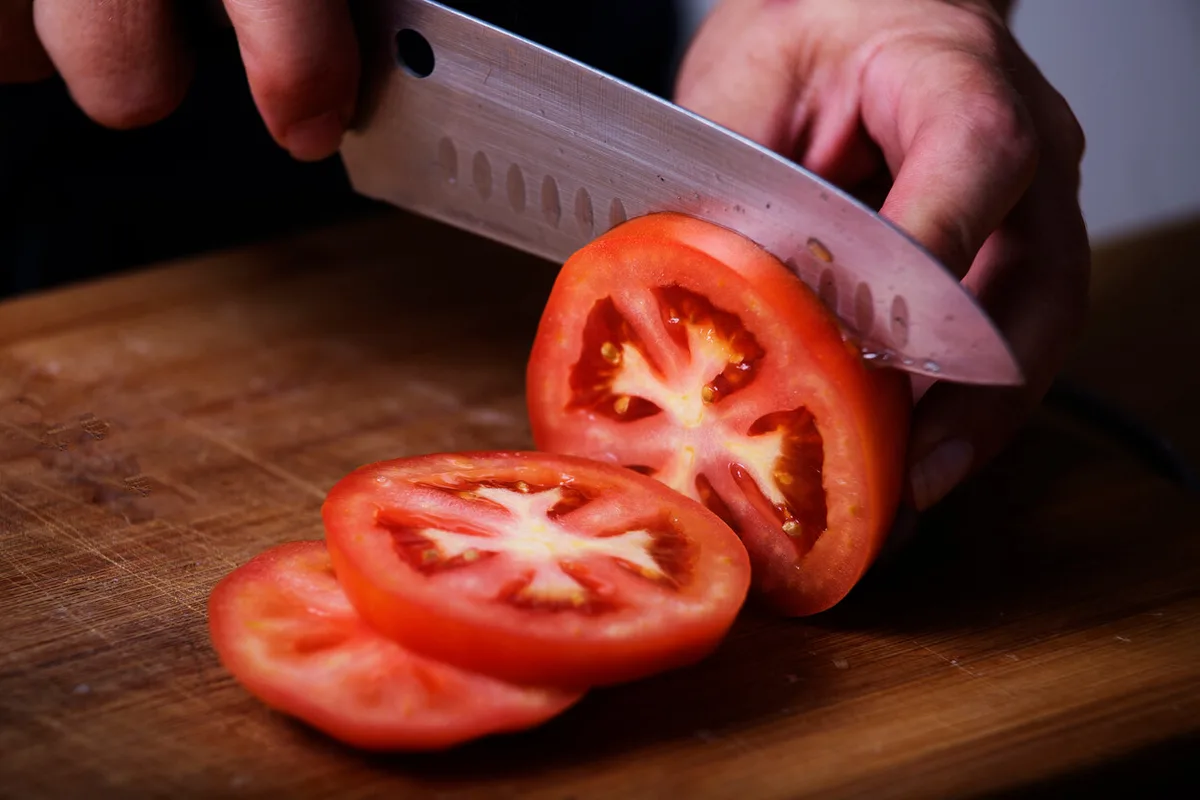
Image source: Bing (Web (fair-use with source credit))
Sharpening Stone Basics: What You Need and Why
The most effective way to get a truly sharp edge on your paring knife involves a sharpening stone, also called a whetstone. These blocks are made of abrasive material that, when used with water or oil, grind away tiny amounts of metal to reform the knife's edge. You'll typically want at least two grits: a medium grit (around 1000) for general sharpening and a finer grit (around 3000-6000) for polishing and refining the edge.
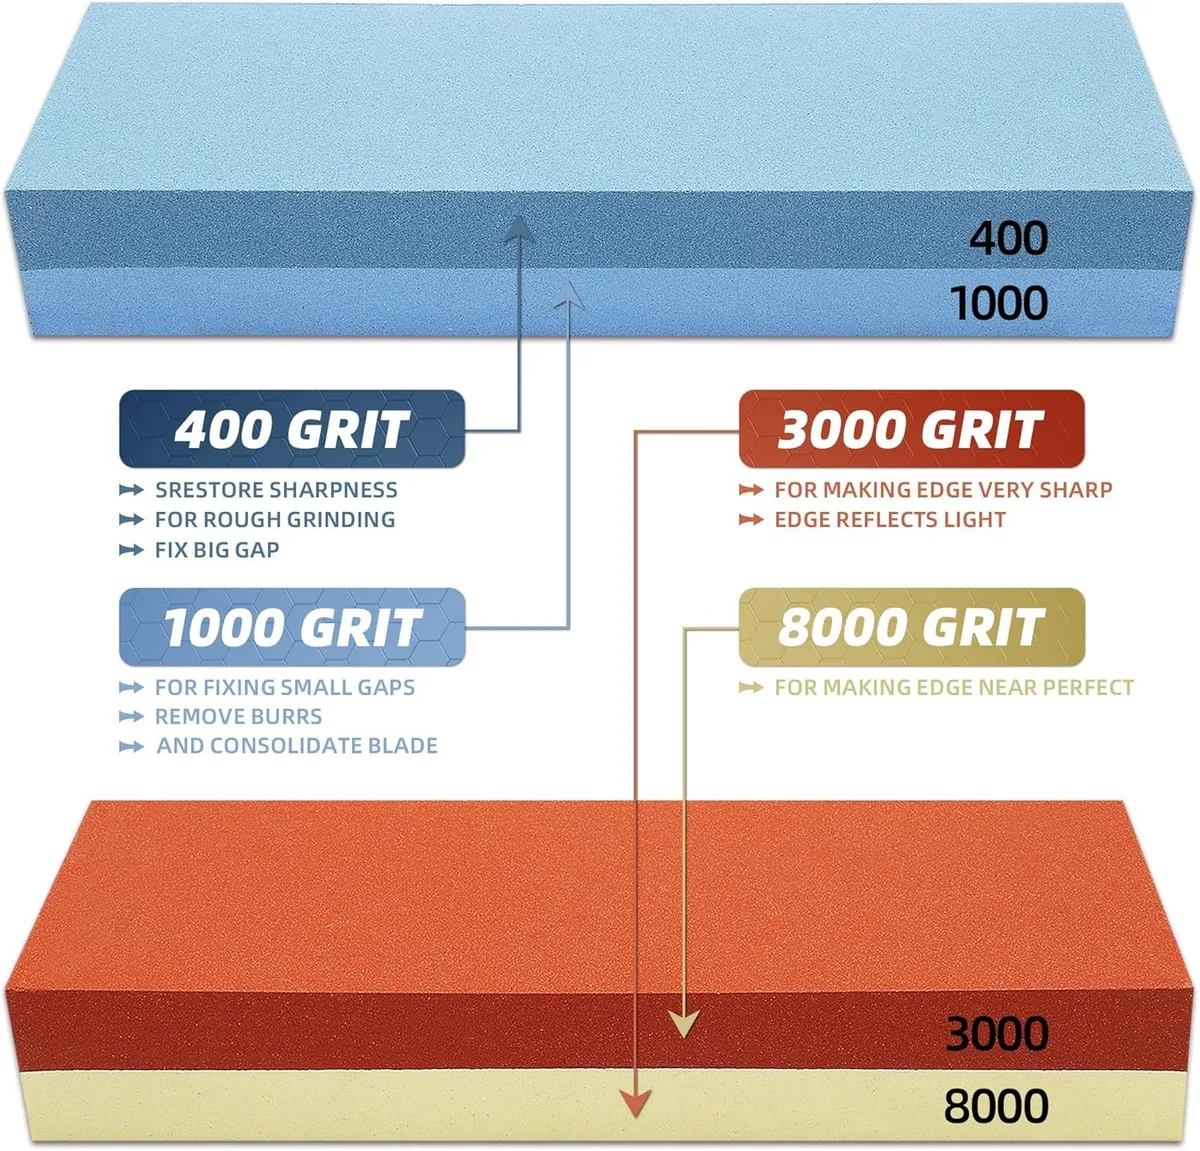
Image source: Bing (Web (fair-use with source credit))
Choosing Your Grit: Coarse, Medium, and Fine Explained
The grit number on a sharpening stone tells you how abrasive it is. Higher grit numbers mean finer abrasive particles and a smoother finish, while lower numbers mean coarser particles for faster metal removal.
- Coarse Grit (Below 1000): Use this for heavily damaged or extremely dull knives that need a lot of metal removed to reshape the edge. It's like taking a sledgehammer to fix a small dent, use it sparingly.
- Medium Grit (1000-2000): This is your workhorse grit for regular sharpening. It effectively removes metal to create a sharp edge without being too aggressive. Most of your sharpening will happen here.
- Fine Grit (3000+): These stones are for refining and polishing the edge created by the medium grit. They remove microscopic burrs and leave the blade feeling exceptionally smooth and sharp. You'll use this for a final touch-up.
For most home cooks, a dual-grit stone (e.g., 1000/3000 or 1000/6000) is an excellent starting point. This gives you the versatility to both sharpen and polish.
Step-by-Step: Getting That Perfect Edge with a Stone
The actual sharpening process might seem intimidating, but breaking it down makes it manageable. The goal is to consistently recreate the factory edge angle on your paring knife. Manufacturer specifications for many Western chef's knives indicate a standard edge angle of approximately 20 degrees per side.
Preparing Your Sharpening Stone
If you're using a water stone, lubrication is crucial. Without it, the stone won't cut effectively and will clog up with metal particles.
- Soak the Stone: Submerge your sharpening stone in cool water. You’ll know it’s ready when the stream of air bubbles coming from it stops, which usually takes about 5-10 minutes. Some synthetic stones require only a few minutes of soaking, while others might need longer.
- Stabilize the Stone: Place the soaked stone on a non-slip surface. A damp cloth or paper towel underneath works well, or many stones come with a dedicated base. This prevents it from sliding around while you're working.
Finding and Holding the Right Blade Angle
This is arguably the most critical part of sharpening. You need to maintain a consistent angle between the blade and the stone. For most Western knives, this is around 20 degrees.
- Visualizing 20 Degrees: Imagine the angle you'd hold a book open to read comfortably, or picture the angle of a standard roofline. If you're unsure, you can place a penny flat on the stone and rest your spine on it; that's roughly 15 degrees. Add another half-penny or a dime, and you're close to 20 degrees. Many dedicated angle guides are available that clip onto your knife's spine to help maintain this precise angle during sharpening, which is a huge help for beginners.
The Sharpening Stroke: Mastering the Motion
With your stone prepared and your angle set, you’re ready to grind. The motion should be smooth and deliberate.
- Start on One Side: Place the heel of your paring knife's blade flat on the stone at your target angle.
- Push Stroke: Gently push the knife forward, away from you, as if you're trying to slice a very thin layer off the stone. As you push, sweep the blade so that the entire edge, from the heel to the tip, makes contact with the stone.
- Pull Stroke: Pull the knife back towards you. Apply very light pressure here; the stone does the cutting on the push stroke. Again, maintain that angle and sweep from heel to tip.
- Count Your Strokes: Perform an equal number of strokes on each side. Start with about 5-10 strokes per side. This ensures you’re removing metal evenly.
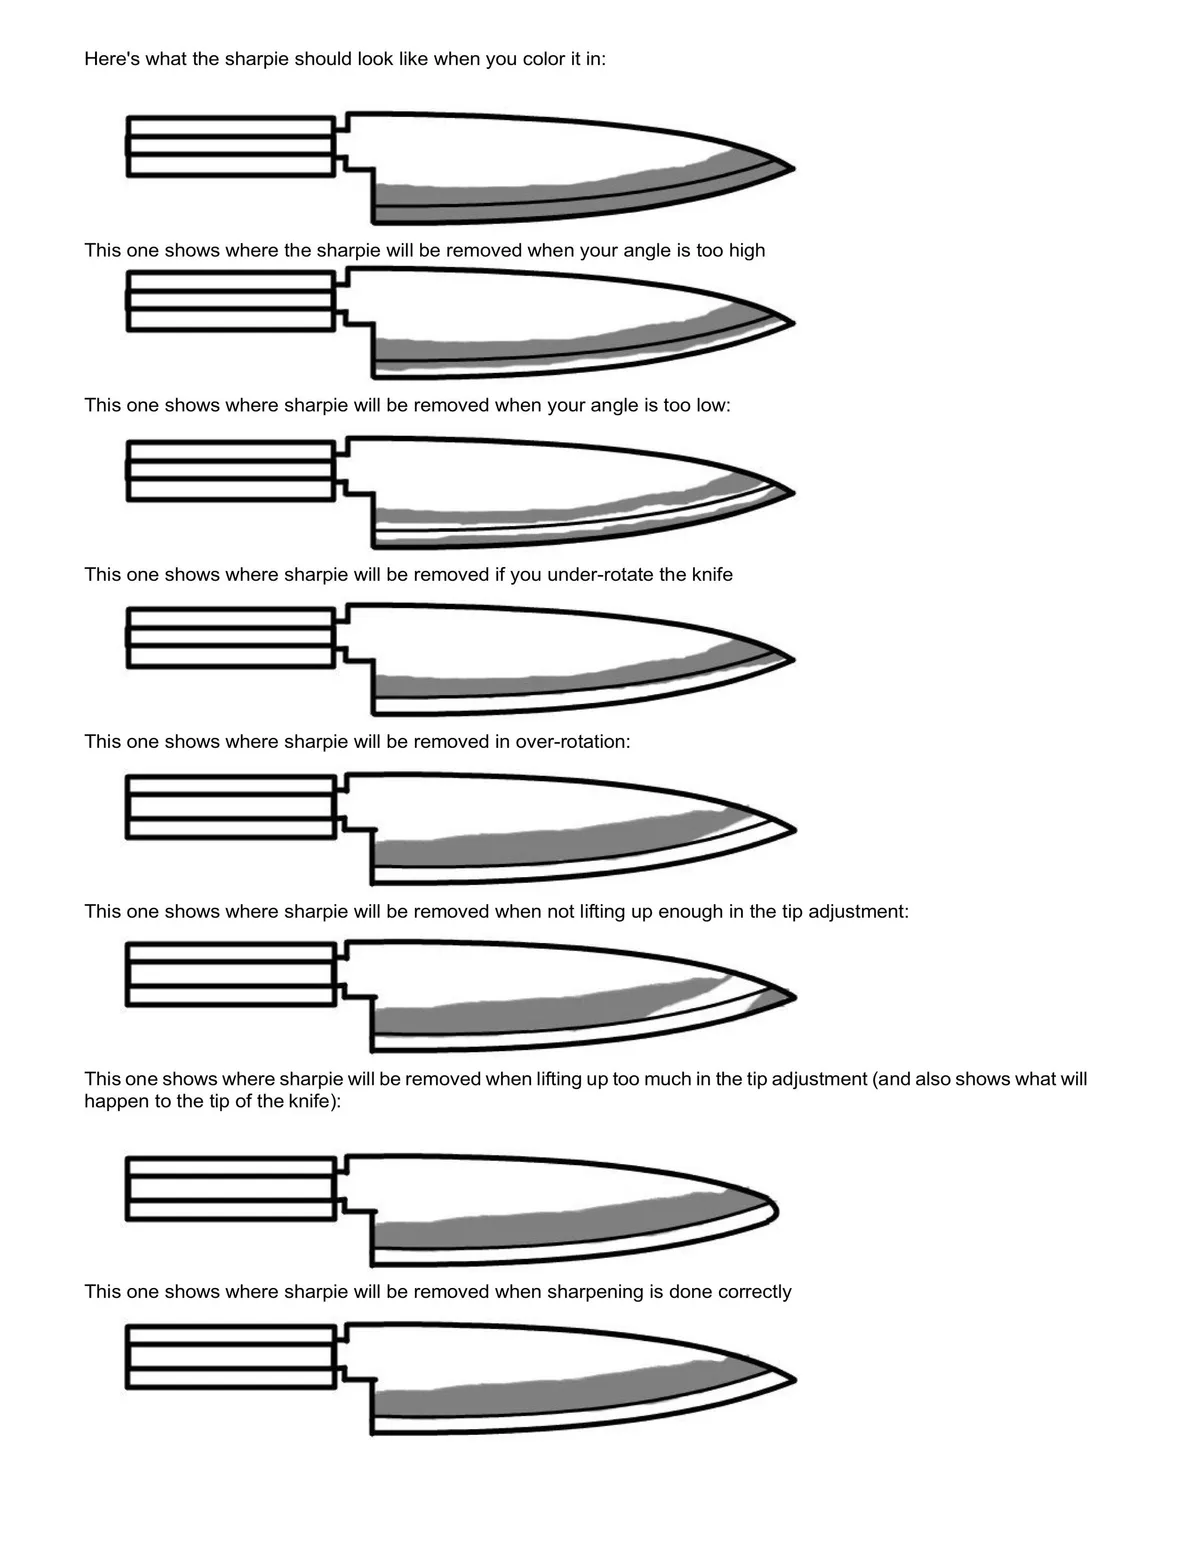
Image source: Bing (Web (fair-use with source credit))
Recognizing and Removing the Burr
As you sharpen one side of the blade, a tiny ridge of metal, called a burr, will form on the opposite side. Feeling this burr is your cue that you're effectively sharpening the edge.
- How to Feel for a Burr: After completing your strokes on one side, carefully run your fingertip away from the cutting edge (never along it) on the opposite side of the blade. You should feel a slight roughness or wire-like edge. If you don't feel a burr, you may need to adjust your angle or apply slightly more consistent pressure.
- Flattening the Burr: Once you've established a burr on both sides, you'll want to refine the edge and remove this burr. This is done by alternating strokes, doing one stroke on side A, then one stroke on side B, then back to A, and so on. Gradually reduce the pressure with each alternating stroke until you're using minimal pressure, then finish with a few light strokes on each side. This process smooths out the burr and leaves you with a truly keen edge.
Honing: Maintaining Your Sharp Edge
Honing isn't sharpening; it's about realigning the microscopic teeth of the blade that get bent out of shape during regular use. Think of it as straightening a bent comb instead of grinding new teeth. A honing steel should be used frequently, often before or after each major cooking session, to keep your knife performing at its best between actual sharpenings.
- Honing Technique: Hold the honing steel vertically with the tip resting on a stable surface. Place the heel of your knife against the top of the steel at the same approximate 20-degree angle. Draw the blade down the steel in a smooth, sweeping motion, maintaining the angle until you reach the tip. Repeat this process 5-10 times on each side of the steel. Regular honing significantly extends the time your knife stays sharp.
Common Paring Knife Sharpening Mistakes to Avoid
Even with the best intentions, it's easy to make mistakes when you're first learning to sharpen. One of the biggest is inconsistent pressure; applying too much force can actually damage the blade or unevenly wear down the stone. Another common pitfall is changing the angle during a stroke, which creates a wavy, weak edge.
Many people also rush the process, skipping crucial steps like properly preparing the stone or checking for a burr, leading to a less-than-ideal result.
- Inconsistent Angle: This is the most frequent offender. If your angle wavers, you won't get a clean, sharp edge. It's better to maintain a slightly imperfect but consistent angle than to constantly change it.
- Too Much Pressure: You don't need to press down hard. The abrasive grit of the stone does the work. Excessive force can chip the blade or overheat the steel, weakening it.
- Skipping the Burr Check: If you don't create and then remove a burr, you haven't actually sharpened the edge properly. You're just dragging a dull surface across the stone.
- Not Lubricating Enough: For water stones, insufficient water means friction and poor cutting action, leading to a duller edge and faster stone wear.
When to Reach for a Pull-Through or Electric Sharpener
While sharpening stones offer the most control and best results, they do require a bit of practice. For those who want a quicker, more straightforward solution, pull-through sharpeners and electric sharpeners are great alternatives. These devices typically have pre-set angles, making it easy to just draw the blade through.
- Pull-Through Sharpeners: These are handheld devices with abrasive slots. You simply pull your knife through them a few times. They're compact and easy to store, making them ideal for quick touch-ups. However, they can sometimes remove more metal than necessary or not provide as refined an edge as a stone.
- Electric Sharpeners: These use motorized abrasive wheels or belts to sharpen the knife. They are very fast and can restore a dull edge quickly, but they often have less control over the angle and can be aggressive, potentially shortening the lifespan of your knife if used too frequently. For everyday home use, a good quality pull-through sharpener can be a convenient option for maintaining sharpness between proper stone sharpening sessions.
Testing Your Newly Sharpened Paring Knife
How do you know if you've achieved a truly sharp edge? The best way is to test it on something you know is difficult for a dull knife. The classic "paper test" is a good indicator.
Hold a piece of printer paper vertically and try to slice downwards through it with your knife. A sharp knife should slice cleanly with minimal resistance, almost as if it's cutting butter.
Another common test involves slicing a tomato or an onion. A sharp paring knife should glide through the skin with ease, without crushing the flesh or requiring significant downward pressure. If you find yourself pressing hard or the knife is skidding, it likely needs more work or a different sharpening approach.
- The Paper Test: A sharp knife should slice through a hanging piece of paper cleanly, without snagging or tearing.
- Tomato Test: Look for the knife to effortlessly pierce the skin and slice through without crushing the tomato.
- Onion Test: A sharp blade will cut through onion layers cleanly, reducing crying and making slicing much faster.
Caring for Your Sharpening Stone and Steel
Proper maintenance of your sharpening tools is just as important as the sharpening process itself. After using a water stone, it's crucial to rinse it thoroughly under running water to remove all metal particles and slurry. Then, let it air dry completely before storing it.
Storing a wet stone can lead to mold or damage.
Honing steels, while less complex, also benefit from a wipe-down after use to remove any metal dust. If your honing steel has a smooth surface, it's mainly for realigning. If it has a diamond or ceramic coating, it can perform some light sharpening as well.
Keeping your sharpening stone flat is also key; over time, they can develop a dished-out surface, making consistent angles harder to achieve. Flattening stones are available for this purpose.
Why Keeping Your Stone Flat Matters
- Consistent Angles: A flat stone ensures that your blade makes even contact across its entire length, leading to a uniform edge.
- Efficient Sharpening: A dished stone means you're not using the full abrasive surface, making the sharpening process longer and less effective.
- Tool Longevity: Regularly flattening your stones helps them last longer and perform better.
Frequently Asked Questions About Sharpening Paring Knives
How often should I sharpen my paring knife?
This depends heavily on how often you use it and what materials you cut. For frequent users, sharpening every few weeks to a month is common. If you only use it occasionally, you might only need to sharpen it a couple of times a year.
Honing, however, should be done much more frequently, as mentioned earlier.
Can I use any sharpening stone on my paring knife?
Yes, but different stones are better suited for different tasks. For general sharpening, a medium grit (around 1000) water stone is ideal. Finer grits are for polishing, and very coarse grits are for repairing severely damaged edges.
Always check the manufacturer's recommendations for your specific knife and stone.
Is it safe to sharpen knives at home?
Yes, it's safe if you take proper precautions. Always use a stable surface for your stone, keep your fingers away from the cutting edge, and focus on maintaining a consistent angle. When in doubt, consider using a guided sharpening system or seeking professional sharpening services.
My knife still feels dull after sharpening, what's wrong?
This could be due to several factors: an inconsistent angle, insufficient strokes, not properly removing the burr, or the knife might have a very hard steel that requires specialized sharpening techniques or tools. Sometimes, simply practicing the motion on a less critical knife can help build muscle memory.