How to Sharpen a Bread Knife
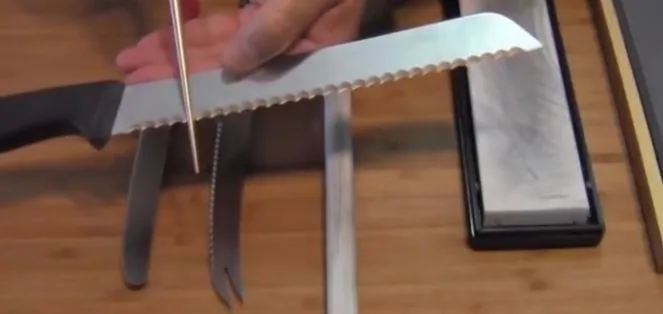
Image source: Bing (Web (fair-use with source credit))
A dull bread knife doesn't just make slicing a chore; it crushes your crusty loaves and turns a satisfying sandwich-making experience into a frustrating battle. Learning how to sharpen a bread knife yourself can bring back that effortless glide, ensuring clean cuts every time. It’s about restoring the keen edge that makes your serrated blade truly effective, saving you from wrestling with your baked goods.
When done correctly, sharpening a bread knife, particularly one with serrations, can be quite achievable. According to knife manufacturer guidelines, maintaining a consistent angle of around 15 to 20 degrees per side is crucial for optimal edge retention. This guide will walk you through the process, highlighting the visual cues and techniques needed to bring your bread knife back to life.
Why a Sharp Bread Knife Matters
A bread knife's serrated edge is designed for a specific task: sawing through tough exteriors and soft interiors without squashing. When that edge dulls, it loses its effectiveness. Instead of a clean slice, you get rips and tears.
This isn't just about aesthetics. A dull knife requires more pressure, which can lead to accidents. Our research indicates that many kitchen injuries stem from using dull knives because they demand excessive force.
Restoring sharpness means safer, more efficient slicing for all your baked goods.
Getting to Know Your Bread Knife and Sharpening Tools
Before you can sharpen, it's helpful to understand what you're working with. Bread knives have unique features, and the tools you choose will dictate your approach.
The Anatomy of a Bread Knife Blade
Bread knives typically feature long, thin blades with a row of sharp teeth, known as serrations. These serrations act like tiny saws, gripping the bread's surface and allowing the blade to cut with a back-and-forth motion. Unlike straight-edged knives, the serrations are the primary cutting surface.
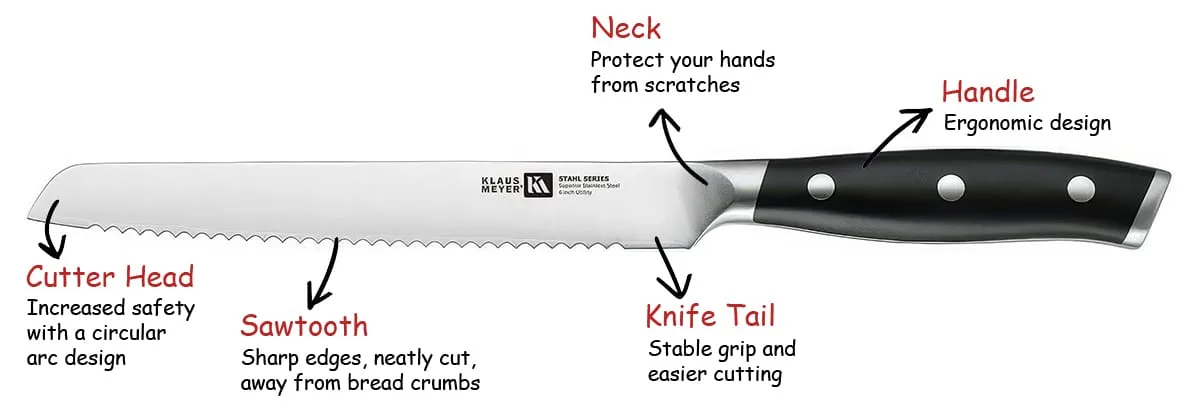
The depth and spacing of these serrations can vary between knives, influencing how they perform on different types of bread. Some have shallow, sharp teeth, while others have deeper, more aggressive ones. This design is what makes them so effective for crusty loaves, bagels, and even firm fruits.
Your Sharpening Arsenal: Whetstones, Electric Sharpeners, and Honing Steels
When it comes to sharpening, you've got a few main options. Each has its pros and cons, and the best choice often depends on your comfort level and the type of knife.
- Whetstones (Sharpening Stones): These are flat blocks of abrasive material, like ceramic, diamond, or natural stone, with various grit levels. Sharpening with a whetstone offers the most control and can yield the sharpest edge, but it requires practice to maintain the correct angle. Grit refers to the coarseness of the stone; lower grits (e.g., 200-1000) are for repairing damage and shaping the edge, while higher grits (e.g., 3000-8000+) are for refining and polishing.
- Electric Knife Sharpeners: These machines take much of the guesswork out of sharpening. You simply pull the knife through designated slots. They are fast and convenient but offer less control, and some models can remove too much metal, potentially shortening your knife's lifespan. Not all electric sharpeners are ideal for serrated blades, so check the manufacturer’s specifications carefully.
- Honing Steels (Sharpening Rods): These are not technically sharpeners but tools for realigning the microscopic teeth on the blade's edge. Honing steels, often made of steel, ceramic, or diamond-infused material, are used regularly to maintain an already sharp edge between full sharpenings. They won't restore a truly dull knife but are essential for keeping it in top condition.
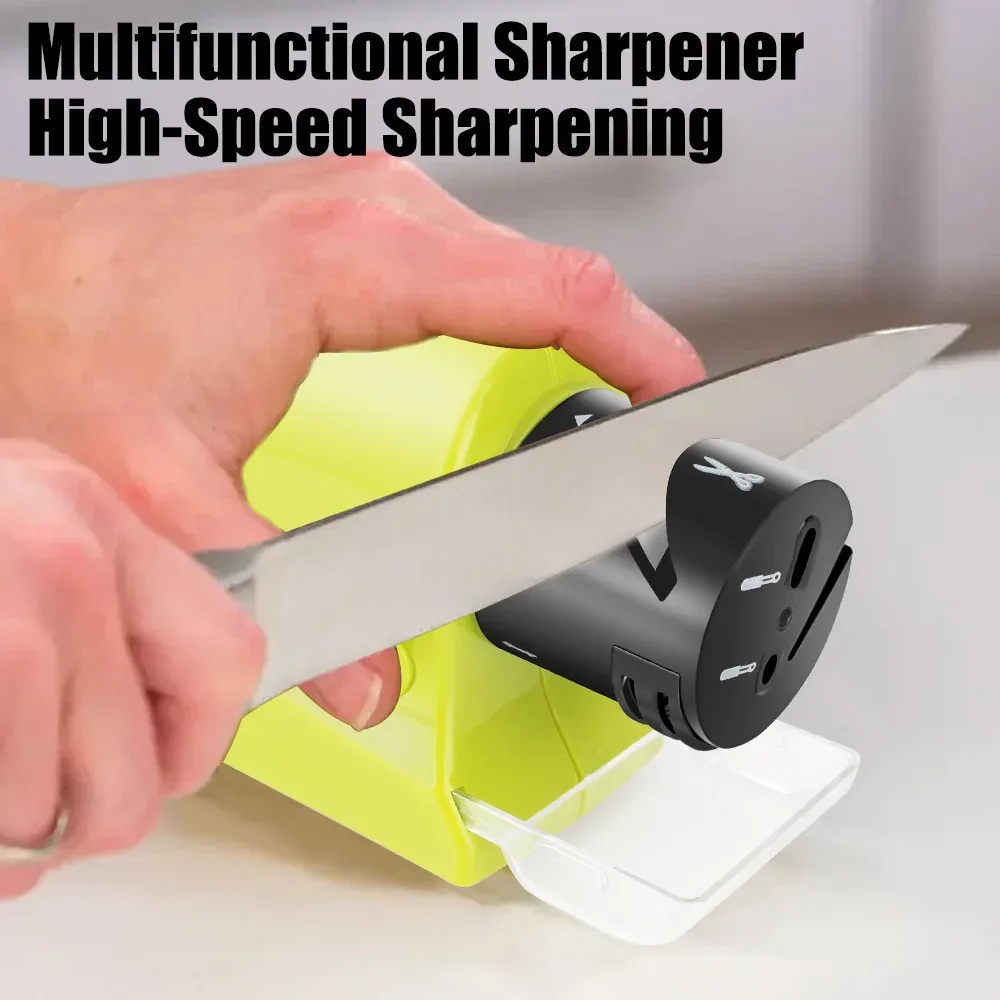
For bread knives, whetstones are often considered the gold standard by enthusiasts, as they allow for precise work on each serration. However, specific electric sharpeners designed for serrated blades are also available and can be a good option for those seeking speed and simplicity.
The Visual Guide to Sharpening a Serrated Blade
Sharpening a bread knife isn't quite the same as sharpening a straight-edged knife. The key is to address each serration individually. This process is best understood by seeing the movements, but we'll describe the crucial visual cues you'd look for.
Step 1: Preparing Your Whetstone (If Applicable)
If you’re using a whetstone, preparation is key. For water stones, soak them in water until they stop releasing air bubbles, typically 5-10 minutes. This ensures they cut effectively and don't get clogged with metal particles.
Diamond stones usually just need a bit of water to lubricate.
Ensure the stone is stable on a non-slip surface. A damp cloth underneath or a dedicated stone holder works well. You want your sharpening surface to be completely secure so your hands and the knife can focus on the edge.
Step 2: Finding and Holding the Sharpening Angle
This is where visual guidance is most helpful. You need to find the angle at which each serration edge meets the sharpening surface. For most bread knives, this angle is between 15 and 20 degrees.
Imagine your knife blade is the roof of a house. You want to place the edge against the stone at an angle that exposes just the very tip of the serration. If you’re using an electric sharpener, it will have pre-set angles.
For a whetstone, try holding the knife so that the spine is just slightly higher than the edge. You'll often see guides or markings on sharpening systems designed for this.
Step 3: The Motion: Moving the Blade Across the Stone
With the correct angle established, you’ll gently draw the blade across the stone. For whetstones, you're typically moving the blade away from you, edge-leading. The motion should be smooth and consistent.
You’re working on the side of the blade that faces the stone. Apply light to moderate pressure, enough to feel the stone engaging the metal, but not so much that you risk damaging the edge or losing your angle. You’ll repeat this motion across the entire length of the blade.
Step 4: Working the Serrations: Tiny Strokes for Tiny Teeth
This is the most distinct part of sharpening a bread knife. Instead of one long stroke, you need to address each serration. You’ll likely use short, controlled strokes, moving the knife forward and backward, or just forward, across the stone.
Focus on placing the edge of one serration onto the stone at your chosen angle. You might move the knife a fraction of an inch at a time, effectively sharpening just one tooth before moving to the next. It’s like filing each tooth of a saw individually.
Step 5: Refining the Edge: Moving to Finer Grits
After you’ve worked through the coarser grit to establish a sharp edge, you’ll move to finer grit stones. This refines the edge, removing any burrs (tiny, wire-like metal fragments) and making the blade smoother and sharper.
Each time you switch to a finer grit, repeat the process of angling and stroking, paying attention to each serration. This progression from coarse to fine grit is standard practice for achieving a truly keen edge on any knife, and it's essential for bringing out the best in your bread knife.
Common Mistakes When Sharpening Bread Knives
It's easy to make a few common missteps when you're first learning to sharpen a bread knife. Knowing these can save you frustration and prevent damage to your blade.
Forgetting the Serrations
This is the biggest trap. Many people try to sharpen a serrated knife like a straight one, using one long stroke. This misses the individual teeth, leaving them dull and ineffective.
You must focus on sharpening each individual serration.
Incorrect Angle or Pressure
Too steep an angle can chip the delicate serrations, while too shallow an angle won't create a proper edge. Too much pressure can cause the metal to fold over or break. Our research shows that maintaining a consistent, light to moderate pressure is key.
For most knives, aim for around 15-20 degrees per side.
Over-Sharpening
It's tempting to keep going, thinking more strokes mean a sharper knife. However, over-sharpening can remove too much metal, shortening the lifespan of your bread knife. You only need enough strokes to feel a slight burr or notice a definite improvement in cutting ability.
When to Sharpen Your Bread Knife
Figuring out when your bread knife actually needs sharpening is more art than exact science, but there are clear signs. The most obvious is performance: if it's struggling to slice through crusty bread without crushing it, it's time.
Another indicator is when you have to apply significant downward pressure or use a sawing motion that feels uneven. Manufacturer specifications often suggest honing after every few uses and a full sharpening when honing no longer restores the edge. As of 2026, consistent performance is still the best metric.
If your bread knife is behaving more like a dull butter knife, it's time to sharpen.
Keeping Your Bread Knife Sharp: Maintenance Tips
Sharpening is only part of the equation; proper maintenance keeps your bread knife performing its best between sharpening sessions. Think of it like tending to a good tool.
- Hone Regularly: Use a honing steel or ceramic rod after every few uses, or even daily if you use your bread knife a lot. This realigns the microscopic teeth of the serrations. It doesn't remove metal, just straightens what’s there.
- Clean Promptly: Wash your bread knife by hand immediately after use. Food particles can dry and harden, making them harder to remove and potentially dulling the edge. Avoid abrasive cleaners.
- Dry Thoroughly: After washing, always dry the knife completely with a soft cloth. Moisture can lead to rust or corrosion, especially on carbon steel blades.
- Store Safely: Never toss your bread knife into a junk drawer. A knife block, magnetic strip, or blade guard protects the edge from accidental bumps and damage. Storing it properly is as important as keeping it sharp.
Sharpening Specific Bread Knife Types
While the general principles apply, there are minor adjustments to consider for different bread knife constructions. The goal is always to maintain the integrity of those serrations.
Serrations on Different Bread Knives
Most bread knives have what's called a "sawtooth" serration, which is what we've been discussing. These require careful attention to each individual tooth. Some specialized bread knives might have a scalloped or wavy edge, which can sometimes be sharpened with a very fine-grit ceramic rod or a specialized guided system, but this is less common.
For the vast majority of household bread knives, stick to methods that address each sawtooth individually. Using a sharpening steel designed for serrations, or a very fine-grit whetstone with careful precision, is key.
Electric Sharpeners and Serrated Blades
Not all electric knife sharpeners are created equal when it comes to serrated blades. Many have slots designed for straight edges and can actually damage the delicate teeth of a bread knife. Always check the manufacturer's manual for your specific electric sharpener.
Look for models that explicitly state they are safe for serrated knives. These often have angled guides or specific slots designed to hit each serration at the correct angle. If your electric sharpener isn’t designed for serrations, it’s best to avoid using it on your bread knife.
For a bread knife, a well-chosen manual method or a dedicated electric serrated sharpener is usually best.
Frequently Asked Questions
How often should I sharpen my bread knife?
You should sharpen your bread knife when you notice it struggling to slice through bread cleanly. For regular use, this might be every few months to once a year, depending on the knife's quality and how often you hone it.
Can I use a regular knife sharpener on my bread knife?
Most standard knife sharpeners are designed for straight edges and can damage the serrations on a bread knife. It's best to use a method specifically designed for serrated blades, like a whetstone, a ceramic rod, or a specialized electric sharpener.
What grit whetstone should I use for a bread knife?
Start with a medium grit (around 1000) to establish a sharp edge, then move to a finer grit (3000+) for refinement. If the knife has significant damage, a coarser grit (around 400) might be needed initially.
How do I know if my bread knife is sharp enough?
A sharp bread knife will slice through crusty bread with minimal effort and without crushing the interior. You should be able to see clean, defined cuts. Testing on a piece of paper can also indicate sharpness, though this is more reliable for straight edges.