How To Use A Dual Action Polisher: Easy Pro Tips
A dual action polisher is used with light pressure, slow passes, and the right pad and polish.
If you want a safer, easier way to correct paint and bring back gloss, learning how to use a dual action polisher is one of the best skills you can build. I’ve used dual action polishers on everything from daily drivers to weekend garage projects, and the big lesson is simple: the tool does a lot of the work, but good technique makes all the difference. Once you understand the basics of how to use a dual action polisher, you can remove light swirls, clean up oxidation, and make paint look richer without the risk that comes with more aggressive tools.
What a Dual Action Polisher Is and Why It Matters
A dual action polisher, often called a DA polisher or orbital polisher, moves in two ways at once. The pad spins and also oscillates in a small orbit. That motion helps reduce heat and lowers the chance of burning through paint compared with a rotary polisher.
This is why so many detailers recommend a dual action polisher for beginners and pros alike. It is more forgiving, easier to control, and better for most paint correction jobs. When people ask how to use a dual action polisher, they usually want two things: real results and less risk. This tool gives you both when you use it the right way.
A DA polisher is commonly used for:
- Removing light swirl marks
- Reducing fine scratches
- Restoring gloss and clarity
- Applying polish or wax more evenly
- Correcting oxidation on older paint
In my own work, the DA polisher became the tool I reached for most often because it was the best mix of safety and performance. It is a bit like using a good chef’s knife after years of dull ones: once you learn the feel, everything gets easier and cleaner.

What You Need Before You Start
Before you learn how to use a dual action polisher, gather the right supplies. Good prep saves time and protects the paint.
Here is the basic setup:
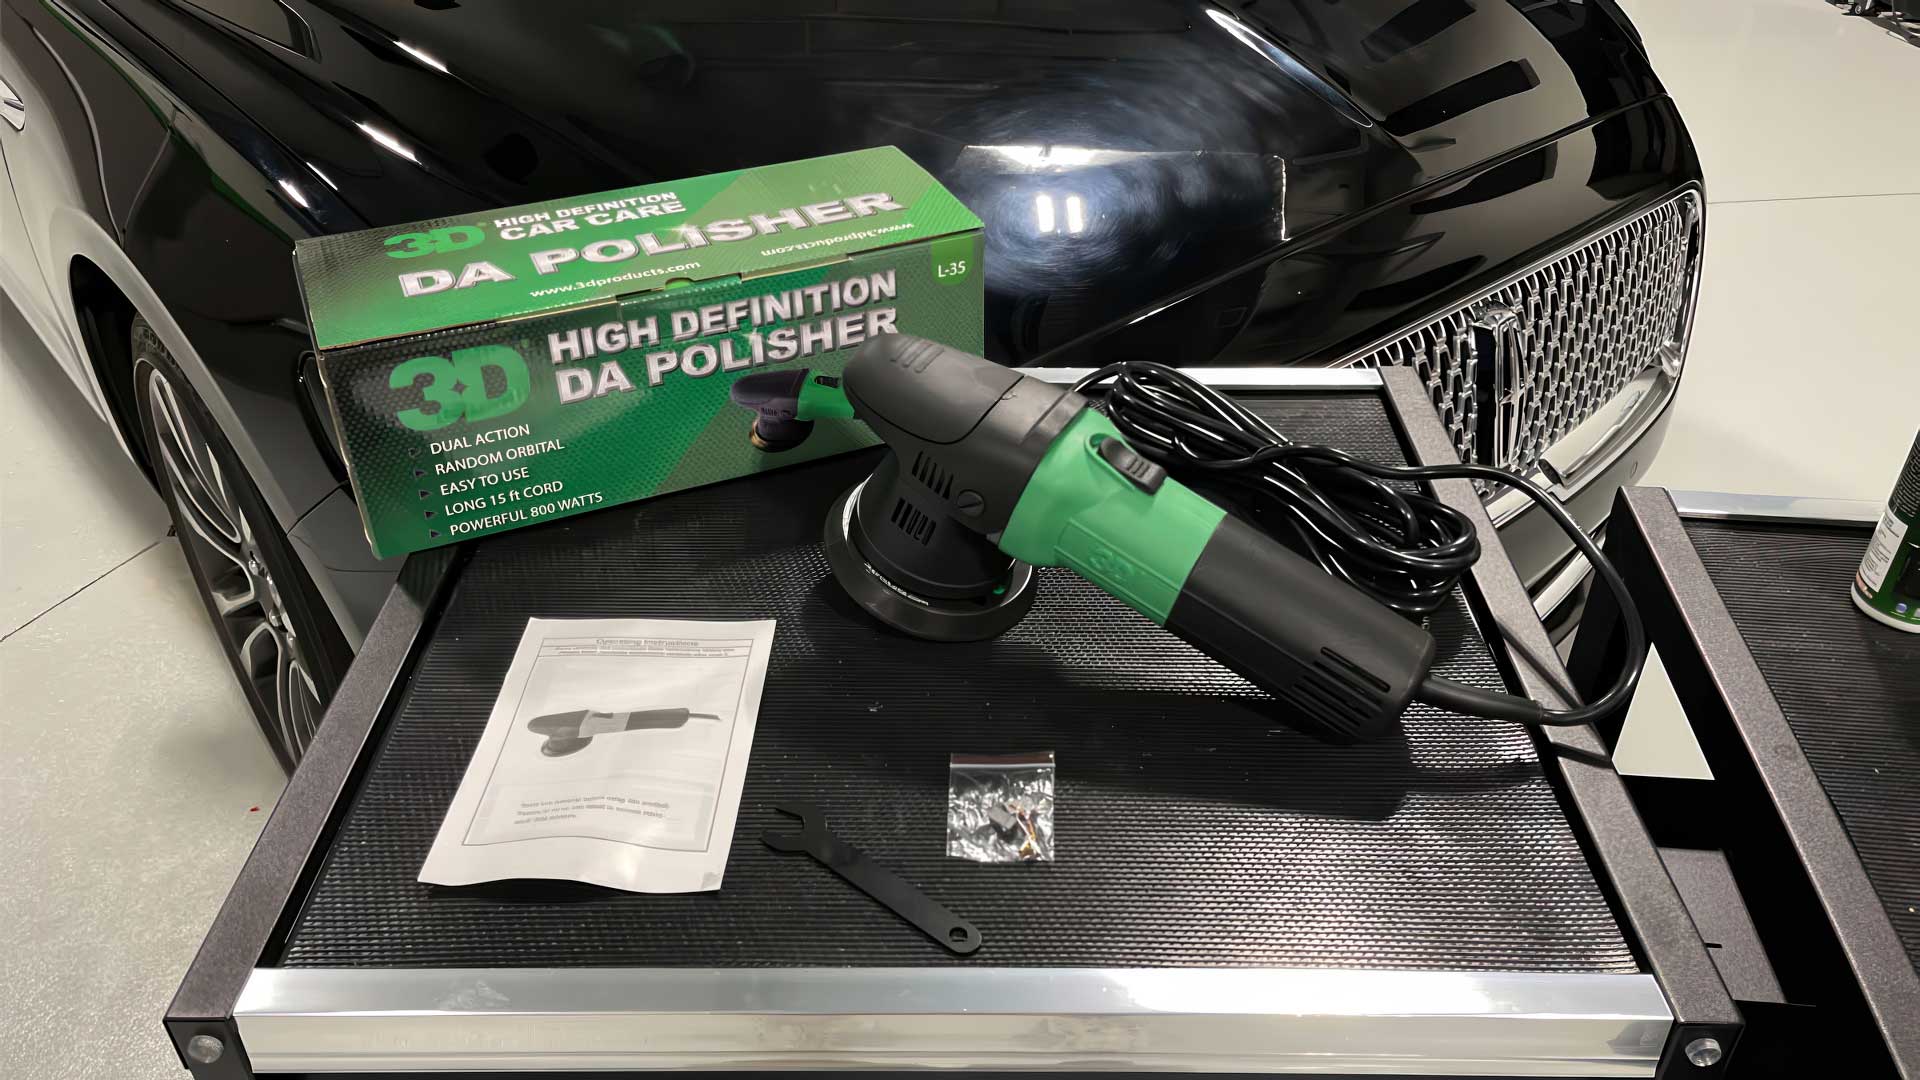
- Dual action polisher
- Foam polishing pad or cutting pad
- Finishing pad for final gloss work
- Compound or polish
- Microfiber towels
- Painter’s tape for trim and edges
- Clean wash mitt and car soap
- Clay bar or clay mitt
- Panel wipe or isopropyl alcohol mix
- Extension cord if your tool is corded
You also want a clean, shaded workspace. Direct sun can make products dry too fast and make the paint hard to read. If the car is hot to the touch, wait until it cools down.
One mistake I made early on was starting on a dirty panel. Even a tiny bit of dust can create more marks while you work. A clean surface is not optional. It is the foundation of the whole job.
How to Use a Dual Action Polisher Step by Step
Learning how to use a dual action polisher is easier when you break it into small steps. Go slow and keep your first passes simple.
1. Wash and decontaminate the paint
Start by washing the vehicle well. Remove dirt, road film, and loose grit so you do not grind it into the paint.
Then clay the surface if needed. Clay removes bonded contamination that washing cannot touch. A smooth panel lets the pad glide better and gives you more even results.
2. Tape off sensitive areas
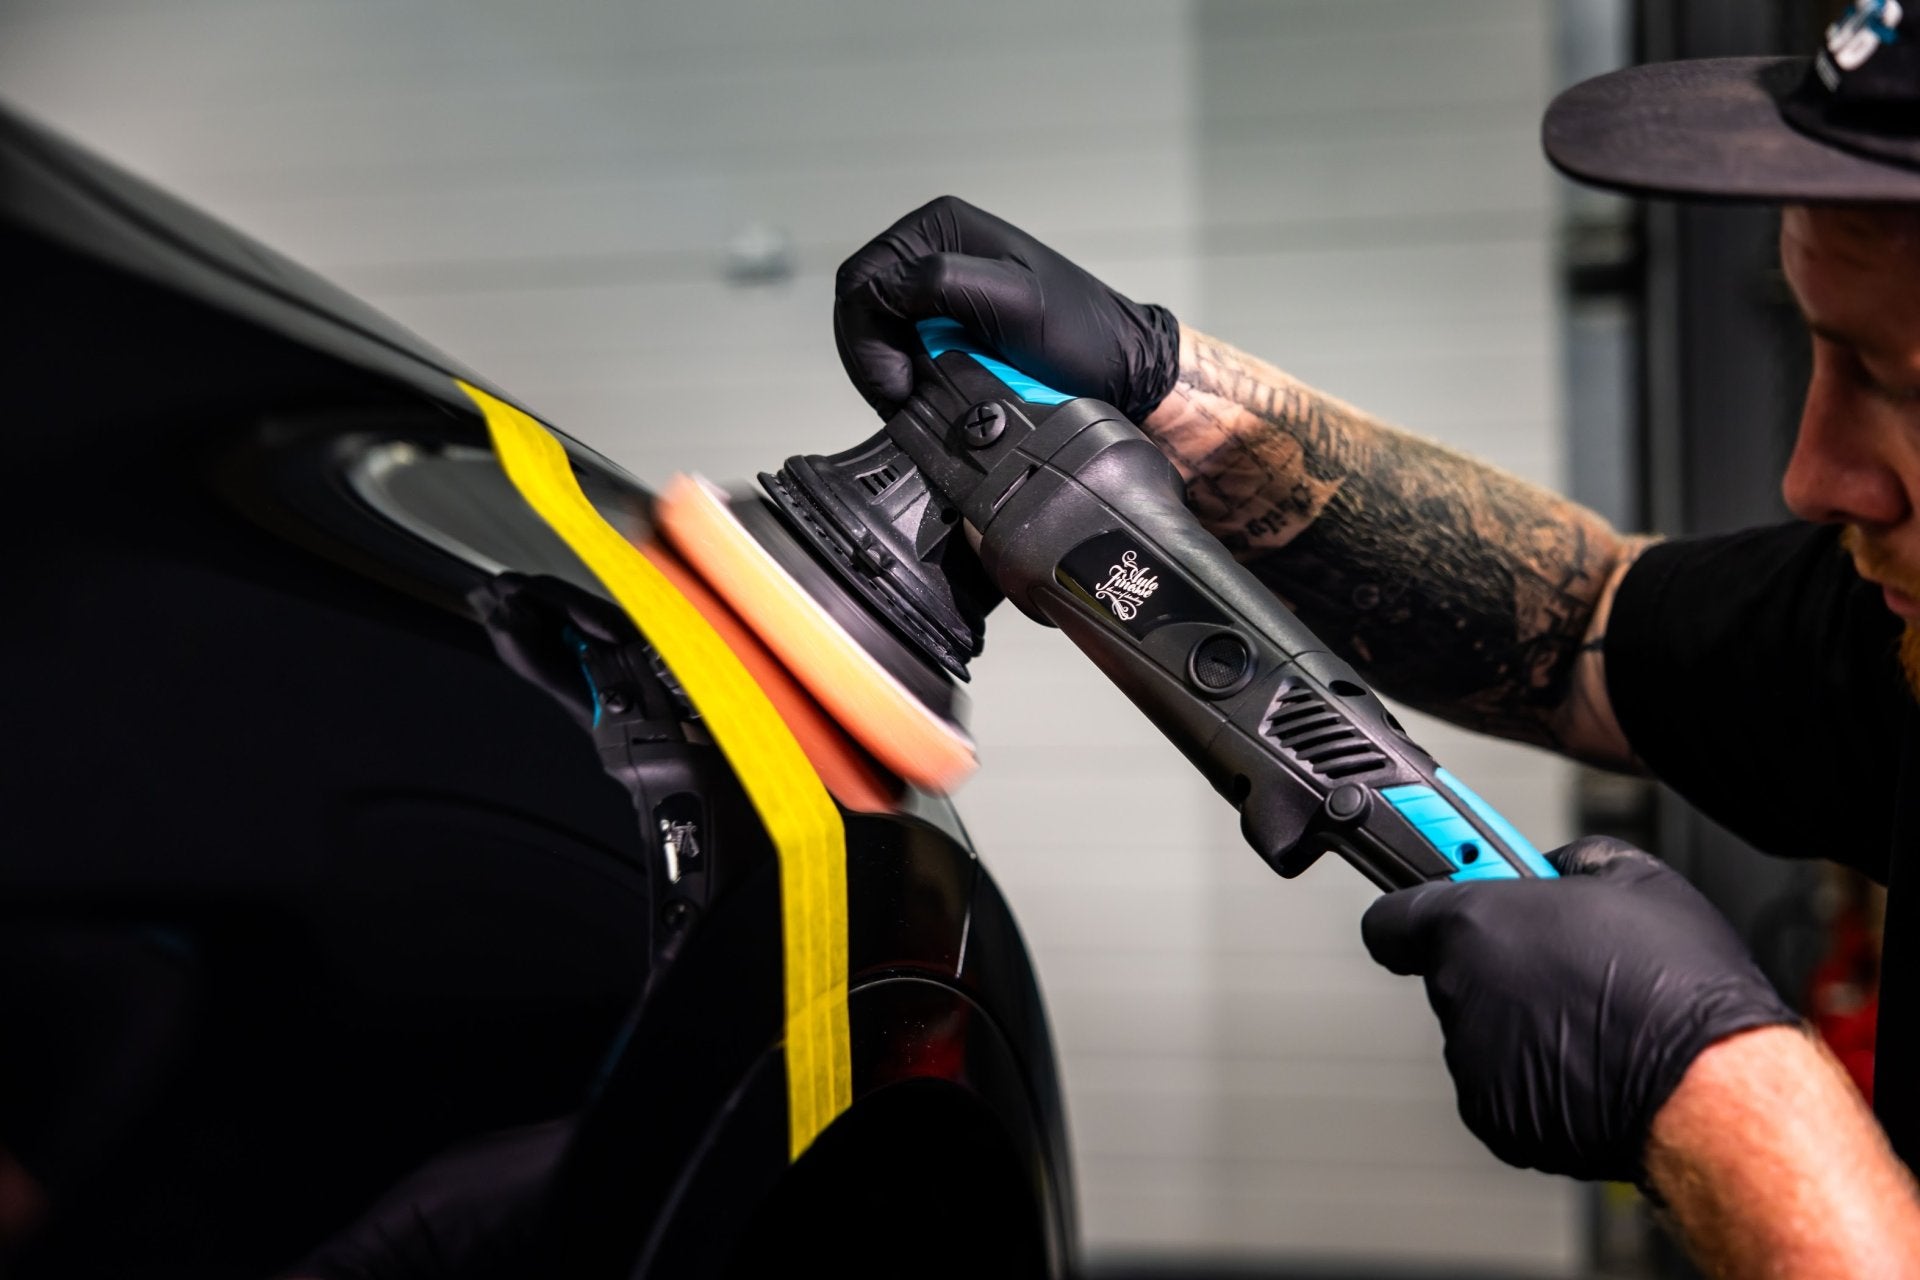
Use painter’s tape on trim, emblems, rubber seals, sharp edges, and textured plastic. Polishing residue can stain some materials, and edges are more prone to heat.
This step may feel tedious, but it prevents a lot of cleanup later. I learned that lesson after polishing around old trim and spending nearly as long cleaning it as I did polishing it.
3. Prime the pad
Apply a small amount of product to the pad and spread it lightly with your hand or a microfiber towel. A primed pad helps the polish work evenly.
Do not soak the pad. Too much product can reduce cutting power and create splatter. For most jobs, a few small dots is enough after the first prime.
4. Spread the polish on the paint
Place the pad on the panel before turning the machine on. This helps prevent product from flinging across the area.
Use a low speed setting to spread the polish over a small section, usually about 2 feet by 2 feet. Keep the pad flat and move it slowly so the product covers the area evenly.
5. Work the polish with slow passes
Raise the speed to your working range and make slow, controlled passes. Move left to right, then up and down in a crosshatch pattern.
Use light to moderate pressure. Let the pad and polish do the work. If you press too hard, the pad can stall or create extra haze.
A good rule I follow is this: if the machine sounds strained or the pad stops moving freely, ease up. A DA polisher works best when it keeps moving.
6. Wipe and inspect the area
After a few passes, stop and wipe the panel with a clean microfiber towel. Then inspect the finish under strong light.
Look for:
- Swirl marks still visible
- Haze or micromarring
- Improved gloss
- Product residue in seams
If the correction is not enough, repeat the section with the same pad and polish, or step up to a more aggressive combo if the paint allows it.
7. Refine and finish
After correction, switch to a finishing pad and finer polish if needed. This step improves clarity and removes any haze left behind by heavier polishing.
A lot of people skip this stage, but it can make a big difference in the final look. Think of it like sanding wood before the final coat. The surface may already look good, but refinement makes it look polished, not just improved.
8. Protect the paint
Once you finish polishing, apply wax, sealant, or ceramic coating if that fits your plan. Polishing improves the look, but protection helps preserve it.
Freshly polished paint is often more vulnerable to contamination and weather. Protecting it is the final step that makes the result last.
Choosing the Right Pad and Product
A big part of how to use a dual action polisher well is matching the pad and polish to the job. Not every paint surface needs heavy correction.
Here is a simple guide:
- Cutting pad plus compound for heavier swirl marks or light scratches
- Polishing pad plus medium polish for general correction
- Finishing pad plus fine polish for gloss and clarity
- Soft foam pad for wax or sealant application
Pad color systems vary by brand, so do not rely on color alone. Always read the product guidance from the manufacturer. Two brands can use the same color for different foam densities.
Paint hardness also matters. Some vehicles, especially certain German paints, may need stronger products. Softer paint may correct quickly but also haze more easily. This is one reason test spots matter so much.
How Fast to Move the Machine
One of the most common mistakes when learning how to use a dual action polisher is moving too fast. Slow passes are the secret to real correction.
Work at a pace of about 1 to 2 inches per second. Overlap each pass by about 50 percent. That gives the pad enough time to break down the polish and contact the paint evenly.
Also, keep the pad flat. Tilting it can reduce performance and increase the chance of leaving uneven marks. If you need to work near curves or edges, use extra care and lighten your pressure.
Common Mistakes to Avoid
Even a great dual action polisher can give poor results if the basics are off. These are the mistakes I see most often:
- Using too much product, which causes sling and poor cut
- Working too large of an area, which makes correction uneven
- Pressing too hard, which stalls the pad
- Moving too quickly, which limits polishing time
- Skipping pad cleaning, which loads the pad with spent residue
- Not inspecting under proper light, which hides defects
- Using the wrong pad for the job
I used to think more pressure meant better correction. It usually does not. In practice, smoother technique and better product choice matter more than muscle.
How to Clean the Pad While Working
Pads clog up as you polish. A dirty pad cuts less effectively and can mar the surface.
Clean the pad regularly by:
- Brushing it with a pad cleaning brush
- Wiping off residue with a microfiber towel
- Using compressed air if available
- Switching to a fresh pad when needed
If the pad feels sticky, looks loaded, or stops correcting well, clean it. This small habit keeps the machine working smoothly and helps your results stay consistent.
How to Use a Dual Action Polisher on Different Surfaces
Not all paint jobs are the same. Understanding surface differences is part of using a dual action polisher safely.
On soft paint
Use less aggressive pads and finer polish. Soft paint can correct fast, but it can also haze or show micro-marring more easily.
On hard paint
You may need a cutting pad and a stronger compound. Hard paint often resists correction, so test spots become especially important.
On black paint
Black paint shows everything. Work in smaller sections and inspect carefully under bright light.
On older or oxidized paint
Start gently. Heavy correction may not be needed if the goal is just to restore shine. If the paint is thin, be extra cautious.
Benefits of Using a Dual Action Polisher
A DA polisher has earned its place in detailing because it offers a good balance of safety and results.
Main benefits include:
- Easier learning curve than a rotary polisher
- Lower risk of burning paint
- Better control for beginners
- Ability to correct and finish in one process
- Versatility for polishing, refining, and applying protectants
For most car owners, this is the smartest tool to learn first. It is powerful enough to improve the finish, but gentle enough to build confidence.
Limitations You Should Know
It helps to be honest about what a dual action polisher can and cannot do. It is not magic.
Limitations include:
- Very deep scratches may not come out
- Severe paint damage may need wet sanding or bodywork
- Some hard paints require multiple passes
- Poor technique can still leave marks
- Thick residue or old wax can hide defects until you clean the panel
I like to think of a DA polisher as a precision tool, not a miracle tool. It can make huge improvements, but it cannot fix every problem safely.
Safety Tips for Better Results
A few simple safety habits can protect both you and the car.
Follow these tips:
- Keep the cord away from the pad
- Do not polish dry paint in direct sun
- Avoid sharp edges and high points
- Check the pad often for trapped dirt
- Wear eye protection if product can splatter
- Unplug the tool before changing pads
If the machine feels too hot or the pad is vibrating strangely, stop and check your setup. Small warnings are worth listening to.
Real-World Advice From Experience
When I first learned how to use a dual action polisher, I wanted fast results. That usually led to overworking one area or using too much compound. The finish improved, but not as cleanly as it could have.
The biggest lesson was patience. A good detail job is more like painting carefully than scrubbing hard. Short sections, clean pads, and steady passes will beat rushed work almost every time.
Another lesson was to test one area before polishing the whole car. That single step can save hours. It tells you how the paint reacts, how much cut you need, and whether your combo is too aggressive.

Frequently Asked Questions of How to use a dual action polisher
How long should I stay on one section with a dual action polisher?
Usually, a few slow passes are enough for one section. If the defect is not improving, inspect the pad, product, and pressure before doing too many more passes.
Can a dual action polisher remove scratches?
It can remove many light scratches and swirl marks, but not all deep scratches. If you can feel the scratch with your fingernail, it may be too deep for safe correction.
What speed should I use on a dual action polisher?
Most correction work happens in the middle speed range, depending on the machine and product. Start low to spread the polish, then increase to your working speed for correction.
Do I need different pads for polishing and waxing?
Yes, that is the better approach. A polishing pad is for correction, while a soft finishing pad is better for wax or sealant.
How do I know if I am pressing too hard?
If the pad stops moving freely, the machine sounds strained, or correction looks uneven, you are likely using too much pressure. Keep the pad flat and let the tool glide.
Conclusion
Learning how to use a dual action polisher is one of the best ways to improve your car’s finish with less risk and more control. Once you understand pad choice, slow passes, light pressure, and proper prep, the process becomes much easier and the results become much better.
Take your time, start with a test spot, and focus on clean technique over force. If you want the paint to look sharper and glossier, practice the method step by step and build confidence with each panel. If this guide helped, keep learning, try it on your own vehicle, and share your results or questions in the comments.