How To Use A Clay Bar: Easy Step-By-Step Guide
A clay bar removes bonded contaminants from paint, leaving the surface smooth and ready for wax or sealant.
If you have ever washed your car and still felt rough paint, you already know why a clay bar matters. I have used a clay bar on daily drivers, black paint, and even older cars that looked clean but felt gritty to the touch. In this guide, I’ll walk you through how to use a clay bar the right way, what it removes, what it cannot do, and the small mistakes that can turn an easy job into an annoying one.
What a clay bar does and why it matters
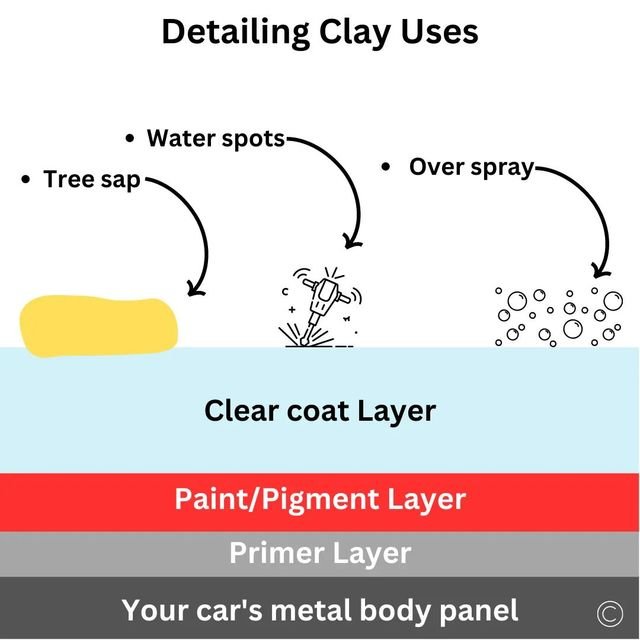
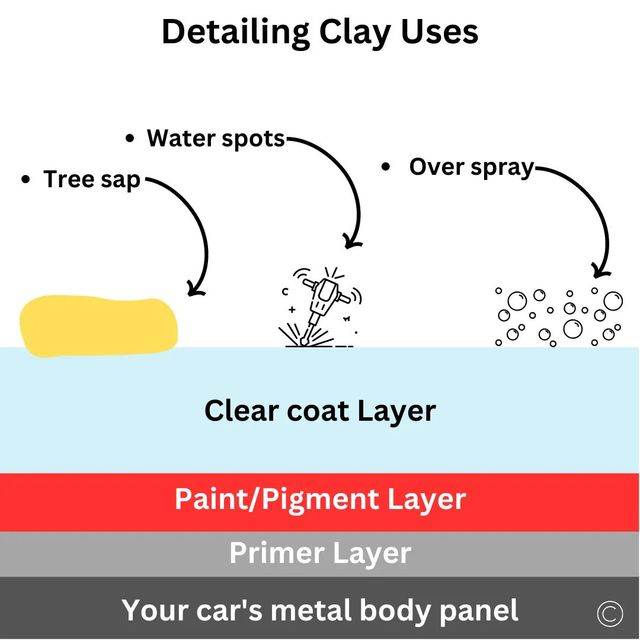
A clay bar is a detailing tool made to pull out bonded contamination from your paint. These are the tiny bits that regular washing leaves behind, such as rail dust, overspray, brake dust, tree sap mist, and industrial fallout. The goal is not to clean dirt like soap does, but to grab what is stuck above the clear coat.
When I first used a clay bar years ago, I remember thinking the paint looked clean already. Then I ran my hand across the hood after claying, and it felt like glass compared with the sandy feel before. That is the real value here: a clay bar helps restore a slick surface so wax, sealant, or ceramic spray can bond better and last longer.
When you should use a clay bar
You do not need to clay your car every wash. In most cases, use a clay bar when the paint feels rough after washing, or before applying protection to a car that has been sitting exposed for a while. It is also helpful after a long winter, a road trip, or parking near construction, trains, or heavy traffic.
Signs your car may need claying include:
- The paint feels rough or gritty when you slide your fingers across it
- Water does not sheet or bead as well as it used to
- The car still looks dull after a wash
- You see tiny dark specks that do not rinse off
- Wax or sealant does not seem to last
A clay bar is part of a proper paint prep routine. It is not a replacement for washing, polishing, or correcting scratches.
What you need before you start
Before you use a clay bar, gather a few simple supplies. The process works best when everything is nearby, because you want to keep the paint wet and avoid dragging the clay on a dry panel.
You will need:
- Car wash soap and water
- Two clean buckets if possible
- A microfiber wash mitt
- A clay bar or clay mitt
- Clay lubricant or a diluted detailing spray made for claying
- Several clean microfiber towels
- Optional: a paint sealant or wax for aftercare
A common mistake is using a clay bar with too little lubricant. I have seen people try to save time with plain water, and that usually causes sticking, extra effort, and sometimes marring. Good lubrication makes the job smoother and safer.
How to use a clay bar step by step
Using a clay bar is simple once you understand the rhythm. Think of it like gently lifting dirt off the paint, not scrubbing it away. Work one small section at a time and keep the panel wet.
1. Wash and dry the car first
Start with a full wash to remove loose dirt and grime. If the surface is dirty, the clay can pick up those particles and drag them across the paint.
Dry the vehicle with a clean microfiber towel. The surface should be clean, but it does not need to be perfectly slick yet, because the clay will handle the bonded contamination.
2. Break off a small piece of clay
If you are using a traditional clay bar, cut or pinch off a small piece about the size of a golf ball or a thick cookie. Flatten it into a patty that fits your hand.
This helps in two ways:
- It gives you better control
- If you drop it, you can throw it away instead of risking the whole bar
That second point matters a lot. Once clay hits the ground, it usually becomes a scratch risk. I always keep a fresh piece in my hand and treat the rest like backup.
3. Spray lubricant on a small section
Work on one small area at a time, about 2 feet by 2 feet. Spray enough lubricant so the panel looks wet and slippery.
You want the clay to glide. If it feels grabby, stop and add more lubricant. Dry claying is one of the fastest ways to mar the paint.
4. Glide the clay gently across the surface
Move the clay bar back and forth with light pressure. Use straight lines, not hard circles. You are not pressing contaminants out of the paint; the clay is lifting them as it passes over the surface.
At first, you may hear or feel a slight rough sound. That often means the clay is removing contamination. As the paint gets cleaner, the movement should feel smoother and quieter.
5. Wipe the area and inspect it
After a few passes, wipe the section with a clean microfiber towel. Then feel the paint again with your hand in a plastic bag or with clean fingertips.
If it still feels rough, repeat the process lightly. If it feels smooth, move to the next section.
6. Fold and knead the clay often
As the clay picks up dirt, fold it into itself and flatten it again. This exposes a fresh, clean surface.
If the clay becomes too dirty, discard it and use a new piece. Trying to save a filthy piece is not worth the risk.
7. Protect the paint afterward
After claying, the paint is usually clean but unprotected. That means it is a great time to apply wax, paint sealant, or a ceramic spray.
This step matters because claying strips away surface contaminants and often removes any old protection that was hanging on. Leaving the paint bare is like washing your dishes and not drying them.

Best practices for safe and effective claying
The best results come from patience, not force. A clay bar should feel smooth in your hand and light on the paint.
Keep these habits in mind:
- Always work on a cool surface
- Do not clay in direct sun if you can avoid it
- Use plenty of lubricant
- Use light pressure only
- Keep the clay clean by folding it often
- Replace clay that has collected too much debris
- Test on one small area first if the paint is delicate
I learned early on that the difference between a great clay job and a frustrating one is usually lubrication and patience. If you rush, the clay will let you know by grabbing the panel. If you slow down, it starts to feel almost effortless.
Common mistakes to avoid
A clay bar is safe when used properly, but a few mistakes can cause scratches or wasted effort.
Avoid these errors:
- Dropping the clay and using it anyway
- Claying a dirty car without washing first
- Using too much pressure
- Working on a hot panel
- Skipping lubricant
- Using a clay bar on severely damaged paint without checking first
- Forgetting to protect the paint afterward
Another mistake is expecting a clay bar to fix scratches or oxidation. It can make the paint feel smoother and improve shine, but it does not remove deep defects. For that, you need polishing.
Clay bar vs clay mitt: what is the difference?
A traditional clay bar is soft and moldable. It is great for detail work and gives you a lot of control. A clay mitt or clay towel is faster and easier for larger surfaces.
Here is the simple breakdown:
- Clay bar: Best for precision and tighter areas
- Clay mitt: Best for speed and frequent use
- Clay towel: Good for large panels and efficient claying
If you are new to detailing, a clay bar is often the best starting point. It teaches you how contamination feels and how much pressure is really needed. Once you understand the process, other clay tools feel easier to use.
What clay bar does not do
It helps to be clear about limits. A clay bar does not deep clean paint in the same way soap does. It also does not correct swirls, remove deep scratches, or restore badly faded clear coat by itself.
What it can do well:
- Remove bonded contaminants
- Improve smoothness
- Help prep paint for wax or sealant
- Make polishing more effective
What it cannot do:
- Repair scratches
- Fix oxidation alone
- Replace a wash
- Remove every stain or defect
That honesty matters because a clay bar is powerful, but it is only one part of a full paint care routine.
How often should you use a clay bar?
Most cars do not need claying every month. For many drivers, two to four times a year is enough. Some cars in harsh environments may need it more often, while garage-kept vehicles may need it less.
A good rule is to clay only when the surface feels rough or when you are preparing for protection. Overclaying is unnecessary and can add wear if you are too aggressive. The paint should be treated like skin, not sanded like wood.
Professional tips from real-world detailing
One lesson I have learned is that the smallest panels often need the most care. Bumpers, lower doors, and rear quarter panels tend to collect more contamination from road spray. I always save extra time for those spots because they usually feel rougher than the hood or roof.
I also like to inspect paint under good light after claying. A clean panel can still show marring if the clay was too dirty or the lubricant too weak. Catching that early lets you polish lightly before applying protection.
A few practical tips that help in real life:
- Use a fresh microfiber towel for each side of the car if needed
- Keep a spray bottle in your pocket so you never run dry
- Work top to bottom
- Rewash the car after heavy contamination if the clay gets loaded fast
- Follow with a quick paint sealant for a slick finish
Frequently Asked Questions of How to use a clay bar
What is the main purpose of a clay bar?
A clay bar removes bonded contaminants that regular washing cannot lift. It leaves the paint smoother and helps wax or sealant bond better.
Can a clay bar scratch paint?
Yes, it can if used incorrectly, especially with too little lubricant or by pressing too hard. Used properly on a clean surface, it is generally safe and effective.
Do I need to wash my car before claying?
Yes, always wash first. Claying a dirty car can drag loose grit across the paint and increase the risk of marring.
Should I clay before or after polishing?
Clay before polishing. Claying removes contamination so the polish can work more evenly and the paint surface is properly prepped.
How do I know when the clay bar is done?
You are done when the paint feels smooth to the touch and no longer feels gritty. If the clay starts getting dirty too fast, fold it to expose a clean side or replace it.
Conclusion
Using a clay bar is one of the easiest ways to make paint feel truly clean again. It removes bonded grime that washing leaves behind, improves the look and feel of the surface, and sets the stage for better protection. If you work slowly, keep the paint wet, and protect it afterward, the results can be a big upgrade.
The best part is that you do not need pro-level tools to get pro-level results. Start with a small section, use light pressure, and pay attention to how the paint feels. If you want, try it on one panel this weekend and see the difference for yourself.