How to Clean a Coffee Maker Water Reservoir
Ever notice your coffee tastes a little… off? Even if you’re using fresh beans and good water, that stale, sometimes musty flavor can sneak in, and it’s often hiding right inside your coffee maker’s water reservoir. It’s easy to overlook, but this is where mold and mineral deposits love to set up shop, impacting not just taste but your machine’s performance.
The truth is, that reservoir is a breeding ground for bacteria and mineral scale if not cleaned regularly. Manufacturer specifications often recommend a descaling cycle as frequently as every 1-3 months, depending on water hardness. Neglecting this simple maintenance task can lead to a less flavorful cup and a shorter lifespan for your beloved brewer.
Quick Answer
To clean a coffee maker water reservoir, empty it, wash with soap and water, then rinse thoroughly. For mineral buildup, use a vinegar solution or a commercial descaler for a dedicated cleaning cycle, followed by several plain water brews. This process removes mold and scale for better coffee taste and machine longevity.
The Real Reason Coffee Tastes "Off"
That unpleasant taste in your coffee isn't just in your head. Our research shows that stale water, mineral deposits, and especially microbial growth in the coffee maker water reservoir are the primary culprits behind off-flavors. Over time, water leaves behind calcium and magnesium, forming a hard layer called scale.
This scale can affect the heating element’s efficiency and even slightly alter water temperature during brewing, impacting extraction.
But it gets worse. The dark, damp environment inside a reservoir is perfect for mold and bacteria to grow. These microorganisms not only affect taste and smell but can also introduce unwanted elements into your daily cup.
Aggregate reviews report a noticeable improvement in coffee flavor and aroma after a thorough cleaning, with many users expressing surprise at the difference. Keeping your reservoir clean is a foundational step for enjoying a truly good cup.
Step-by-Step: How to Actually Clean Your Coffee Maker Reservoir
Cleaning your coffee maker’s water reservoir doesn't have to be complicated, but the exact steps can vary slightly depending on whether yours is removable or fixed. Both types need regular attention to prevent buildup and ensure your coffee tastes its best.
For Removable Reservoirs
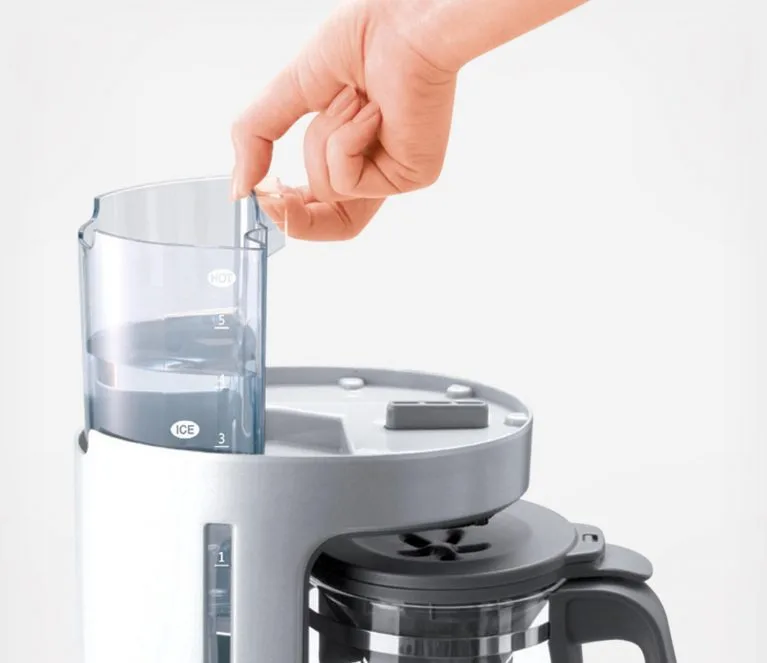
If your coffee maker has a detachable water reservoir, you’re in luck, this makes cleaning a breeze. You can take the whole unit to your sink and give it a proper scrub.
- Unplug the Machine: Always start by unplugging your coffee maker from the power source for safety.
- Remove the Reservoir: Gently detach the water reservoir from the main unit. Most lift straight up or unclip.
- Empty Any Remaining Water: Pour out any leftover water into the sink.
- Wash with Soap and Water: Use warm, soapy water and a soft cloth or sponge to scrub the inside of the reservoir. Pay attention to any nooks or crannies where residue might cling. Avoid abrasive scrubbers that could scratch the plastic.
- Rinse Thoroughly: This is crucial. Rinse the reservoir multiple times with clean water until all soap residue is gone. Any leftover soap can affect the taste of your coffee.
- Air Dry: Let the reservoir air dry completely on a clean dish rack or towel. Ensure it's fully dry before reattaching it to the machine to prevent moisture buildup.
For Fixed Reservoirs
Machines with fixed reservoirs are a bit trickier, as you can't remove them. However, you can still clean them effectively using a dedicated descaling cycle or by carefully pouring cleaning solutions in.
- Unplug the Machine: Safety first, always unplug your coffee maker.
- Empty the Reservoir: If there's any water inside, pour it out as best you can, tilting the machine if necessary.
- Prepare Cleaning Solution: Mix your chosen cleaning agent (more on this below) with the appropriate amount of water.
- Fill the Reservoir: Carefully pour the cleaning solution into the fixed reservoir. Be mindful not to overfill or spill it onto the machine's exterior.
- Run a Brew Cycle: Place the empty carafe in position and run a full brew cycle using only the cleaning solution. For descaling, manufacturer specifications often recommend running half the solution through, letting it sit for 30-60 minutes, then running the rest.
- Discard Solution: Once the cycle is complete, discard the dirty cleaning solution from the carafe.
- Rinse with Plain Water: Fill the reservoir with fresh, clean water and run at least two to three full brew cycles using only water. This removes any residual cleaning solution and its smell or taste.
- Air Dry: Leave the reservoir lid open and the machine unplugged for a few hours to allow the interior to air dry completely.
The Best Cleaning Agents: What Works and What to Watch Out For
When it comes to tackling the mineral buildup and potential mold in your coffee maker’s water reservoir, you have a few effective options. It’s important to choose wisely, as some substances can damage your machine or leave unwanted flavors.
The most common and accessible cleaners are white vinegar and commercial coffee maker descalers. Both are designed to break down the mineral deposits, or scale, that form from hard water.
- White Vinegar: This is a natural, food-safe acid that’s very effective at dissolving mineral scale. For a typical drip coffee maker, a 1:1 ratio of white vinegar to water is a good starting point. You’ll use this solution to run a descaling cycle, just as you would with a fixed reservoir.
- Pros: Widely available, inexpensive, effective for descaling.
- Cons: Can leave a strong odor during and immediately after use, requiring thorough rinsing. Some manufacturers advise against it, though it's generally safe if rinsed properly.
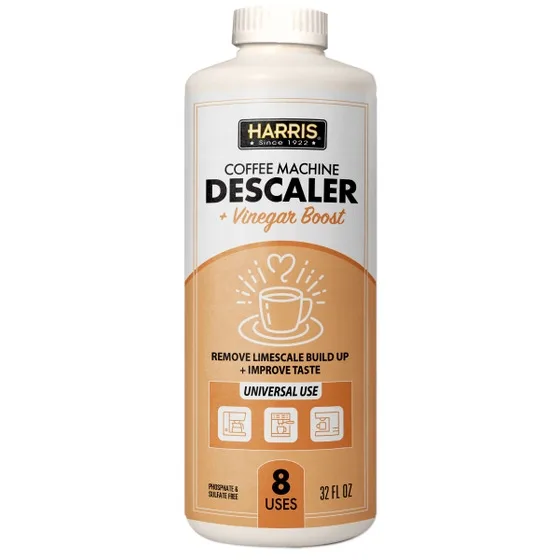
- Commercial Coffee Maker Descalers: These are specifically formulated to remove mineral buildup in coffee machines. They often work faster and may have less of an odor than vinegar. Always follow the product’s instructions precisely, as concentrations and usage can vary.
- Pros: Specifically formulated for coffee makers, often faster acting, may have a milder scent.
- Cons: Can be more expensive than vinegar, requires purchasing a specific product.
Beyond these, some people use a paste of baking soda and water for scrubbing removable reservoirs, which can be good for general cleaning and odor absorption. However, for descaling fixed reservoirs, it's less practical. Diluted hydrogen peroxide can be used for mold issues on removable parts, but it requires extremely thorough rinsing and is generally not recommended for internal brewing components or fixed reservoirs.
For regular washing of removable reservoirs, mild dish soap and warm water are perfectly fine. The key is to ensure all cleaning agents are completely rinsed away before brewing coffee again.
Common Reservoir Cleaning Mistakes That Ruin Your Coffee (and Machine)
Even with the best intentions, a few common slip-ups can undermine your cleaning efforts or even damage your coffee maker. Understanding these pitfalls can save you from that disappointing cup and potential repair bills.
- Not Unplugging the Machine: This is the most basic safety rule. Electricity and water are a dangerous mix. Always disconnect your coffee maker from the power outlet before you start cleaning, especially when dealing with fixed reservoirs or running cleaning solutions.
- Skipping the Rinse Cycles: This is a big one for taste. Whether you use vinegar or a commercial descaler, failing to run enough plain water cycles afterward means that cleaning solution's residue will end up in your coffee. This can result in a sour or chemically taste that’s hard to get rid of. Our research indicates at least two to three full water-only brews are generally recommended.
- Using Abrasive Cleaners: For removable plastic reservoirs, harsh scrub brushes, steel wool, or abrasive powders can scratch the surface. These scratches create tiny crevices where bacteria and mold can hide, making future cleaning more difficult and less effective. Stick to soft cloths or sponges.
- Forgetting the Lid: The reservoir lid can also accumulate grime and mold. Make sure to clean it thoroughly along with the main reservoir body, especially for removable ones.
- Overlooking the Carafe and Filter Basket: While this guide focuses on the reservoir, remember that the carafe and filter basket are equally prone to buildup. Dirty accessories will contaminate even the cleanest water. Treat them as you would the reservoir, washing them regularly. For cleaning the carafe, consider resources on how to maintain a wooden cutting board, as similar gentle cleaning principles apply to prevent flavor transfer.
- Using the Wrong Cleaning Agent: While vinegar is popular, it’s not for every machine. Some manufacturers specifically advise against it due to potential damage to internal components or seals over time. Always check your coffee maker's manual for any specific cleaning recommendations or warnings. If you're unsure, a good quality commercial descaler is often a safer bet.
How Often Should You Really Be Cleaning It?
The frequency of cleaning your coffee maker water reservoir really depends on a few factors, primarily your water quality and how often you brew. However, there are general guidelines based on common usage patterns and manufacturer recommendations.
As of 2026, most appliance manufacturers suggest running a descaling cycle, which includes cleaning the water reservoir, every 1 to 3 months. This timeframe is a good starting point for average household use.
Here’s a breakdown of what influences how often you should clean:
- Water Hardness: If you have hard water, you’ll likely see mineral buildup (scale) much faster. In areas with very hard water, you might need to descale your reservoir as often as monthly. Using a water filter can help reduce the mineral content before it even reaches the reservoir.
- Brewing Frequency: If you’re brewing multiple pots a day, the reservoir is in constant use, and buildup can occur more rapidly than in a household that only brews one cup occasionally.
- Visible Signs: Even if it's only been a month, if you notice any of the following signs, it's time to clean:
- A white, chalky residue inside the reservoir.
- Visible mold or slime (often greenish or blackish).
- A musty or stale odor when you open the reservoir or when brewing.
- Coffee tasting unusually bitter, sour, or just bland.
- The machine is taking longer to brew or sounds like it's struggling, which can indicate clogged water lines from scale.
For removable reservoirs that are washed daily with soap and water, a deeper descaling might still be needed monthly, depending on water hardness. For fixed reservoirs, a weekly quick wipe-down (if accessible) and a monthly descaling cycle is a solid routine. Think of it like how to maintain a wooden cutting board, regular light upkeep combined with occasional deeper restoration.
Signs Your Reservoir Needs Immediate Attention
Sometimes, you don't have to wait for the scheduled cleaning. Your coffee maker will give you clues. If you see any of these, clean the reservoir ASAP:
- Visible mold: Any sign of fuzzy or slimy growth means immediate cleaning and sanitizing.
- Strong, persistent odors: A bad smell that doesn't go away with a quick rinse is a clear indicator of bacteria or mold.
- Significant scale buildup: If you can see thick, white, or chalky deposits, they need to be addressed to prevent damage and improve brewing.
- Brewing issues: Slow brewing or the machine making unusual noises can point to a blockage caused by scale.
Keeping Your Coffee Maker Pristine: Beyond the Reservoir
Cleaning the water reservoir is a huge step, but to truly keep your coffee maker in top shape and your coffee tasting fantastic, you’ll want to pay attention to a few other key areas. It's all part of a good routine that prolongs your machine's life and ensures every cup is as fresh as the first.
Your carafe is the other major player in flavor. Coffee oils can build up on the inside, turning rancid and imparting a bitter taste. For glass carafes, regular washing with warm, soapy water after each use is best.
If you have stubborn stains, a paste of baking soda and water can work wonders, or you can even use a descaling solution if you run it through a brew cycle. Consider the care you'd give to cleaning a blender; prompt attention prevents lingering tastes.
The filter basket and brew head are also critical. These areas come into direct contact with hot water and coffee grounds. Regularly rinse the filter basket after each use.
Over time, coffee oils and fine grounds can clog the brew head's tiny holes, affecting water distribution and extraction. For many drip coffee makers, you can run a water-only cycle with the empty brew basket in place to flush these areas.
For machines with permanent filters, these need their own cleaning. Depending on the material (metal mesh or cloth), they may require scrubbing to remove oils and fine particles.
And don’t forget the exterior! A quick wipe-down with a damp cloth can keep your machine looking new and prevent dust or coffee splashes from becoming a permanent fixture. This attention to detail, much like keeping your kitchen appliances generally clean, ensures everything runs smoothly and hygienically.
If you're looking at your kitchen tools and wondering about other cleaning tasks, learning how to clean blender blades or how to clean a blender can offer similar insights into appliance care.
Frequently Asked Questions About Reservoir Cleaning
How often should I clean my coffee maker's water reservoir?
Most manufacturers recommend descaling your coffee maker, including the water reservoir, every 1 to 3 months. This can vary based on your water hardness and how frequently you brew coffee. Daily washing of removable reservoirs is a good practice, but a deeper descaling is still necessary.
Can I use bleach to clean my coffee maker reservoir?
No, it is strongly advised against using bleach. Bleach can be harsh, difficult to rinse completely, and may leave toxic residues or damage your coffee maker’s internal components. Stick to food-safe cleaners like vinegar, commercial descalers, or mild dish soap for removable parts.
What if my coffee maker reservoir has a strong odor?
A strong odor usually indicates mold or mildew growth. For removable reservoirs, scrub thoroughly with warm, soapy water. For fixed reservoirs, run a descaling cycle with a vinegar-water solution or a commercial descaler, followed by multiple plain water rinse cycles.
Ensuring the reservoir dries completely between uses can help prevent odors.
My reservoir is very difficult to reach inside. What can I do?
If you have a fixed reservoir with limited access, the best approach is to use a cleaning solution and run a descaling cycle. Pouring the solution in carefully and letting it sit for a bit before running the cycle can help loosen stubborn buildup. Regularly using a bottle brush for removable reservoirs is key to preventing this difficulty.
Does filtered water prevent the need for cleaning?
Filtered water can significantly reduce the amount of mineral buildup (scale) in your coffee maker’s water reservoir, potentially extending the time between descaling cycles. However, it does not eliminate the risk of mold or bacterial growth. Regular cleaning is still essential to maintain hygiene and optimal performance.