How to Use a Food Processor for Shredding
Tired of spending ages grating cheese or carrots by hand? Learning how to use a food processor for shredding can slash your prep time and give you consistently perfect results, every single time. It's a simple skill that unlocks a world of faster cooking.
Our research shows that many home cooks avoid their food processor for shredding due to a perceived complexity, but it’s far more straightforward than it seems. Manufacturer specifications for popular models often highlight shredding capabilities as a primary function, with typical disc speeds exceeding 1,500 RPM. This guide breaks down the process so you can start shredding with confidence.
Quick Answer
To use a food processor for shredding, assemble the machine with the correct shredding disc, prepare your food into feed tube-sized pieces, and feed it gently while the processor runs. Ensure all parts are locked securely before starting. Chill cheese slightly for best results.
Why Visuals Matter for Shredding with a Food Processor
When you're trying to figure out how to use a food processor for shredding, seeing is believing. Text can describe the process, but it's hard to capture the exact way food should move through the feed tube or how a properly assembled machine looks. Visual cues are crucial for understanding the right consistency of your ingredients and how the blades interact with them.
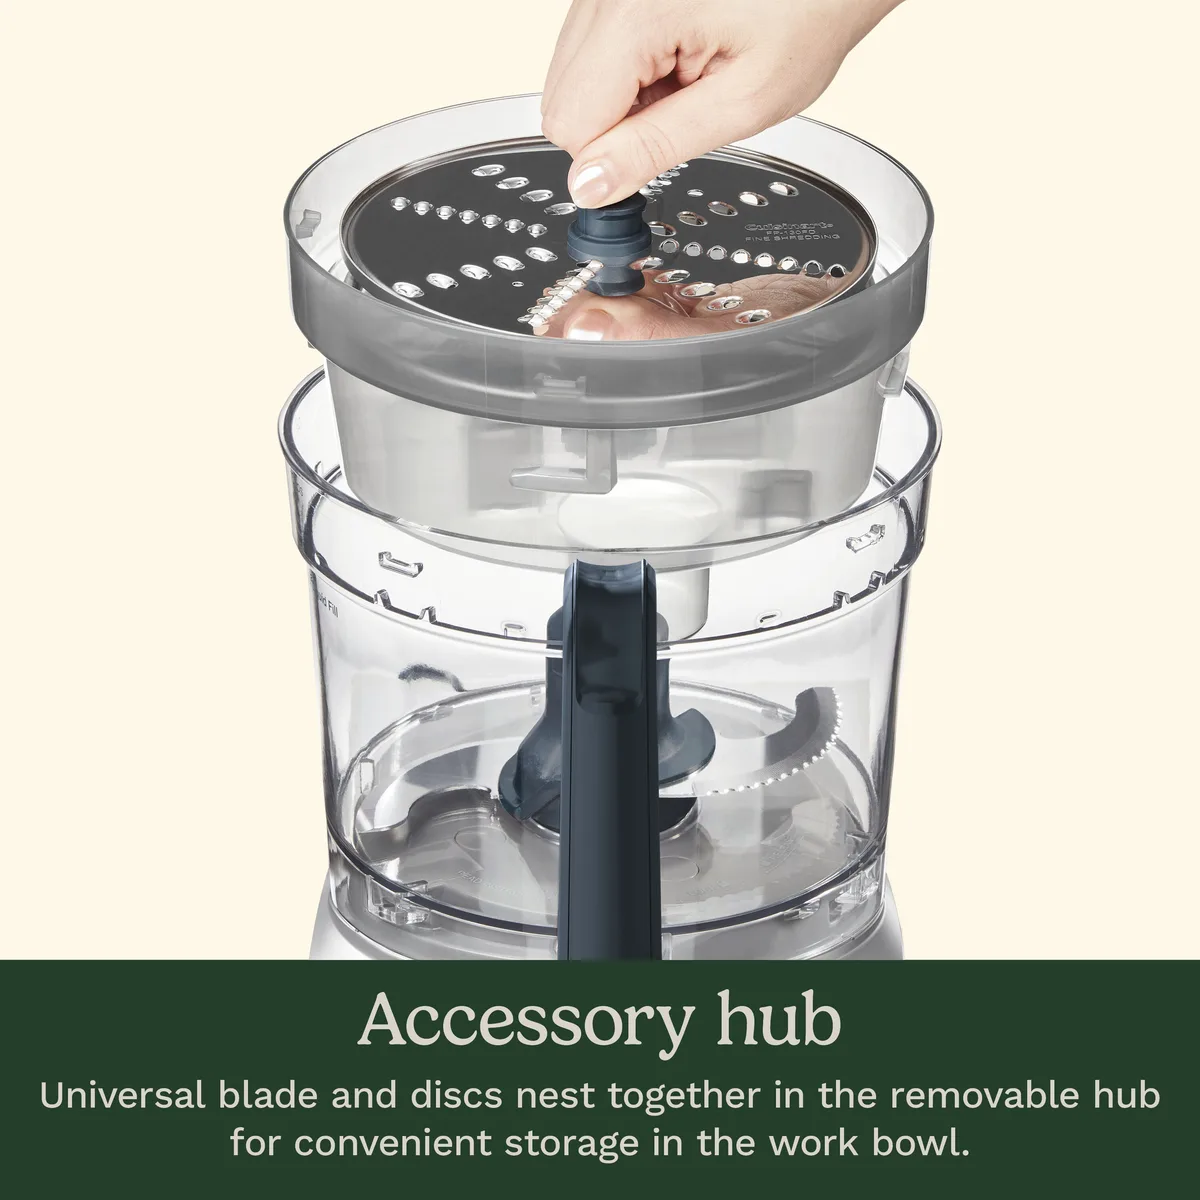
Image source: Bing (Web (fair-use with source credit))
For instance, understanding the angle at which to push softer vegetables can prevent them from getting mashed. Seeing how a chilled block of cheese slides versus a room-temperature one helps you predict the outcome. Relying solely on written instructions can lead to confusion about crucial details like disc placement or lid security, which are vital for both effective shredding and safe operation.
Getting Ready: Your Food Processor & The Shredding Disc
Before you even think about turning on your food processor, you need to make sure you have the right tools and that they're put together correctly. It’s like getting your ingredients prepped before you start cooking. This stage sets you up for success and, more importantly, for safety.
What's the Right Disc?
Most food processors come with a few different attachments, and for shredding, you'll be looking for a specific metal disc. These discs have holes and are designed to slice ingredients as they spin at high speeds.
- Shredding Discs: These are typically flat, circular metal plates with sharp, uniformly sized holes.
- Variations: Many processors include at least two shredding discs: one for a finer shred and one for a coarser shred. Check your machine's manual to identify which is which, as they are often labeled or have different hole sizes.
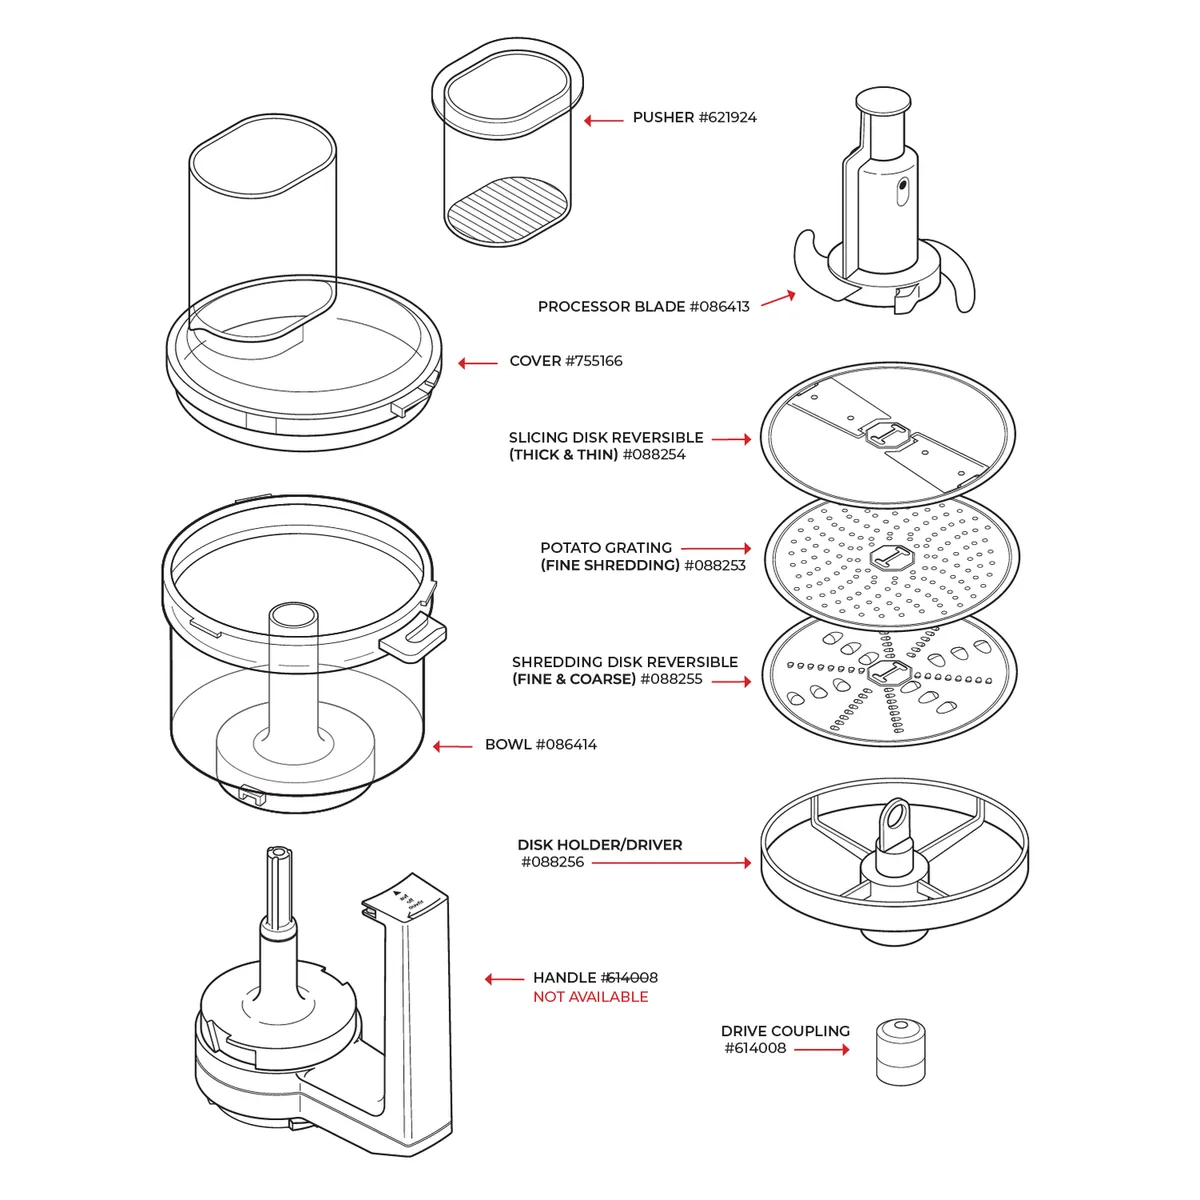
Image source: Bing (Web (fair-use with source credit))
Selecting the right disc depends on your recipe. For toppings where you want a delicate texture, like on a salad or as a cheese garnish, a finer shred is best. If you need substantial shreds for something like coleslaw or hash browns, a coarser disc will work more efficiently.
Assembling the Base and Bowl
Proper assembly is non-negotiable for safety. A food processor’s motor base and work bowl are designed to interlock securely. Manufacturer specifications often require the bowl and lid to be correctly locked for the unit to power on, preventing accidental activation.
- Work Bowl Placement: Ensure the work bowl is firmly seated on the motor base. It usually twists into place and locks with an audible click.
- Lid Security: The lid must also be securely attached, often requiring a specific alignment and a twist or latch mechanism. Most units will not operate unless both the bowl and lid are properly engaged. This prevents the motor from running with an open bowl, which could cause injury or a mess.
Step-by-Step Shredding: From Prep to Plate
Now that your machine is ready, let's get to the main event: shredding! This process is designed to be quick and efficient, but paying attention to a few key details makes all the difference in the quality of your output and your overall experience.
Preparing Your Food (Cheese & Veggies)
Proper preparation of your ingredients is crucial for smooth shredding and preventing jams or mushy results. You can’t just toss a whole block of cheese or an entire carrot into the feed tube.
- Cheese: For firm cheeses like cheddar or mozzarella, chilling them in the freezer for about 15 to 30 minutes beforehand is highly recommended. This firms up the cheese, making it easier to shred cleanly and preventing it from becoming a sticky paste. Cut the chilled cheese into chunks that will easily fit down the feed tube.
- Vegetables: Wash and trim your vegetables. For items like carrots, zucchini, or potatoes, cut them into lengths that fit comfortably within the feed tube without getting stuck. If you have a very large vegetable, you might need to cut it in half or quarters lengthwise.
Feeding and Shredding Safely
With your food prepped and the machine assembled, you're ready to shred. This is where the machine does the heavy lifting, but you guide the process.
- Turn On: Start the food processor on its standard speed setting.
- Feed Gently: Place your prepared food chunks into the feed tube, one or a few at a time.
- Use the Pusher: Employ the food processor's pusher tool to guide the food down towards the spinning shredding disc. Apply gentle, consistent pressure. Avoid forcing the food; let the motor and the disc do the work.
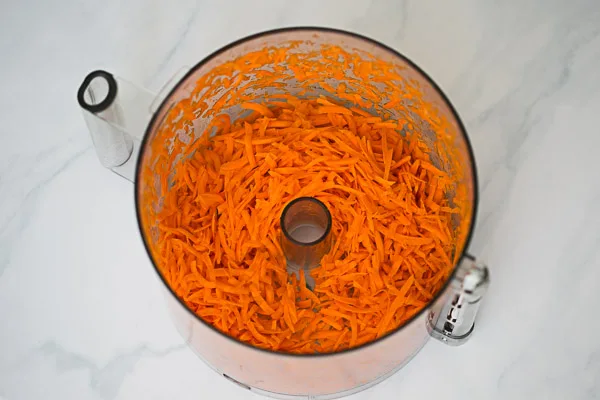
Image source: Bing (Web (fair-use with source credit))
The pusher is designed to fit snugly in the feed tube, ensuring your fingers stay safely away from the spinning blades. Aggregate user reviews consistently highlight the importance of this tool for safe operation. For items like very long vegetables, you might need to add more pieces as the previous ones are processed.
Unloading Your Perfect Shreds
Once all your food has been fed through the processor, it's time to see the results and clean up. This stage requires a bit of care due to the sharp blades.
- Turn Off: Switch off the food processor.
- Wait: Crucially, wait until the shredding disc has completely stopped spinning before attempting to remove the lid. This is a key safety measure.
- Remove Parts: Carefully lift off the lid. Then, gently remove the shredding disc. Be mindful of its sharp edges. Your freshly shredded ingredients will be waiting in the work bowl, ready for your recipe.
Common Mistakes to Avoid When Shredding
Even with a food processor, it's possible to run into issues if you're not careful. Understanding these common pitfalls can save you time, frustration, and potentially prevent a mess. Many of these stem from not following best practices for food prep or assembly.
Mushy Messes & How to Prevent Them
One of the most common complaints is ending up with mushy, paste-like shreds instead of distinct pieces. This typically happens with softer ingredients or when the food is too warm.
- Softer Cheeses: As mentioned, firm cheeses are best. Very soft cheeses, like fresh mozzarella or feta, can easily turn into a sticky mass rather than shredding cleanly. For these, manual grating might offer better control.
- Over-Chilling: While chilling cheese is good, freezing it for too long can make it brittle and difficult to shred properly. Aim for that firm-but-not-frozen state.
- Vegetable Consistency: Very watery vegetables, like cucumbers, might also produce a softer output. Consider their intended use in your recipe.
Food That Won't Fit: Troubleshooting
Sometimes, your food chunks just won't fit down the feed tube, or they get stuck. This usually comes down to preparation.
- Chunk Size: Ensure your food is cut into pieces that are narrower than the feed tube's diameter. If the tube is round, cut items into quarters or smaller logs. If it’s rectangular, ensure the pieces can slide in without forcing.
- Length: Long items need to be cut to a length that allows the pusher to guide them effectively without the top sticking out too far.
- Too Much at Once: Overcrowding the feed tube with too many pieces at once can cause a jam. Feed items gradually, using the pusher to maintain a steady flow.
Expert Tips for Consistently Great Shreds
Based on extensive user feedback and manufacturer guidelines, a few simple strategies can elevate your shredding game from "okay" to "perfect" every single time. These aren't complicated; they just involve a bit of mindful technique.
- Chill Your Ingredients: This is hands-down the most important tip for cheese. A 15-30 minute stint in the freezer firms up blocks, making them slice cleanly instead of smearing. For veggies like zucchini or carrots, a quick chill can also help them hold their shape better.
- Match the Disc to the Task: Don't default to just one shredding disc. Use the finer disc for garnishes or lighter toppings and the coarser one for heartier dishes like coleslaw or casseroles. Experiment to see what texture your favorite recipes benefit from most.
- Gentle Pressure with the Pusher: You are guiding, not forcing. Let the motor and the spinning disc do the work. Apply steady, light pressure with the pusher. Jamming food down can overload the motor or create uneven shreds.
- Clean As You Go: Food processors are much easier to clean immediately after use. A quick rinse of the bowl, lid, and disc before food dries on saves you scrubbing later. For deeper cleaning, most components are dishwasher-safe, but always check your model's manual first. Per common dishwasher specifications, ensure components are placed securely to avoid damage.
Safety First: Handling Sharp Blades
This might seem obvious, but the shredding discs on a food processor are incredibly sharp. They are designed to slice through food efficiently, and that means they can cause serious injury if handled improperly. Always prioritize safety when working with these components.
- Never Reach Into the Bowl: Always ensure the machine is unplugged and the disc has stopped spinning completely before removing the lid or any parts. This is a fundamental safety protocol for all kitchen appliances with blades.
- Handle Discs with Care: When removing the disc from the bowl or washing it, hold it by the center hub, not by the cutting edges. Use a brush to clean around the blades, and dry it thoroughly before storing. Sharp edges can easily catch you off guard, especially when wet.
- Secure Storage: Store your shredding discs in a safe place where they won't be accidentally knocked over or where children cannot access them. Some processors come with storage cases or slots in the base to help with this.
FAQs About Food Processor Shredding
Can I shred hard cheese like Parmesan?
Yes, hard cheeses can be shredded, but they benefit most from being very well chilled, almost frozen, to prevent them from becoming gummy. Cut them into chunks that fit the feed tube.
What happens if I put too much food in the feed tube at once?
Feeding too much food can cause the processor to jam, potentially overload the motor, or result in uneven shreds. It’s best to feed ingredients gradually using the pusher.
Do I need to use the pusher tool?
Absolutely. The pusher is a critical safety feature that keeps your fingers away from the spinning shredding disc. It also helps to guide food evenly for consistent results.
How do I clean the shredding disc?
The shredding disc should be washed carefully by hand with a brush to get around the sharp edges, or placed in the dishwasher on the top rack if your model's manual confirms it's safe. Always dry thoroughly afterward.
Can I shred frozen food?
Generally, no, unless your food processor's manual specifically states it's designed for frozen items. Shredding discs are typically meant for fresh or chilled ingredients. Attempting to shred hard frozen items can damage the blades or motor.