How to Clean Stand Mixer Attachments

Image source: Bing (Web (fair-use with source credit))
When you're deep into baking, the last thing you want is a stubborn stain or a piece of dried batter clinging to your stand mixer attachments. Keeping these essential tools clean is crucial for both hygiene and performance, ensuring your next batch of cookies or bread comes out just right. Learning how to clean stand mixer attachments properly means they'll last longer and work better.
It’s not just about making them look good; regular, correct cleaning prevents build-up that can affect mixing efficiency. Manufacturer specifications often detail recommended cleaning methods, which typically involve warm, soapy water and gentle scrubbing, with specific guidance for different materials like stainless steel or aluminum.
Know Your Mixer Attachments: What They're Made Of
Understanding the material of your stand mixer attachments is the first step to cleaning them effectively. Different metals and finishes require different care to avoid damage and ensure they stay in top condition for years.
Stainless Steel vs. Aluminum
Most mixers come with attachments made from either stainless steel or aluminum. Stainless steel is known for its durability and resistance to rust and corrosion, making it a popular choice for kitchenware. Aluminum, on the other hand, is lighter and can be more prone to oxidation, which might cause it to appear dull or gray over time.
Manufacturer specifications usually confirm the material, which dictates the best cleaning approach.
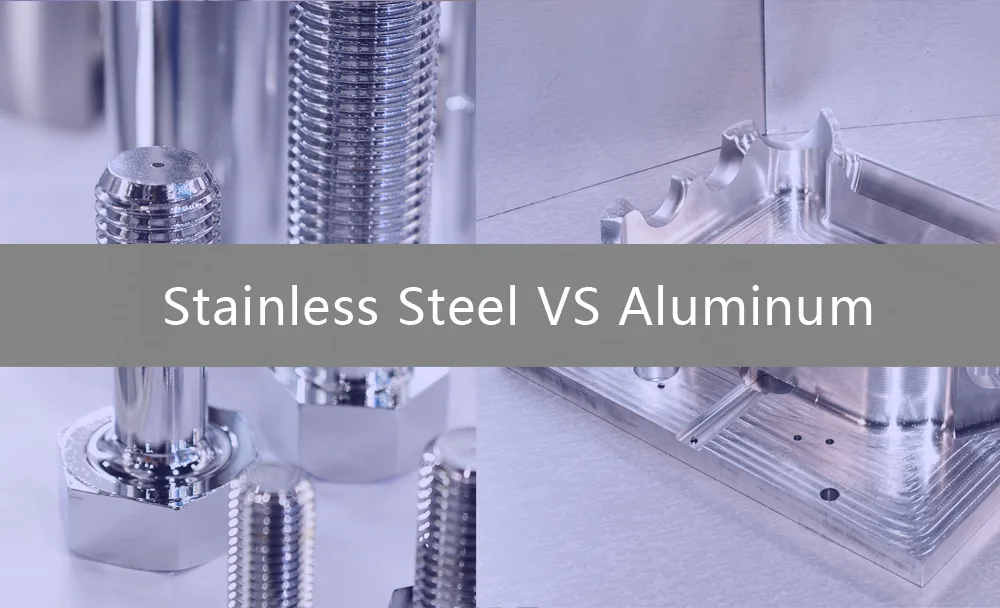
Image source: Bing (Web (fair-use with source credit))
- Stainless Steel: Generally dishwasher safe and resilient to most cleaning agents. It resists staining and scratching better than aluminum.
- Aluminum: Can be sensitive to harsh detergents and acidic substances, which may cause discoloration or dulling. Handwashing is often recommended for these parts to preserve their finish.
Coatings and Special Materials
Some attachments might feature special coatings or be made from unique materials. If your attachment has a non-stick coating or a specific finish, it’s vital to consult your mixer’s manual before applying any cleaning method. These coatings can be sensitive to abrasive materials or strong chemicals, which could strip the finish or cause pitting.
Always check the manufacturer's documentation for specific care instructions for these specialized parts.
Everyday Cleaning: Getting That Sparkle Back
For the daily grind, keeping your stand mixer attachments clean is simple. These methods are designed for light, everyday food residue.
Quick Wash Basics
The easiest way to maintain your attachments is through a quick hand wash after each use. As soon as you’re done mixing, scrape off any excess food like dough or batter. Then, fill your sink with warm water and a few drops of mild dish soap.
Use a soft sponge or a non-abrasive brush to gently scrub all surfaces of the attachment.
- Unplug the mixer first: Always ensure the stand mixer is unplugged before you remove or clean any attachments.
- Scrape and scrub: Remove thick residues before washing to make the process easier.
- Use mild soap: Harsh detergents can damage finishes over time.
Drying is Key
After washing, thorough drying is just as important as the cleaning itself. Water left on metal can lead to water spots, and in some cases, even rust, especially on certain types of steel or if minerals are present in your tap water.
- Towel dry immediately: Use a clean, soft dish towel to thoroughly dry all parts of the attachment.
- Check crevices: Pay attention to any nooks or crannies where water might linger.
- Air dry if needed: If you’re short on time, you can let them air dry completely on a rack, but always check for moisture before storing. This prevents mineral deposits from forming.
Tackling Tougher Messes on Stainless Steel
Stainless steel attachments are tough, but even they can sometimes present a challenge with stubborn food remnants or slight discoloration. These methods are geared towards restoring their shine without causing harm.
Grease and Sticky Residue Solutions
Grease or sticky dough can sometimes leave a film that’s hard to scrub off with just soap and water. Baking soda is an excellent natural option for these situations. Make a paste by mixing baking soda with a small amount of water, then gently rub it onto the affected areas.
Let it sit for a few minutes to help break down the residue, then scrub with a soft sponge and rinse thoroughly.
- Baking soda paste: Mix 2 parts baking soda to 1 part water.
- Gentle action: Apply with a soft cloth or sponge.
- Rinse completely: Ensure all baking soda residue is gone.
Dealing with Discoloration
Occasionally, stainless steel might develop a slight discoloration, often from prolonged contact with acidic foods like tomatoes or citrus. In such cases, a baking soda paste can also help lift these marks. For more persistent discoloration, a commercial stainless steel cleaner might be considered, but always test it on an inconspicuous spot first.
Aggregate reviews indicate that such cleaners are effective when used sparingly as directed by the manufacturer.
Caring for Aluminum Attachments
Aluminum attachments require a bit more delicate handling than their stainless steel counterparts to maintain their appearance and integrity.
Gentle Cleaning for Dullness
Aluminum can oxidize over time, leading to a dull, grayish appearance. If your aluminum attachments look a bit lackluster, a mild acidic solution can often help restore their shine. Mix equal parts white vinegar and water.
Submerge the aluminum parts in this solution for about 10 to 15 minutes. Afterward, gently scrub with a soft sponge and rinse extremely well to remove all traces of the vinegar. This process helps to lift the oxidized layer.
- Vinegar soak: Use a 1:1 ratio of white vinegar and water.
- Short soak time: Don't leave it submerged for too long, typically 10-15 minutes.
- Thorough rinse: Essential to remove any acidic residue.
Dishwasher Caution for Aluminum
While some manufacturers may list aluminum attachments as dishwasher safe, it’s often a trade-off. The high heat and strong detergents in dishwashers can accelerate oxidation and dull the aluminum’s finish more quickly than handwashing. If you choose to use the dishwasher, place aluminum parts on the top rack and ensure they are dried immediately afterward to minimize exposure to residual moisture and detergent.
Editorial analysis of user feedback suggests that handwashing preserves the original finish for much longer.
The Whisk: Getting Into Every Wire
The wire whisk, with its intricate design, is notorious for trapping food particles. Cleaning it effectively requires attention to detail.
Reaching Hidden Food Bits
After use, rinse the whisk under running water to dislodge loose food. If batter or other residue has dried on, a short soak in warm, soapy water can help loosen it. Use a soft dish brush to scrub around each individual wire, ensuring no bits are hiding.
Sometimes, small, stubborn bits can get wedged between the wires. A toothpick or the dull side of a butter knife can be carefully used to gently dislodge these, but be cautious not to bend the delicate wires.
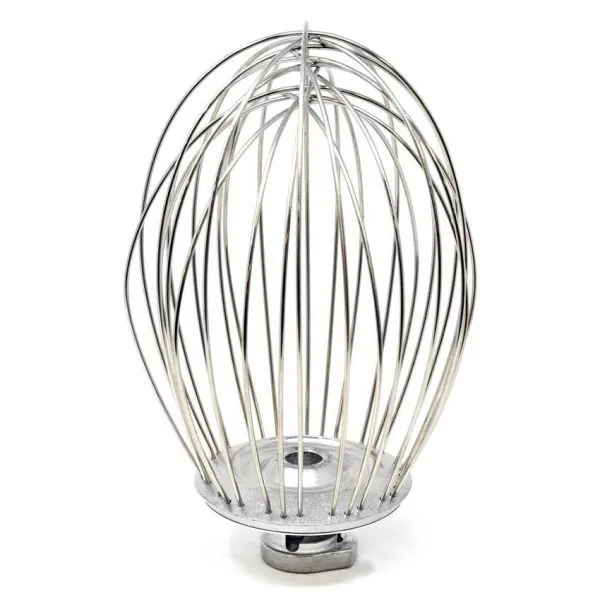
Image source: Bing (Web (fair-use with source credit))
- Soak first: Loosens dried-on food.
- Brush every wire: Don't miss any spots.
- Careful probing: Use a toothpick for stubborn bits.
Common Cleaning Mistakes to Avoid
Making a mistake while cleaning your stand mixer attachments can lead to damage that's hard to fix. It's easy to overlook small details, but avoiding a few common pitfalls will ensure your equipment stays in great shape.
What NOT to Do With Your Attachments
One of the most significant errors is using abrasive scrubbers, like steel wool or harsh scouring pads, on most attachments. These can scratch the finish, especially on aluminum or coated beaters. Manufacturer specifications for many models, such as those from KitchenAid, explicitly advise against such materials to preserve the appliance's longevity.
Harsh chemicals, including bleach, should also be avoided as they can damage the metal and leave residues.
- Avoid abrasive scrubbers: Steel wool and rough pads can scratch.
- Skip harsh chemicals: Bleach and strong solvents can damage finishes.
- Don't soak unsealed parts: Some components might have internal seals that could be compromised by prolonged soaking.
Protecting Your Mixer's Motor
When cleaning, it's critical to remember that the main stand mixer unit itself is an electrical appliance. Never submerge the mixer body in water or allow water to enter the motor housing. If you’re washing attachments that are still attached to the mixer (which is generally not recommended), be extremely careful to keep the mixer head and base dry.
Any liquid getting into the motor could cause short circuits or irreparable damage, making repairs costly.
When to Consult Your Manual
Your stand mixer's manual is the definitive guide for care and maintenance. While general advice is helpful, specific models and their attachments can have unique cleaning requirements.
Model-Specific Care Instructions
Different brands and models of stand mixers often have attachments made from slightly varying materials or with unique finishes. For instance, some older models might have aluminum parts that are more sensitive than modern stainless steel components. Your manual will provide precise instructions, including whether specific attachments are truly dishwasher safe or if handwashing is the only recommended method.
This is particularly true for attachments with non-stick coatings or special textures.
- Check your manual first: It has the most accurate advice for your specific model.
- Material matters: Aluminum requires gentler care than stainless steel.
- Dishwasher guidance: Confirm if your attachments can go in the dishwasher.
Understanding Manufacturer Specifications
Manufacturer specifications, often found in the user manual or on the brand’s official website, are based on rigorous testing. They detail acceptable cleaning agents, temperatures, and methods. For example, some manufacturers might specify a maximum water temperature for handwashing or recommend specific types of brushes.
Following these guidelines, like those often found on official product support pages, helps prevent voiding warranties and ensures the longevity of your attachments. As of 2026, these online resources remain the best source for such details.
Frequently Asked Questions About Attachment Cleaning
How often should I clean my stand mixer attachments?
You should clean them after every use. This prevents food particles from drying on, which makes them much harder to remove later and can affect hygiene and performance.
Can I use a metal spatula to scrape dough off my attachments?
It's generally best to avoid metal spatulas, especially on aluminum attachments, as they can scratch the surface. A silicone or rubber spatula is a safer choice for scraping off most residues.
My stainless steel whisk has rust spots. What can I do?
Rust spots on stainless steel can sometimes occur if the item is left wet or comes into contact with other rusting metal. Try making a paste of baking soda and water, apply it to the rust spots, let it sit for a few minutes, then gently scrub with a soft sponge. Rinse thoroughly and dry immediately.
If the rust persists, consult your manufacturer's documentation for specific stainless steel rust removal advice.
Are there any specialized cleaning products recommended?
While mild dish soap and baking soda are usually sufficient, some manufacturers offer specialized cleaning kits or recommend specific approved cleaners for very stubborn issues. Always refer to your manual before using any product not explicitly mentioned.
Can I store my attachments while they are still slightly damp?
No, it's crucial to ensure all attachments are completely dry before storing them. Even slight dampness can lead to water spots or potential corrosion over time, especially if stored in a humid environment.