How to Assemble a Food Processor
Getting a new food processor is exciting, but before you can start chopping, slicing, and pureeing, you need to put it together. It might seem a bit daunting with all the parts, but most models are designed for straightforward assembly. Understanding how the pieces fit is key to safe and effective operation.
In our research, manufacturer specifications consistently highlight the importance of correct assembly for both performance and safety. For instance, most modern food processors incorporate interlocking safety mechanisms that prevent operation unless the bowl and lid are correctly secured, a feature often tested to standards like IEC 60335-2-14. This guide will walk you through the process step by step, so you can get cooking with confidence.
Assembling Your Food Processor: A Visual Guide
This section provides an essential overview of how to put your food processor together. Remember, visual aids are often the most helpful here, so imagine diagrams showing each piece clicking into place.
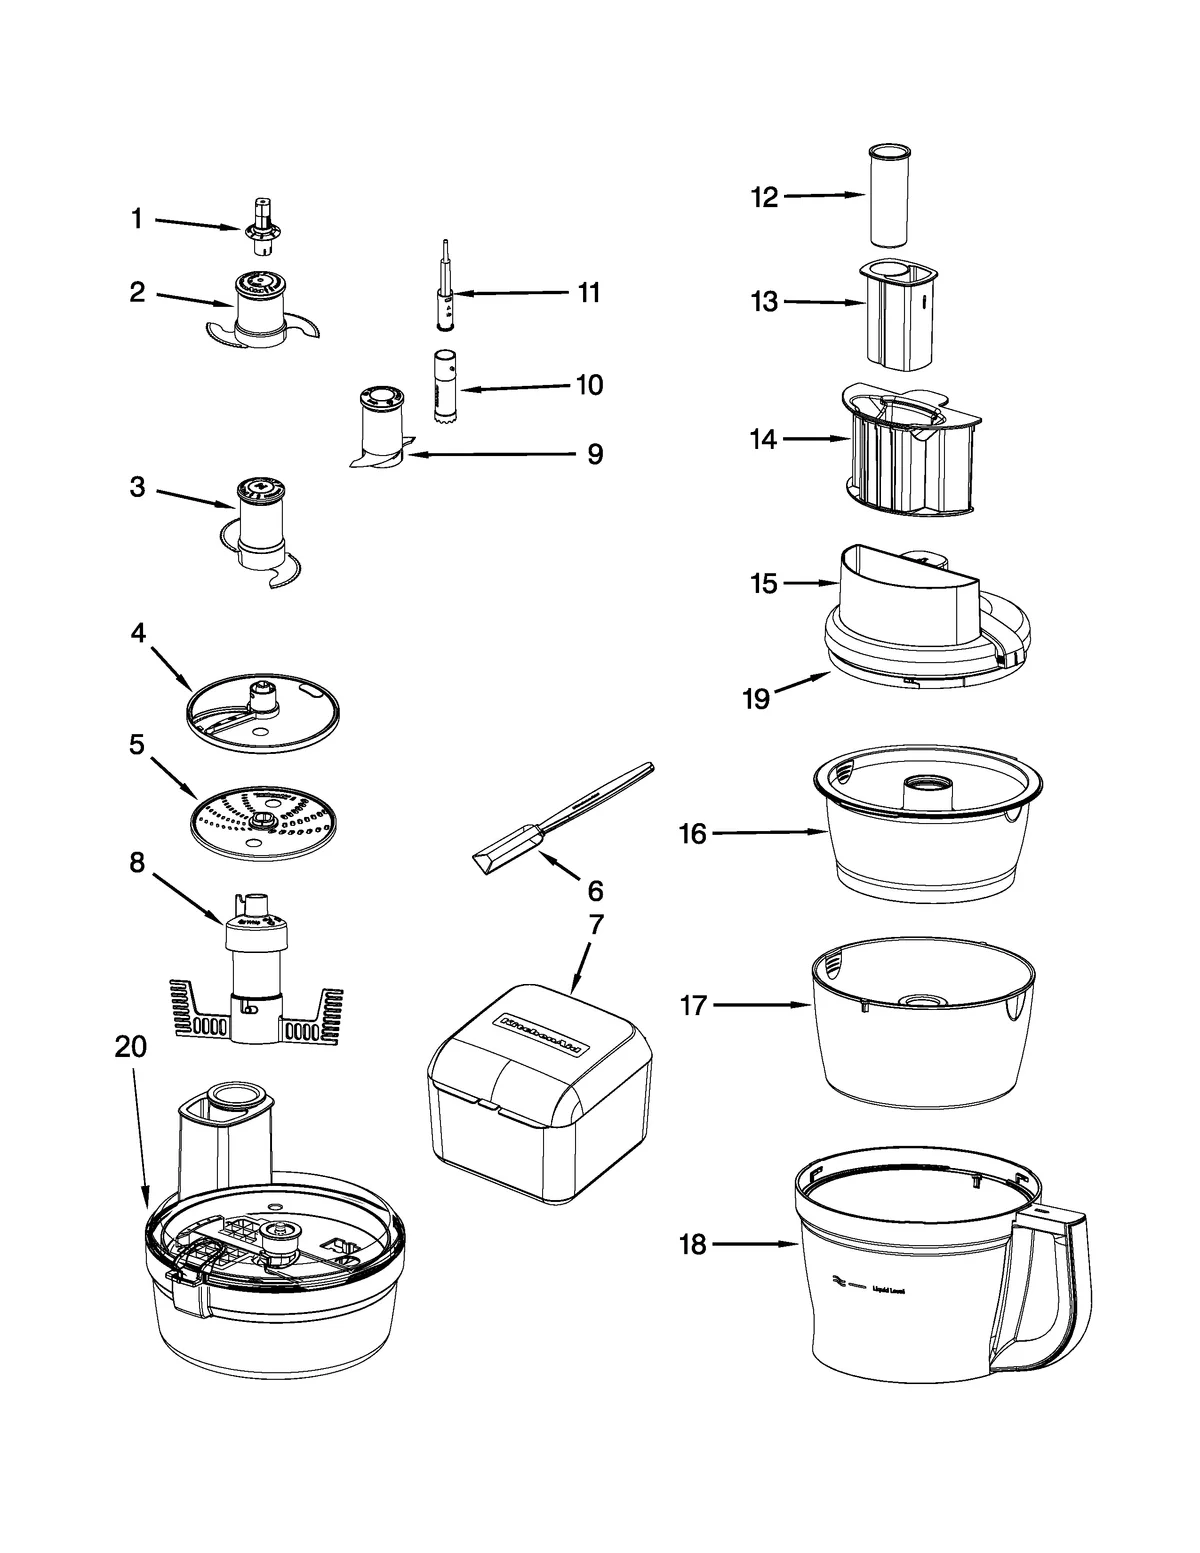
Image source: Bing (Web (fair-use with source credit))
Key Food Processor Parts You Need to Know
Before you can assemble anything, it's helpful to know what each part does. This makes the assembly process much more intuitive.
The Motor Base: The Brains and Brawn
This is the main unit that plugs into your wall outlet. It houses the motor that powers the blades and usually features the control buttons or dial for operation. Its weight and non-slip feet are designed to keep it stable on your countertop during use.
The Work Bowl: Where the Magic Happens
The work bowl is the transparent container that attaches to the motor base. It’s where you place your ingredients to be processed. Most are made from durable, BPA-free plastic and are designed with specific notches or a locking mechanism to ensure it attaches securely to the base.
The Lid: Sealing the Deal (Safely)
The lid covers the work bowl and typically includes a feed chute. This chute is a channel through which you can add ingredients while the food processor is running. The lid itself is also a critical safety component, often featuring a lock that prevents the machine from operating if it's not properly sealed.
The Blade Assembly: Your Cutting Powerhouse
This is the sharp component responsible for chopping, slicing, or pureeing. There are usually different blade assemblies or discs for various tasks. They typically attach to a central spindle that protrudes from the base of the work bowl.
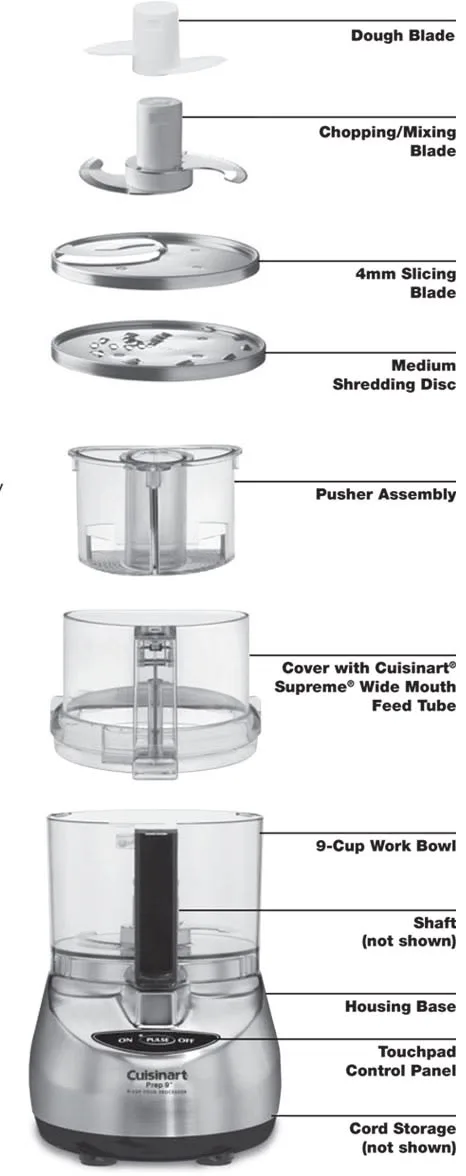
Image source: Bing (Web (fair-use with source credit))
The Pusher: For Safe Ingredient Feeding
The pusher is designed to fit into the feed chute and allows you to safely guide ingredients down towards the spinning blade. It's crucial for keeping your fingers away from the sharp blades while the food processor is in operation.
Step-by-Step Food Processor Assembly
Putting your food processor together is usually a simple, multi-step process. Following these steps ensures everything is locked in securely for safe use.
1. Seat the Work Bowl
Place the work bowl onto the motor base. You'll notice that the bowl isn't perfectly round; it has specific tabs or a groove on its bottom edge. These need to align with corresponding slots or a raised area on the motor base.
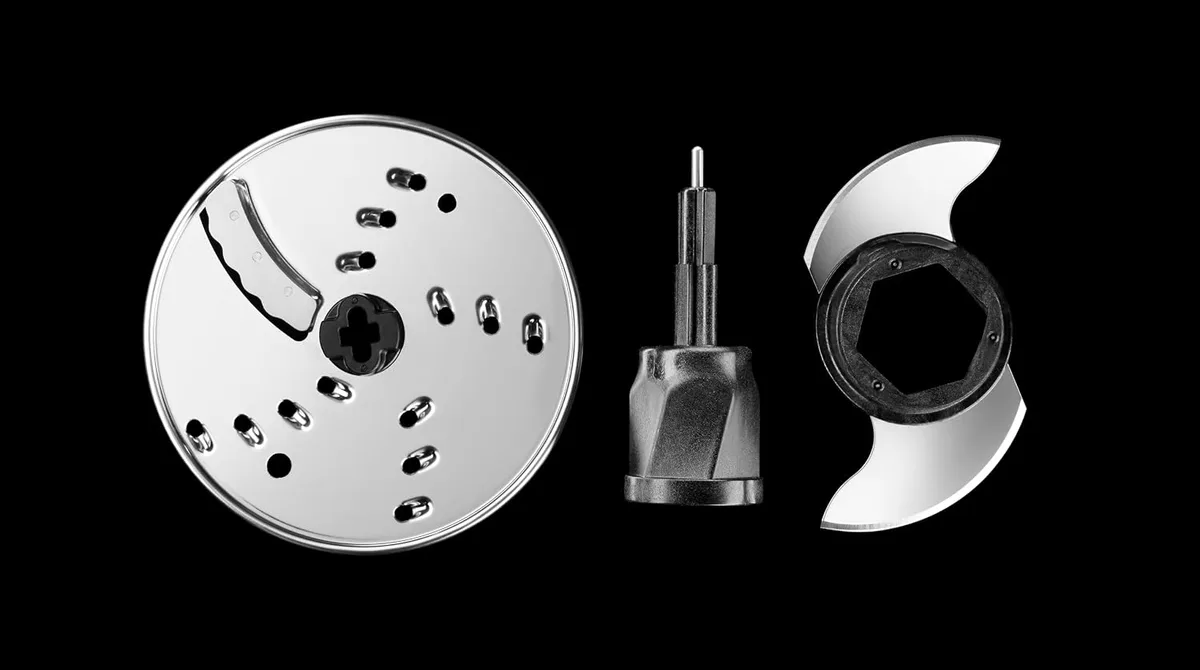
Image source: Bing (Web (fair-use with source credit))
Once aligned, gently press down and twist the bowl, typically counter-clockwise, until you feel it lock into place. A secure fit is vital. You might hear a click, or a small indicator light on the base might illuminate, confirming it’s properly seated.
This setup is standard across many models to engage the motor's safety interlocks.
2. Install the Blade Assembly (Carefully!)
Handle the blade assembly by its central hub or plastic parts, being extremely cautious of the sharp edges. The blade usually has a central opening or fitting that aligns with a spindle or post sticking up from the bottom of the work bowl.
Carefully lower the blade onto this central spindle. It should slide on smoothly and sit firmly. If it doesn’t go on easily, don't force it.
Double-check that you're using the correct blade for your model and that it's oriented properly. A wobbly blade indicates it's not seated correctly.
3. Secure the Lid
Now, place the lid onto the work bowl. Similar to the bowl, the lid has a specific orientation. Look for notches on the lid that line up with tabs or corresponding cutouts on the rim of the bowl.
Press the lid down firmly, then twist it, usually clockwise, until it locks. You should feel and possibly hear a distinct click. This locking action is essential for activating the food processor's safety features.
Without the lid fully secured, the motor will not engage, preventing accidental operation.
4. Insert the Pusher
Once the lid is locked in place, slide the pusher into the feed chute opening in the lid. It should move up and down freely within the chute. The pusher is your tool for guiding food into the processing area and should fit snugly but not tightly.
Visual Cues for Correct Assembly
Understanding the visual and tactile feedback from your food processor is just as important as following the steps. It’s your confirmation that everything is connected correctly and safely.
What to Look (and Feel) For
When assembling, pay close attention to how the parts connect. A proper fit means parts shouldn't wobble or feel loose. For the work bowl, you should feel a definitive "lock" when it's correctly seated on the motor base, often accompanied by a subtle click or an indicator light.
The blade assembly should sit snugly on its spindle without any play. The lid's locking mechanism provides the most crucial feedback; a solid click and a taut seal confirm it's ready for operation. Aggregate user reviews often mention that a lack of these tactile cues is the first sign of an improper setup.
Common Assembly Mistakes and How to Spot Them
Mistakes often happen when users rush the process or don't pay attention to the specific shapes of the components. A common error is not fully seating the work bowl; this can lead to the machine not turning on. Forgetting to lock the lid is another frequent issue, which also prevents operation due to safety interlocks.
Sometimes, users try to force a blade assembly that's misaligned, which can damage the spindle or the blade itself. If a part feels difficult to attach, it's a sign to stop and re-examine the alignment rather than applying excessive force. These assembly errors are primary reasons for troubleshooting inquiries reported to manufacturers.
Essential Safety When Assembling
Safety should be your top priority when handling any kitchen appliance, especially one with sharp blades like a food processor. Always remember that these machines are designed with safety features, but they rely on you to use them correctly.
When assembling, always handle the blade assembly with extreme care. Manufacturer guidelines often recommend holding it by the central plastic hub, keeping fingers well away from the cutting edges. Never place your fingers inside the work bowl after the blade is installed, even if the machine is unplugged.
Ensure the food processor is unplugged from the power outlet before you begin assembly or disassembly. This basic precaution prevents accidental startups.
Taking It Apart: The Reverse Process
Disassembling your food processor is simply the reverse of putting it together, and it’s just as important to do it correctly for safety and ease of cleaning. Start by ensuring the unit is unplugged. Remove the pusher from the feed chute.
Then, unlock and remove the lid. Be mindful of any residual food particles that might cling to the lid or blades.
Next, carefully lift the blade assembly off the spindle. Again, handle it by the central hub to avoid cuts. Finally, twist the work bowl to unlock it from the motor base and lift it away.
This methodical disassembly ensures all parts are handled safely and are ready for cleaning. Following these steps will help maintain your appliance and keep it in good working order for years to come.
Frequently Asked Questions About Food Processor Assembly
How long does setup usually take?
Most food processors can be assembled in under a minute once you're familiar with the parts. The initial setup might take a bit longer as you get acquainted with your specific model's locking mechanisms.
What if a part doesn't seem to fit?
If a component feels resistant or doesn't align easily, stop and re-check the orientation. Forcing parts can cause damage. Consult your manufacturer's manual for visual guides specific to your model.
Can I use a food processor with a slightly wobbly bowl?
No, a wobbly bowl indicates it's not properly seated or locked. Continue to the next step only when the bowl feels secure on the motor base. This ensures the safety interlocks function correctly.