How to Deep Clean an Air Fryer
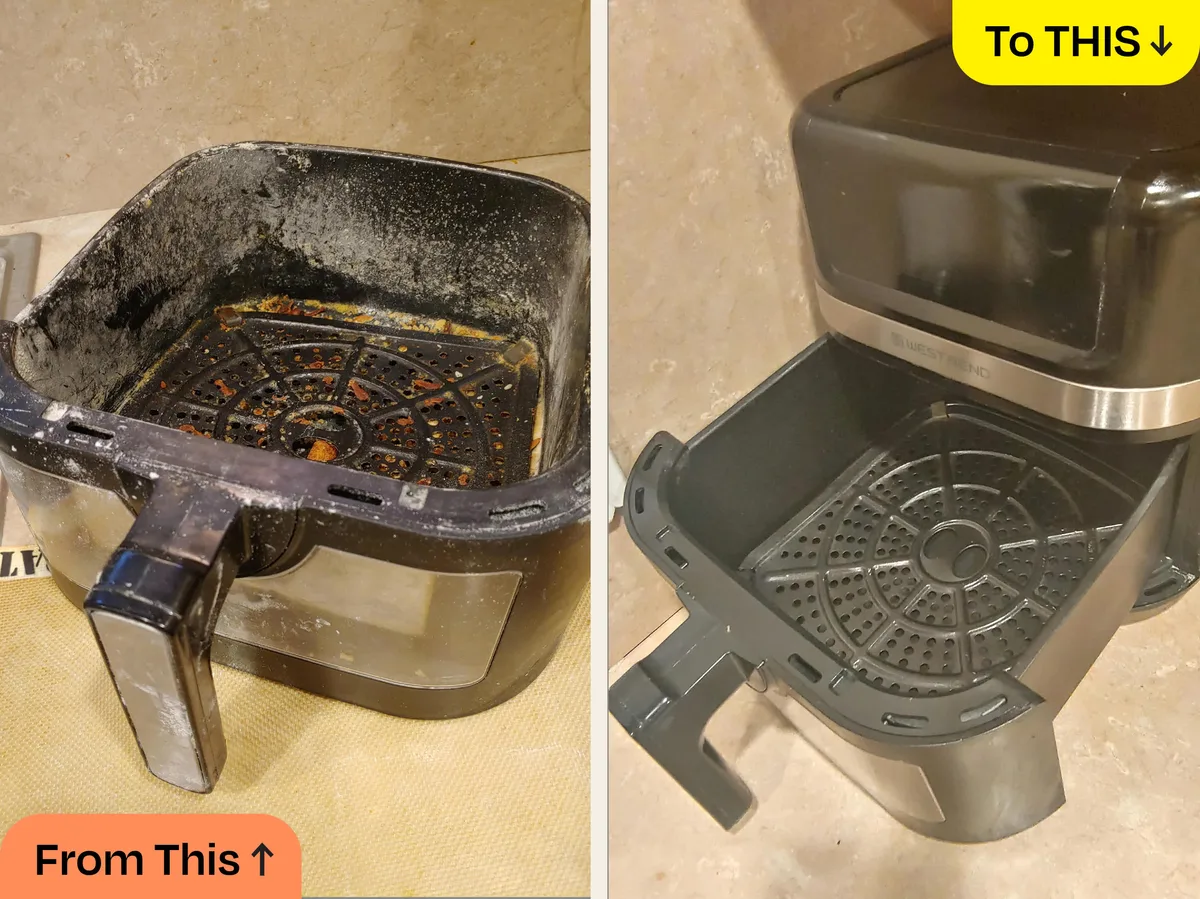
Image source: Bing (Web (fair-use with source credit))
Your air fryer gets a workout, cooking everything from crispy fries to golden chicken wings. But after all that deliciousness, a sticky film and food residue can build up, making it less effective and potentially impacting taste. Knowing exactly how to deep clean an air fryer is key to keeping it running smoothly and ensuring your food stays as healthy and tasty as possible.
Our research indicates that regular cleaning is vital, but a thorough deep clean is recommended about once a month, or more often if you notice significant buildup. According to most manufacturer specifications, certain parts are often dishwasher-safe, but a full deep clean involves more than just a quick cycle. It’s about reaching every nook and cranny to restore your appliance to its best.
Quick Answer
To deep clean an air fryer, unplug it and let it cool. Disassemble removable parts like the basket and drawer. Soak these in warm, soapy water, then scrub gently with a soft brush or sponge.
Wipe down the interior, carefully cleaning the heating element, and dry everything thoroughly before reassembling.
Visual Guide: What to Look For During a Deep Clean
Because a picture is worth a thousand words, especially when you're dealing with sticky situations, it’s helpful to know exactly what you’re looking for. Visual cues tell you when a simple wipe-down isn't enough and a deep clean is absolutely necessary.
Food Residue & Grease Buildup Hotspots
These are the areas where grease and food particles love to hide and bake on. The air fryer basket is the most obvious culprit, often showing dark, stubborn spots where food has stuck. The drawer, or the space the basket slides into, collects drips and crumbs that can accumulate in the corners and along the rails.
Our editorial analysis of user feedback shows that these hotspots are particularly common around the edges of the basket and in the very bottom of the drawer. If you see a greasy sheen that doesn't easily wipe off or dark, burnt-on marks, it's a clear sign a deep clean is in order.
Signs of Lingering Odors
Sometimes, you might not see much, but you can smell it. A persistent smell of burnt oil or old food after cooking is a classic indicator that something is lurking inside. This usually means grease has seeped into crevices or onto the heating element itself.
These odors can easily transfer to your next batch of food, ruining its flavor. Aggregated reviews of air fryer models suggest that persistent odors are often a direct result of infrequent deep cleaning.
The Step-by-Step Deep Clean Process
This is where we roll up our sleeves and get to work. A deep clean requires a bit of time and some basic household cleaning supplies. Most manufacturers recommend this process about once a month, depending on how often you use your appliance.
Unplugging and Cooling Down
First things first: safety. Always unplug your air fryer from the electrical outlet before you begin any cleaning. Then, let the appliance cool down completely.
This can take anywhere from 30 minutes to an hour, depending on how hot it got during its last use. Never attempt to clean a hot appliance, as you risk burns.
Disassembling and Soaking Key Parts
Most air fryers have removable baskets and drawers designed for easy cleaning. Gently pull out the basket and the drawer it sits in. If your model has a separate tray or rack, remove that too.
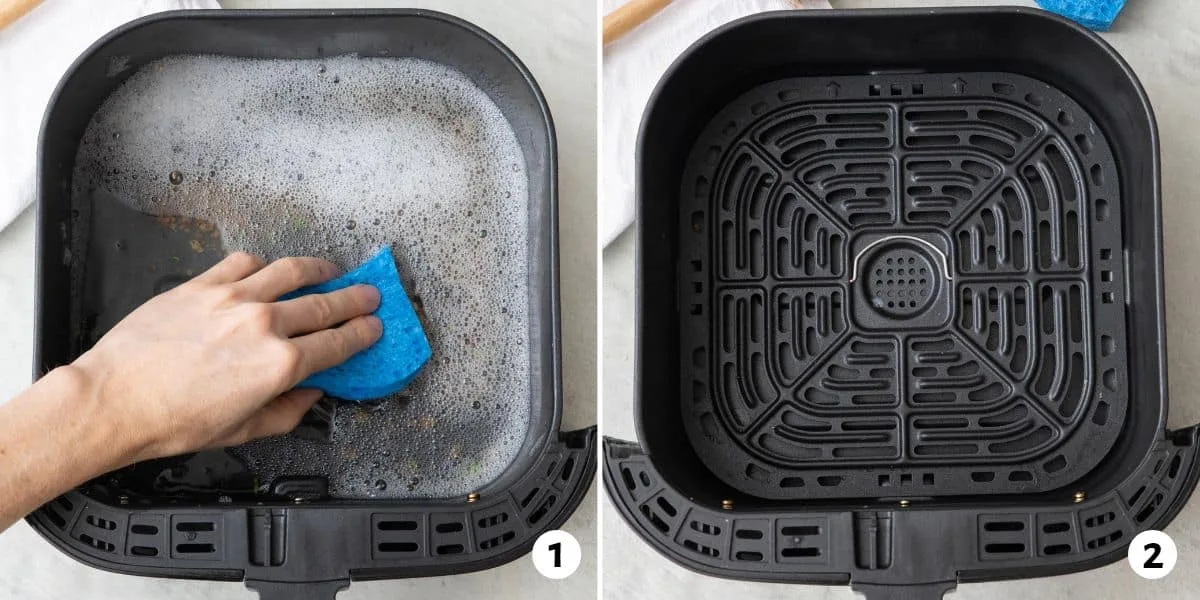
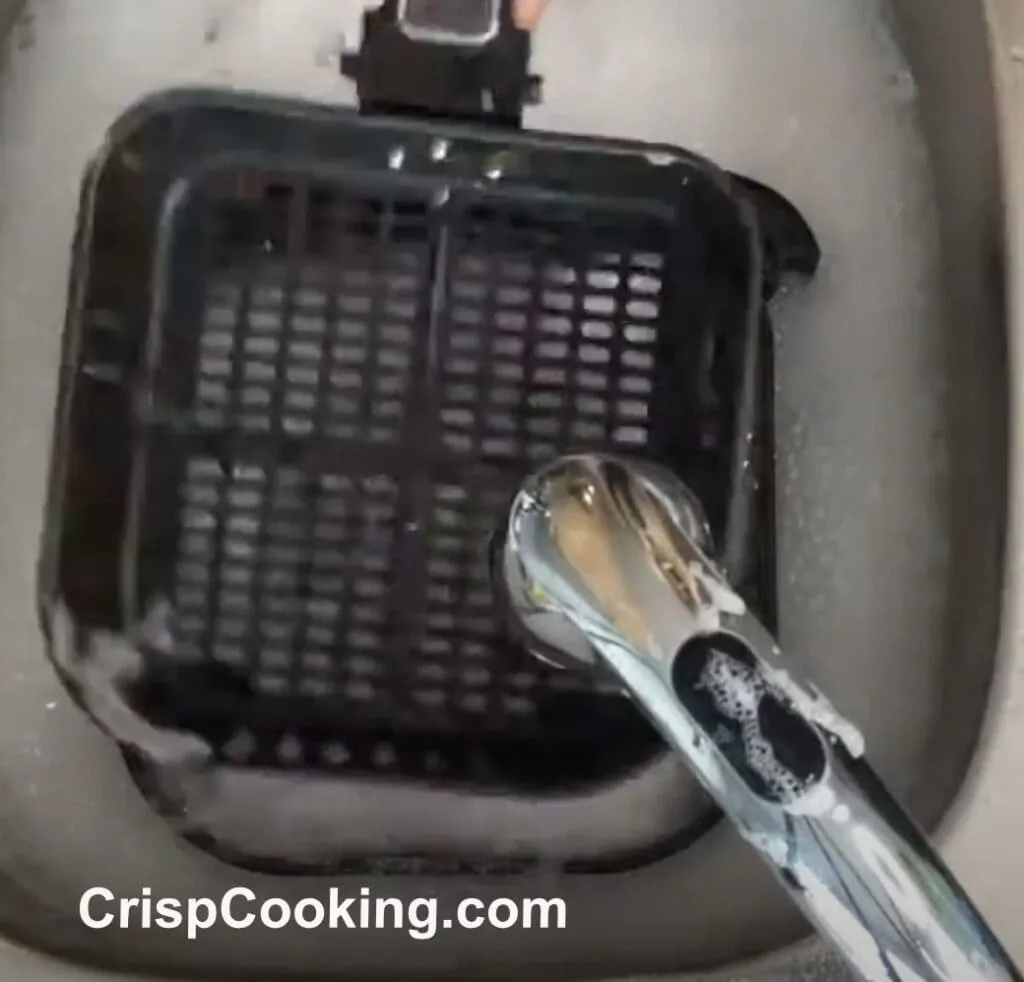
Place these parts in your sink or a large basin. Fill with hot, soapy water, a good squirt of dish soap works wonders here. Let them soak for at least 20, 30 minutes.
This loosens up most of the dried-on food and grease, making scrubbing much easier. If your air fryer basket or drawer is labelled as dishwasher-safe, you can opt for that after a quick soak, but handwashing often does a better job on tough buildup. For those needing to outfit a kitchen, looking at a quality best dishwasher for small kitchen or a best portable dishwasher can streamline cleanup for various appliances.
Scrubbing Away Stubborn Grime
After soaking, use a soft brush, a non-abrasive sponge, or a soft cloth to scrub the basket and drawer. For really stuck-on bits, you might need a bit more elbow grease, but avoid using steel wool or harsh abrasive pads, as these can damage the non-stick coating. If you've got particularly tough spots, a paste made of baking soda and water can be effective.
Apply it to the spot, let it sit for 10-15 minutes, then gently scrub. Rinse all parts thoroughly with clean water to remove any soap residue.
Cleaning the Heating Element and Interior
This part requires a bit more care. With the air fryer still unplugged and cool, take a damp cloth and gently wipe down the inside of the appliance. Pay attention to the walls and the bottom.
The heating element, usually a coiled rod at the top, can also collect grease splatters. Gently wipe it with a slightly damp cloth, being careful not to saturate it or use excessive force. Some manufacturers suggest using a soft brush for this area.
Aggregated user feedback suggests that for persistent residue near the heating element, a soft toothbrush can be very useful for getting into small spaces.
Drying and Reassembly
This is a crucial step that many people overlook, and it’s vital for preventing mold or mildew. Make sure all the removable parts, the basket, drawer, and any trays, are completely dry. You can let them air dry on a rack, or gently towel dry them with a clean, lint-free cloth.
Ensure the interior of the air fryer is also dry before you put everything back together. Once everything is dry, reassemble the basket and drawer into the air fryer.
Common Deep Cleaning Mistakes to Dodge
Even with the best intentions, it’s easy to make a misstep when deep cleaning your air fryer. Avoiding these common errors will save you from potential damage and ensure your appliance works better for longer.
Damaging the Non-Stick Coating
Many air fryer baskets and drawers come with a non-stick coating to prevent food from sticking. This is great for cooking, but it can be delicate. Using abrasive scrubbers like steel wool, harsh scouring pads, or even some strong chemical cleaners can scratch or chip away at this coating.
Once damaged, food is more likely to stick, and the coating itself can start to flake off, which isn't ideal for your food. Always opt for soft sponges, cloths, or silicone brushes.
Forgetting Hard-to-Reach Spots
The drawer and the interior cavity are prime spots for hidden grease and food debris. It’s easy to just wipe the obvious surfaces, but grease can drip and accumulate along the edges, under any lip of the drawer, or in the corners of the interior. A quick glance might miss these areas, but they’re exactly where odors can develop and where buildup can affect air circulation.
Regularly check these less visible areas during your deep clean.
Improper Drying
This is more common than you might think. If you put a damp basket or drawer back into the air fryer, or if the interior isn't fully dry, moisture can get trapped. Over time, especially in humid environments, this can lead to mold or mildew growth inside your appliance.
This is not only unhygienic but can also create persistent musty odors. Always ensure everything is thoroughly dry, ideally air-dried or gently towel-dried with a clean cloth, before reassembly and storage.
Keeping Your Air Fryer in Top Shape: Maintenance Tips
A deep clean is fantastic, but consistent maintenance is what really keeps your air fryer performing at its peak. Think of it like servicing your car; a little regular attention goes a long way.
For starters, always try to wipe down the basket and drawer with a damp cloth or paper towel immediately after use, once it has cooled down. This removes fresh grease and crumbs before they have a chance to harden and become a challenge later. This quick clean can significantly reduce the frequency needed for a full deep clean.
Manufacturer specifications often mention the importance of checking for any loose parts or unusual noises during operation. If you notice any, consult your appliance manual. As of 2026, many modern air fryers also come with advanced features, but their core function still relies on proper maintenance.
Regular checks ensure that the fan and heating element are free from excessive dust or debris, promoting efficient air circulation. For those who appreciate well-maintained kitchen appliances, ensuring your best compact freezer or best chest freezer is equally clean can lead to better food storage.
Air Fryer Deep Cleaning FAQs
How often should I deep clean my air fryer?
Our research and aggregate user feedback suggest a deep clean is typically needed about once a month. However, if you notice significant grease buildup, lingering odors, or a decline in cooking performance, you might need to do it more often.
Can I use harsh chemicals to clean my air fryer?
No, it's generally not recommended. Harsh chemicals can damage the non-stick coating and leave behind residues that could be harmful when heating food. Stick to mild dish soap, warm water, and natural cleaners like baking soda.
My air fryer still smells after cleaning, what should I do?
If odors persist after a deep clean, the issue might be with the heating element or internal fan. Try a baking soda paste treatment or consult your appliance's manual. If the smell is very strong or doesn't go away, it might be time to contact the manufacturer.
Are all air fryer parts dishwasher safe?
Not all of them are. Always check your air fryer's user manual to confirm which parts, if any, can be safely cleaned in a dishwasher. Many baskets and drawers are, but the main unit or heating element should never be submerged.
How do I clean the heating element safely?
Ensure the air fryer is unplugged and completely cool. Use a soft, slightly damp cloth to gently wipe the heating element. Avoid soaking it or using abrasive materials.
For stubborn residue, a soft brush or toothbrush can help reach tight spots without causing damage.