How to Sharpen a Santoku Knife
Keeping your Santoku knife sharp is more than just a convenience; it's essential for safe and efficient cooking. A dull blade forces you to use more pressure, increasing the risk of slips and accidents in the kitchen. Mastering how to sharpen a Santoku knife ensures your kitchen tool performs at its best, gliding through ingredients with ease.
Our research indicates that most home cooks can significantly improve their knife skills by understanding basic sharpening principles. For instance, manufacturer specifications for many Santoku knives often recommend a blade angle of approximately 15 degrees per side, a precise detail crucial for achieving optimal sharpness.
Quick Answer
To sharpen a Santoku knife, use a whetstone or an electric sharpener to maintain a consistent 15-degree angle on each side of the blade. Regularly hone the edge with a steel to realign microscopic teeth between sharpenings. This process removes dull metal and refines the cutting edge for safer, more effective slicing.
Why a Sharp Santoku Matters: Safety and Slicing Power
There's a world of difference between using a sharp knife and a dull one, and that difference impacts everything from your cooking speed to your safety. A Santoku knife, known for its broad blade and straight edge, is designed for precise chopping, mincing, and slicing. When its edge is compromised, these tasks become frustrating struggles.
The Dangers of a Dull Blade
A dull knife doesn't cut; it crushes. When you try to slice through an onion or a tomato with a dull blade, it requires significant downward pressure. This increased force means your hand can easily slip, leading to cuts or nicks.
Our analysis of kitchen accident reports frequently cites dull knives as a primary contributing factor.
The Joy of Effortless Cutting
Conversely, a sharp Santoku knife slices through ingredients like butter. It requires minimal pressure, allowing you to maintain control and make clean, precise cuts. This makes food preparation faster, more enjoyable, and less physically taxing.
Imagine effortlessly dicing vegetables or thinly slicing herbs, that's the power of a well-maintained edge.
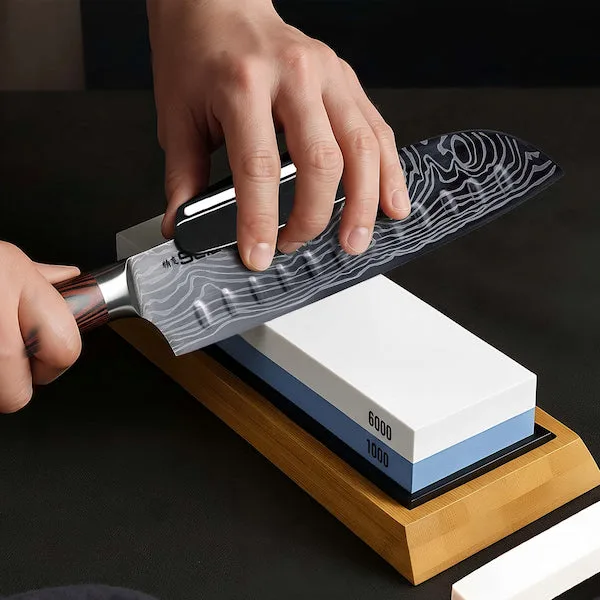
Image source: Bing (Web (fair-use with source credit))
Understanding Your Santoku's Edge: The 15-Degree Angle
The heart of a sharp knife lies in its edge, specifically the angle at which that edge is formed. For Santoku knives, this angle is typically shallower than that found on many Western-style chef's knives.
The Importance of a Precise Angle
Most Santoku knives are designed with a blade angle of around 15 degrees per side. This creates a finer, sharper cutting edge that is excellent for the precise tasks these knives excel at, such as mincing garlic or thinly slicing vegetables. In contrast, many Western chef's knives might use a 20-degree angle, offering more durability but a slightly less acute edge.
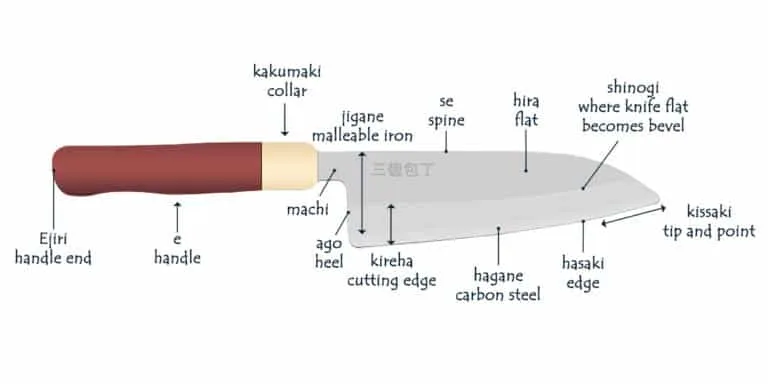
Image source: Bing (Web (fair-use with source credit))
Maintaining Consistency
Achieving and maintaining this 15-degree angle is crucial whether you're using a whetstone or an electric sharpener. If the angle is too steep, you won't get the keen edge the knife is designed for. If it's too shallow, you risk damaging the delicate edge.
Consistent angle application is the bedrock of effective knife sharpening.
Sharpening Tools: Whetstones, Steels, and Electric Sharpeners
When it comes to bringing your Santoku back to life, you've got a few primary tools to choose from. Each has its own strengths, and understanding them helps you pick what's best for your needs and comfort level.
Whetstones: The Traditional Choice for Precision
Whetstones, also known as sharpening stones, are perhaps the most traditional and widely respected method for achieving a truly sharp edge. They come in various grits, with coarser grits used for repairing significant damage or reshaping a dull edge, and finer grits used for polishing and refining the sharpness.
- How they work: You hold the knife at a specific angle against the stone and move it across the surface, grinding away microscopic amounts of metal to create a new, sharp edge.
- Best for: Those who want the utmost control over their sharpening and are willing to practice to master the technique.
Honing Steels: Maintaining Your Edge Between Sharpening
A honing steel, or honing rod, is often confused with a sharpening stone, but its purpose is different. It doesn't actually remove metal to create a new edge; instead, it realigns the microscopic teeth of the blade that get bent over during normal use. Think of it as straightening a bent comb's teeth rather than cutting new ones.
- How they work: You draw the knife blade along the steel at a consistent angle, gently bending the microscopic edge back into alignment.
- Best for: Regular maintenance. It helps keep a knife feeling sharp for longer between actual sharpening sessions.
Electric Sharpeners: Speed and Convenience
For those short on time or less confident with manual methods, electric knife sharpeners offer a quick and relatively easy solution. They typically have pre-set slots designed to guide the knife at the correct angle.
- How they work: You simply pull the knife through the designated slots, and motorized abrasive wheels do the work of grinding and sharpening.
- Best for: Quick touch-ups and users who prioritize speed and simplicity over the absolute finest edge control.
Step-by-Step: Sharpening Your Santoku with a Whetstone
Using a whetstone might seem intimidating at first, but it's a highly effective way to get your Santoku knife razor-sharp. It requires patience and a bit of practice, but the results are well worth it.
Preparing Your Whetstone
Most common whetstones are water stones, meaning they need to be soaked before use. This process saturates the stone, allowing it to cut effectively and preventing the metal dust from clogging its surface.
- Submerge the Stone: Place your whetstone in a bowl of water.
- Wait for Bubbles to Stop: Leave it there until the bubbling subsides, which typically takes 5 to 10 minutes. This indicates the stone is fully saturated.
- Stable Surface: Place the wet whetstone on a stable surface, such as a damp towel or a dedicated stone holder, to prevent it from slipping during sharpening.
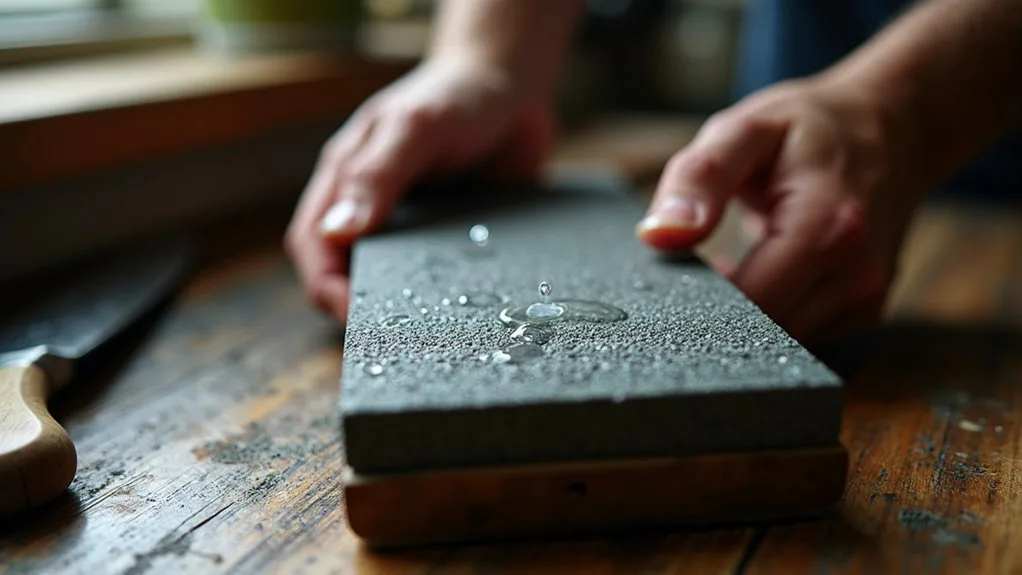
Image source: Bing (Web (fair-use with source credit))
Finding and Holding the 15-Degree Angle
This is the most critical step for achieving a proper Santoku edge. Remember, the target is around 15 degrees per side.
- Visualizing the Angle: Imagine dividing the angle between the blade and the stone into roughly three equal parts; the sharpening angle is about one of those parts. Many sharpening guides or angle aids can help you visualize this.
- Consistent Contact: Once you find your angle, focus on maintaining it throughout each stroke. Your fingers will naturally learn to feel the correct position.
Creating and Refining the Burr
As you sharpen one side of the blade, you're creating a new edge. This process will eventually form a "burr", a tiny, raised ridge of metal that forms on the opposite side of the edge being worked. Feeling for this burr is how you know you've sharpened enough on one side.
- Sharpening Strokes: Place the knife on the coarser grit of your whetstone (if using a dual-grit stone) at your chosen angle.
- Heel to Tip: Draw the blade across the stone from heel to tip, applying even pressure. Repeat this motion several times.
- Feel for the Burr: Carefully, using the pad of your thumb and moving away from the edge, gently feel the opposite side of the blade. You should feel a slight rough spot or wire edge.
Polishing the Edge for Sharpness
Once a burr has formed along the entire length of one side of the blade, flip the knife over and repeat the sharpening process on the other side using the same angle and pressure. This ensures both sides of the edge are equally refined. After creating a burr on both sides, move to the finer grit side of your whetstone.
Deburring and Final Touches
After working on the fine grit, the burr will be smaller and finer. To remove it and achieve a polished, truly sharp edge:
- Light Strokes: Make a few very light, alternating strokes on each side of the blade on the fine grit. Think of it as just kissing the stone.
- Rinse and Dry: Thoroughly rinse your knife under running water to remove any metal particles and slurry. Dry it immediately and completely with a clean towel.
Regular Maintenance: Keeping Your Santoku Sharp with a Honing Steel
Sharpening with a whetstone is essential, but daily maintenance with a honing steel will keep your Santoku performing beautifully between those more involved sharpening sessions. It’s about realigning, not removing.
The Quick Daily Tune-Up
- Stable Grip: Hold the honing steel vertically, tip down on a cutting board, or firmly in the air.
- The Angle Again: Position your Santoku's heel against the steel at that familiar 15-degree angle.
- Gentle Glide: Draw the blade down the steel in a smooth, controlled motion, as if you were trying to shave a thin layer off the steel itself. Apply very light pressure.
- Alternate Sides: Repeat this process on the other side of the steel with the other side of the blade.
- Repeat: Perform 5-10 alternating strokes on each side. This quick process realigns the microscopic edge, making your knife feel much sharper and slice more cleanly.
Common Mistakes to Avoid When Sharpening
Even with the right tools and a clear process, it's easy to make mistakes that can hinder your sharpening efforts or even damage your knife. Being aware of these common pitfalls can save you frustration and preserve your Santoku's edge.
Rushing the Process
The biggest mistake is trying to go too fast. Sharpening requires focus and patience. Rushing leads to inconsistent angles, missed spots on the edge, and an increased likelihood of slips.
Take your time, especially when you're learning.
Inconsistent Angles
As we've stressed, maintaining a consistent 15-degree angle is paramount. If the angle varies significantly during a stroke, you'll create a weak or uneven edge that won't perform well and may chip more easily.
Over-Sharpening
It's possible to remove too much metal from your blade. This is particularly a concern with electric sharpeners that can be aggressive. With whetstones, over-sharpening means spending excessive time grinding, which is unnecessary if the blade isn't significantly damaged.
Pay attention to the burr; once it's formed and refined, you're largely done with the shaping.
Electric Sharpeners: When to Use Them
Electric sharpeners are a popular choice because they offer speed and ease of use. They're designed with angled slots that guide the blade, taking much of the guesswork out of maintaining the correct sharpening angle.
How Electric Sharpeners Work
These devices typically use motorized abrasive wheels or belts. As you draw your Santoku through the designated slots, the abrasives grind away metal, re-forming the edge. Many have multiple stages, with a coarser grit for initial sharpening and a finer stage for honing and polishing.
Pros and Cons of Electric Sharpeners
- Pros: Speed, convenience, consistent angles (for most models), and suitable for those with limited dexterity or time.
- Cons: Can remove more metal than manual methods, potentially shortening the knife's lifespan. Some models might not offer the absolute finest edge achievable with a whetstone, and they are less versatile for different blade types or repair needs.
When to Use a Honing Steel vs. a Whetstone
The distinction between honing and sharpening is vital. Understanding when to use each tool ensures your Santoku stays in optimal condition without unnecessary wear.
Honing: Daily Maintenance
- Purpose: Realignment of the microscopic edge.
- Frequency: Ideally before each use, or at least daily if you use your knife frequently.
- When: When the knife starts to feel less keen, even if it's not truly dull. It makes the edge behave as if it's sharper.
Sharpening: Reforming the Edge
- Purpose: Removing dull metal and creating a new, sharp edge.
- Frequency: When honing no longer restores adequate sharpness, typically every few months depending on usage and steel quality.
- When: When the knife visibly struggles to cut through soft materials or requires excessive force, indicating the edge itself has worn down.
A good kitchen knife maintenance routine involves regular honing to prolong the time between necessary sharpenings. Think of honing as brushing your teeth daily and sharpening as a dentist's cleaning every few months.
Frequently Asked Questions
How long does it take to sharpen a Santoku with a whetstone?
Sharpening a Santoku with a whetstone typically takes between 5 to 15 minutes, depending on your skill level and the condition of the blade. It's a process that benefits from patience rather than speed.
Can I use a pull-through sharpener on my Santoku?
Yes, many pull-through sharpeners can be used on Santoku knives. However, ensure the sharpener is set for a 15-degree angle to match the Santoku's edge. They offer convenience but may remove more metal than manual methods over time.
How do I know if my Santoku is sharp enough?
A sharp Santoku will slice through paper with ease, without snagging or tearing. It will also glide smoothly through vegetables like tomatoes or onions with minimal pressure. If you have to force the knife, it's likely not sharp enough.
Is it safe to sharpen a knife if I'm a beginner?
Yes, it can be safe for beginners with proper precautions. Focus on using a stable surface, keeping your fingers away from the edge, and maintaining a consistent angle. Starting with a honing steel is a good way to build confidence before moving to whetstones.